Start the installation process by running the executable installer file that you’ve downloaded from the XMPro Documentation Site. Accept the licence agreement when asked. Please note that an installer that would enable you to install the database and website will be installed first. When this initial installation is complete, run the Subscription Manager installer as administrator from the Start menu and follow the steps, as listed below.
Component Choice
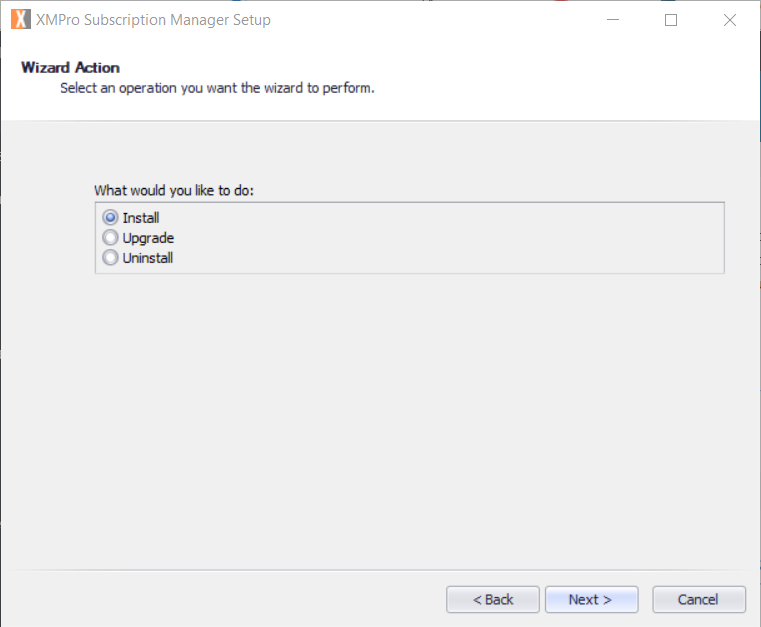
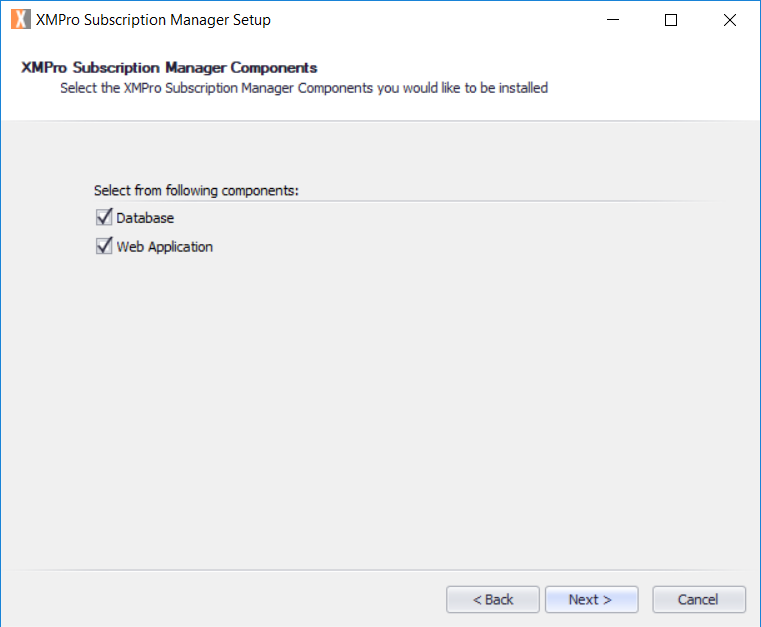
When the installer launches, choose “Install”. Next, select the components that you would like to install. If this is the first time you are installing Subscription Manager, it is recommended that you select both “Database” and “Web Application”.
Details: Database
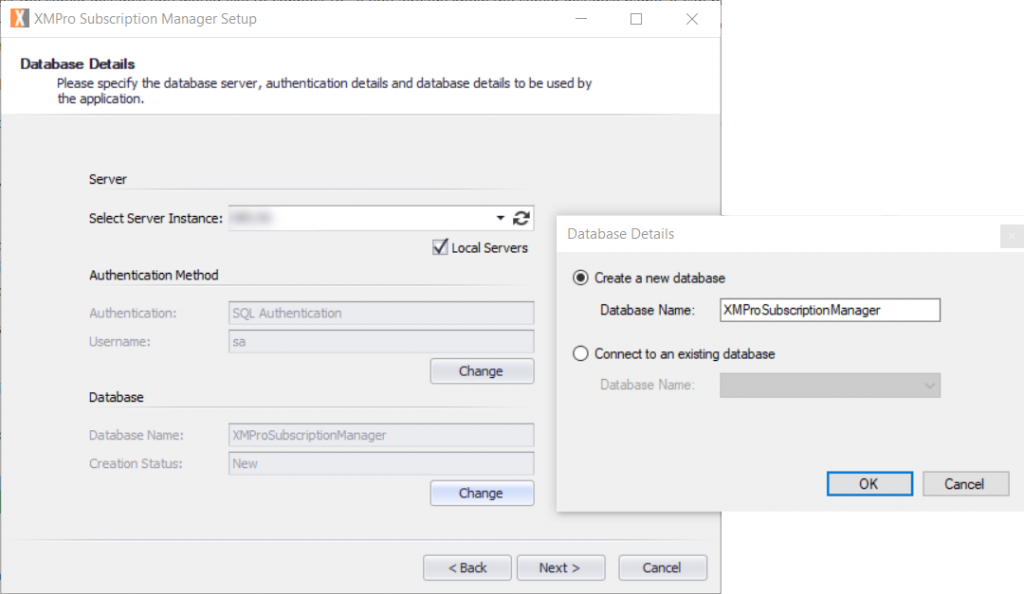
Server
Select the server instance you would like to connect to. If you already know the server instance name, it can be entered manually. Otherwise, use the refresh button on the right to load all available servers. Selecting the “Local Servers” check box will limit the search to the local network.
Authentication Method
Next, specify the authentication method that should be used. If your using Windows authentication, you may leave this option as is.
To connect to the database using SQL Server authentication, click on the Change button. Select the “Use SQL Authentication” option and enter the username and password of the SQL Server instance you’re connecting to.
Database
The Database section allows you to configure if you would like to use an existing database or create a new one. Leaving the options as default will result in a new database being created. To change the pre-populated name of the new database or to select to use an existing database, click on the Change button and make the changes needed by selecting the correct option and specifying the name of the new database or selecting an existing database from the drop down.
Details: Web Application
Application Pool
By default, a new application pool will be created when installing the site. The new application pool will have the same name as the name specified in the “Application Pool Name” field. If you wish to change this name or use an existing application pool, click on the Change button and make the changes needed by either selecting the “Create a new Application Pool” option and giving it an appropriate name or selecting the “Use an existing Application Pool” option and selecting an existing application pool from the drop down.
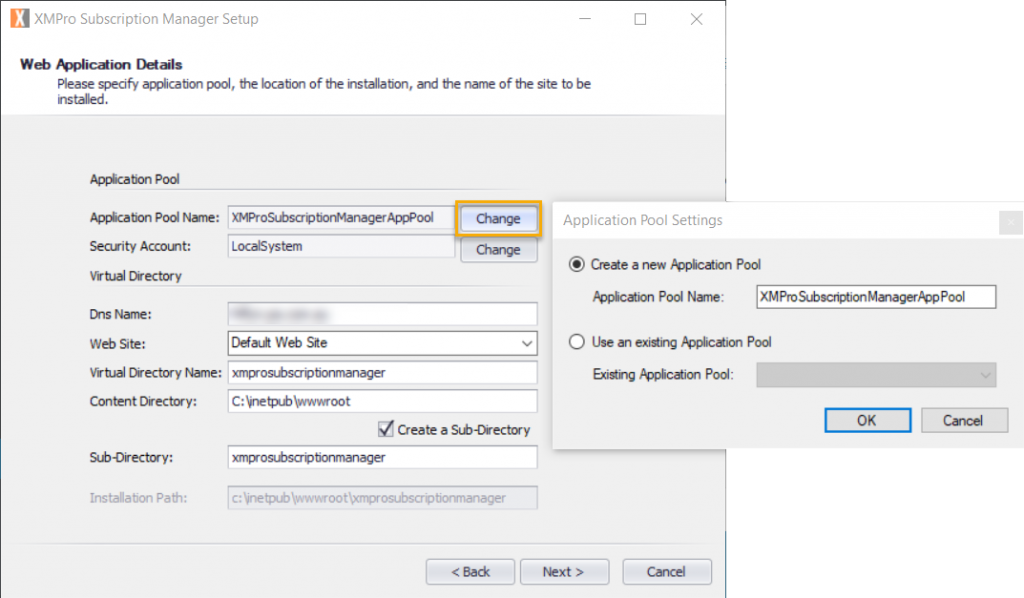
Next, select a service account that can be used. The default option is “LocalSystem”, which is a built-in security account. You can either change it by selecting a different built-in security account from the drop down or by specifying your own security account.
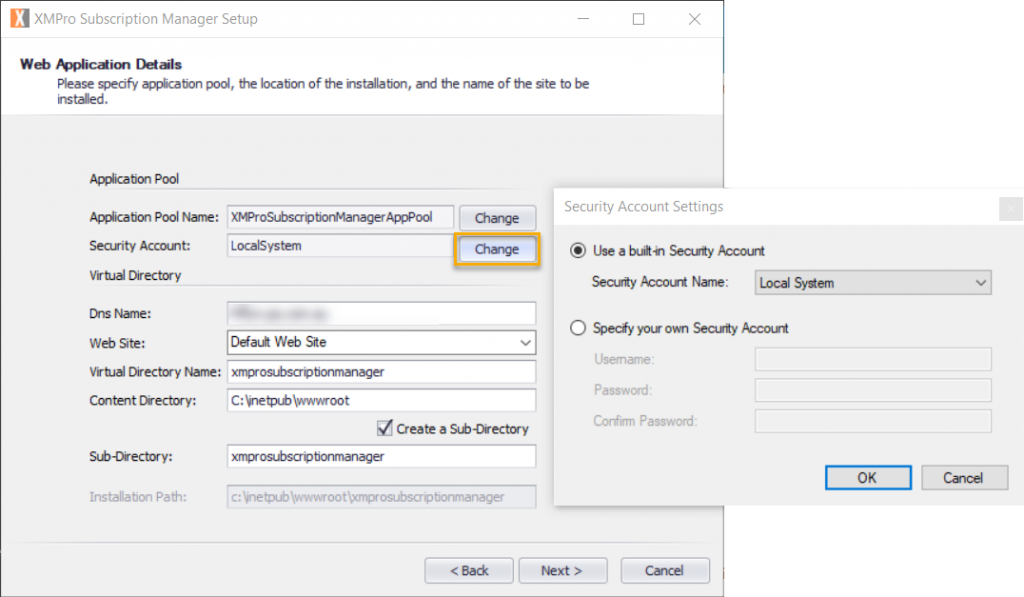
Virtual Directory
Verify if your DNS name is correct. If not, edit the value to contain the correct DNS name. Next, select the parent site from the Web Site drop down. Choose a name for the virtual directory that should be created within IIS for the Subscription Manager site. Verify if the value in the content directory field is correct. If not, apply any changes needed. You also have the option to create a sub-directory within the content directory. If you wish to create a sub-directory, select the “Create a Sub-Directory” check box and specify a name in the “Sub-Directory” text box.
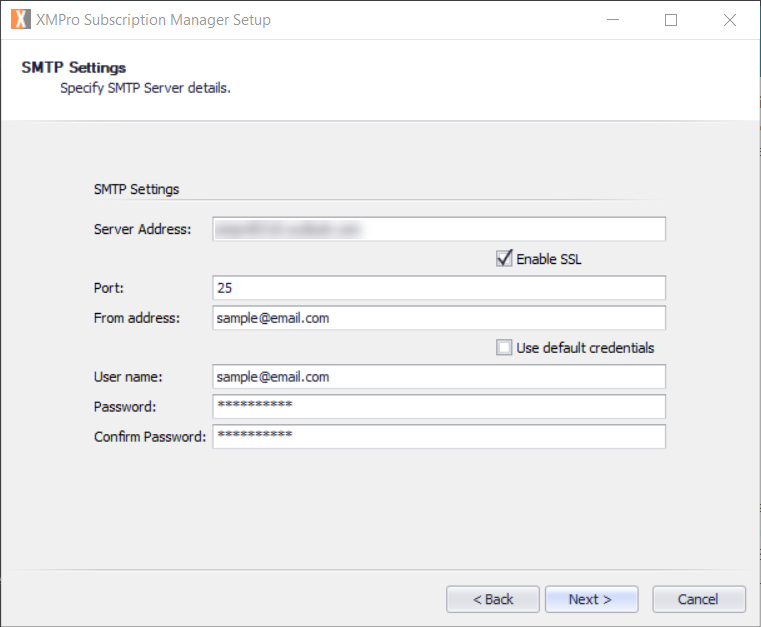
Settings: SMTP
Provide SMTP details for an email account that can be used to send notifications to users from Subscription Manager. Some of the values will already be filled in for you. Only change the pre-defined values if needed. The SMTP details consists of the following:
- Server Address (address of the server that needs to be used, for example xyz.outlook.com)
- Enable SSL (specify if you would like SSL to be used)
- Port (port that should be used to send the email)
- From address (the address that should be used to send the email)
- Use default credentials (specify if you would like to use default credentials)
- User name (the username of the user who owns the email address)
- Password (password for the email address specified in the From address field)
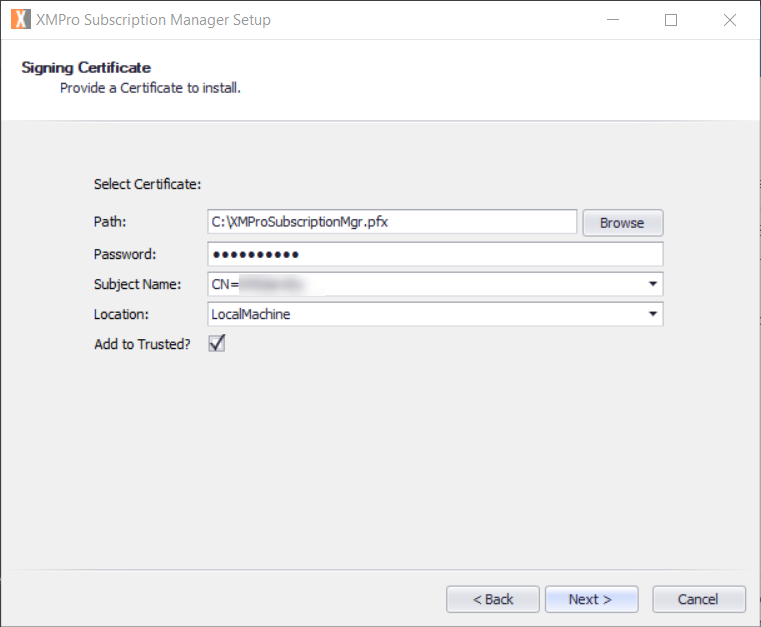
Options: Certificates
During the installation process, you will be asked to upload two certificates. The first is a signing certificate and the second an encryption certificate. You may use the same certificate for both options. Start by browsing to a suitable .pfx certificate file. Specify the password, subject name, and location for the certificate. Please note that the Subject Name needs to be in the following format: “CN=MyCertificateSubjectName“. It is recommended that you choose “LocalMachine” for the signing certificate option and “CurrentUser” for the encryption certificate.
It is important for the signing certificate to be added to the “Trusted People” group. Select the “Add to Trusted?” check box to inform the installer that it needs to be added to this group. There is no need to add the encryption certificate to this group.
Final Steps
Continue through the wizard, confirming the installation and letting the installer install the components you selected. Note the username and password on the last screen down. This username is a username that has been created in the database during installation as Subscription Manager itself needs at least one user in the system. You can navigate to the newly installed instance of Subscription Manager by opening IIS and browsing to the site or by directly putting the URL into your browser. The format of the URL will be as follows: “https://yourdnsname/virtualdirectoryname/”
Optional: IIS User Permissions
In some scenarios you may need to grant permission on the signing certificate’s private keys to the IIS_USRS group. To do this, click here and follow the steps in the article.
Custom Service Accounts
If you’ve chose to use a custom service account during installation, you may have to perform an extra step. An error may be shown after logging into Subscription Manager, even after giving the IIS_USRS group permission on the signing certificate private keys. The error would be as follows : “We could not grant you access to the requested subscription. There was an unexpected error“. The logs would also contain the following error: “System.Security.Cryptography.CryptographicException: Keyset does not exist“.
To solve this issue, use the article mentioned above as a guideline and grant access for the Application Pool Identity (in some cases a domain account) on the signing certificate private keys.