In this article, we will look at how to set up AD FS so that it can be used as an external identity provider for Subscription Manager, allowing single sign-on capability between AD FS and Subscription Manager.
Follow the steps below:
Step 1:
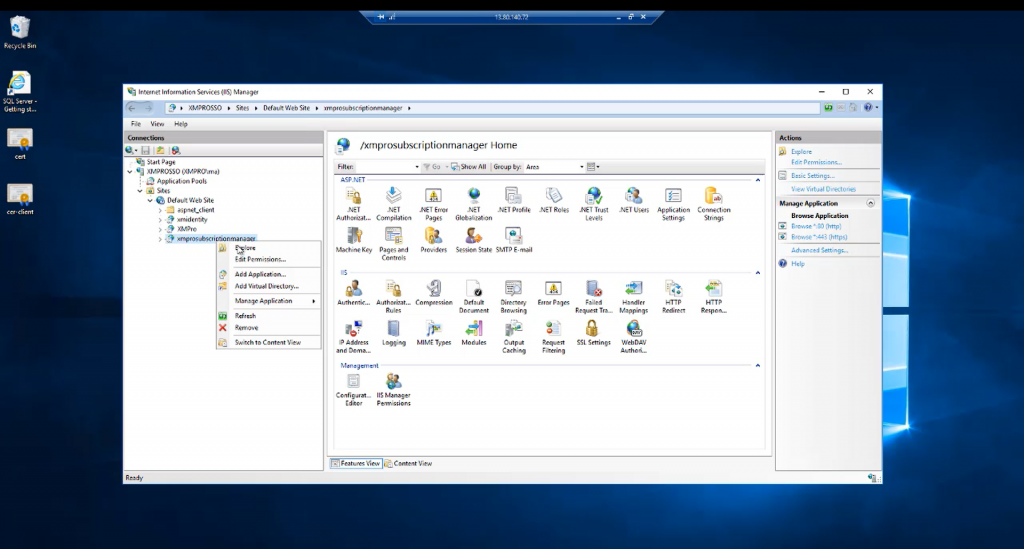
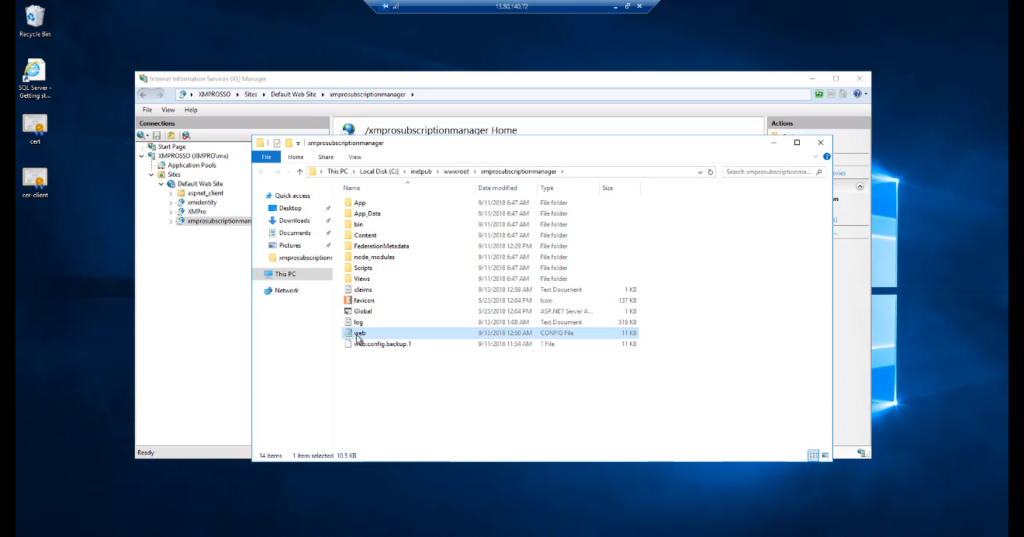
Open the location in IIS where Subscription Manager was installed by right clicking on the application name in IIS and choosing “Explore“.
Step 2:
Open the web.config file using a text editor such as Notepad or Notepad++.
Step 3:
Scroll down to the “xmpro” section. It might be encrypted, which will require you to decrypt it first. For instructions, please refer to the How to encrypt and decrypt a web.config file Knowledge Base article.
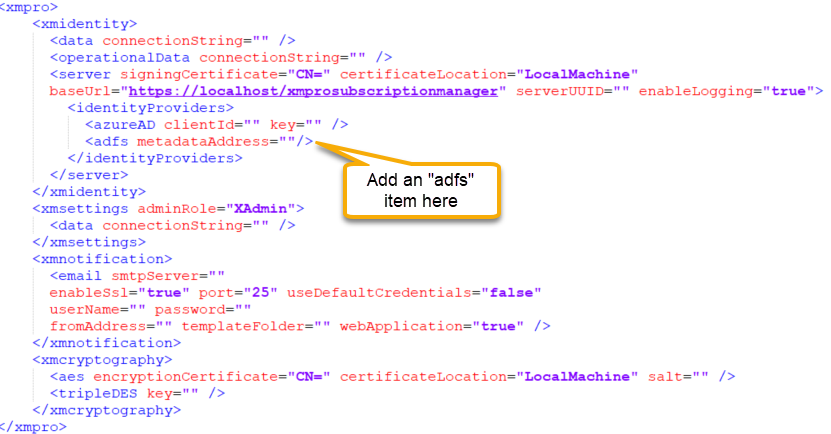
Under the “identityProviders” tag, add a new item called “adfs” and specify the metadata address of your AD FS, as per the image below. Set the correct URL for the metadataAddress value. An example of how the URL might look is “https://adfs.domain.com/federationmetadata/2007-06/federationmetadata.xml“. Verify your URL by browsing to it in a browser.
Step 4:
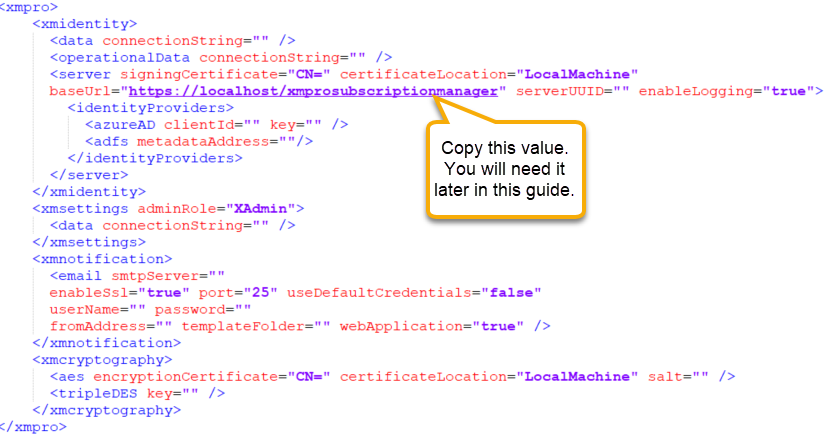
Next, create a relying party trust between the Subscription Manager application and AD FS. To do that, start by copying the “baseUrl” value in the web.config.
Step 5:
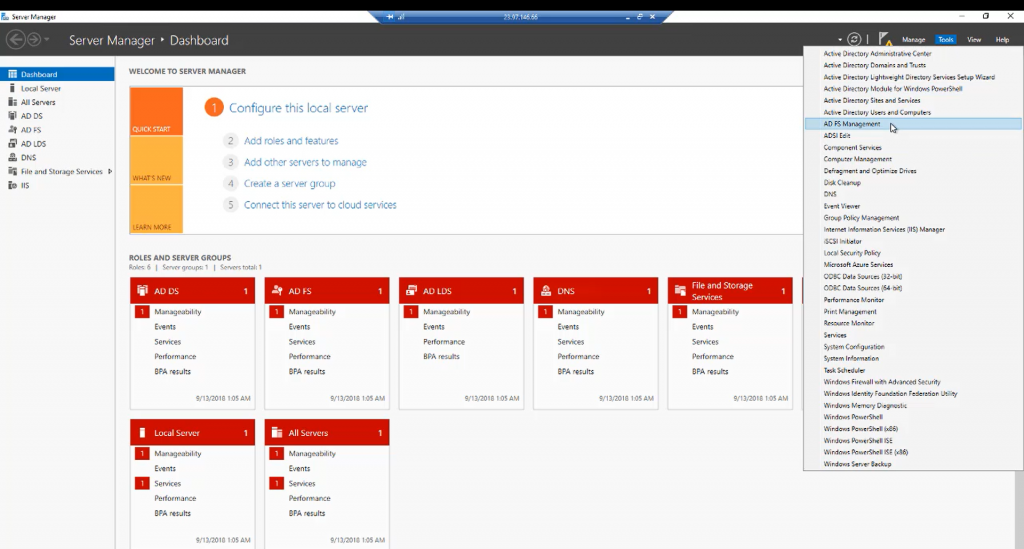
Next, log on to your AD FS server and go to Tools –> AD FS Management.
Step 6:
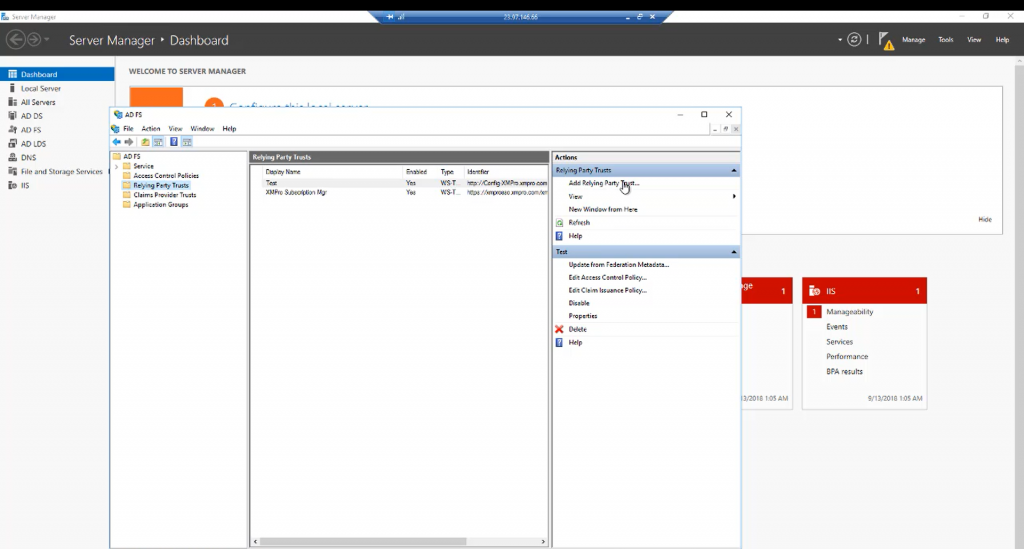
Click on “Add Relying Party Trust“.
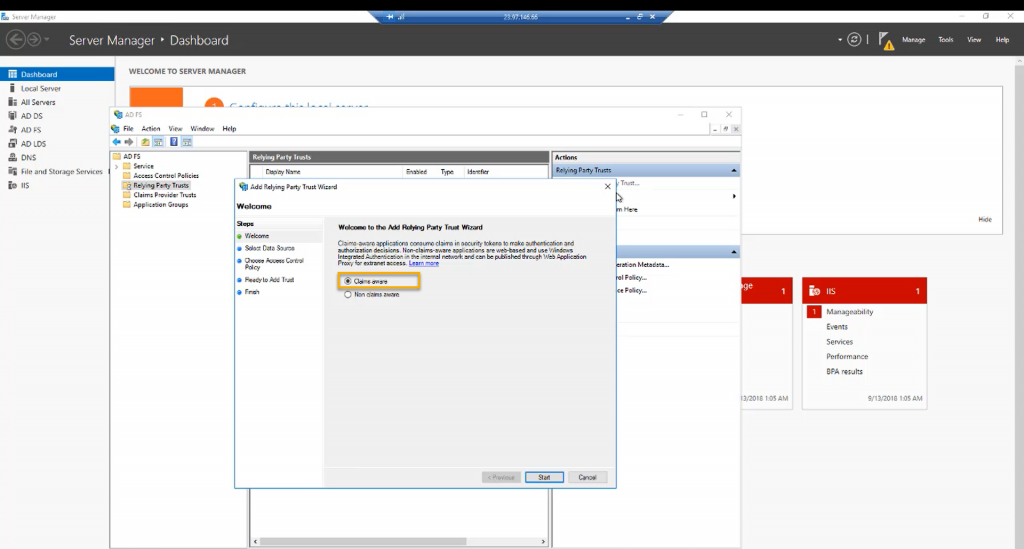
Step 7:
Select “Claims aware“ and click “Start“.
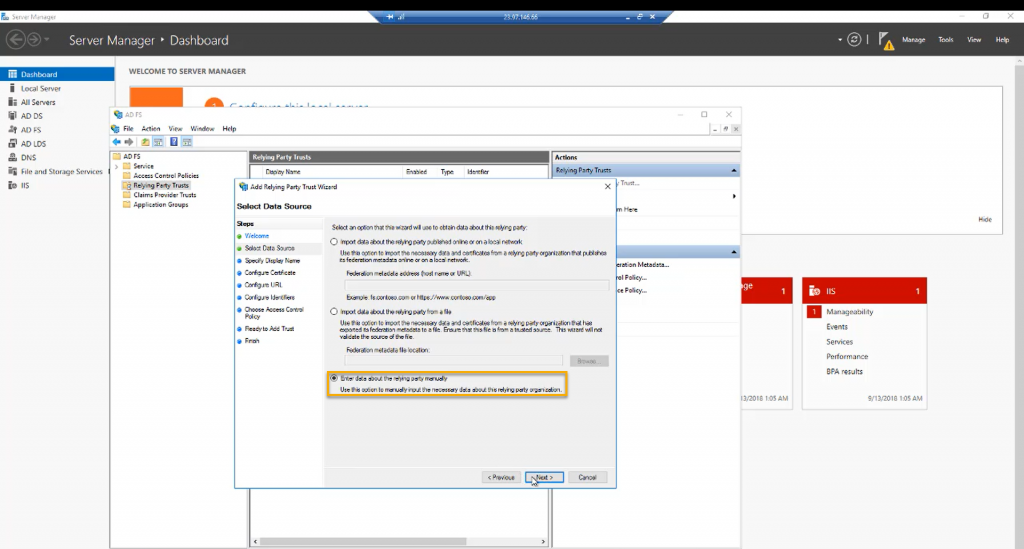
Step 8:
Select “Enter data about the relying party manually” and click “Next“.
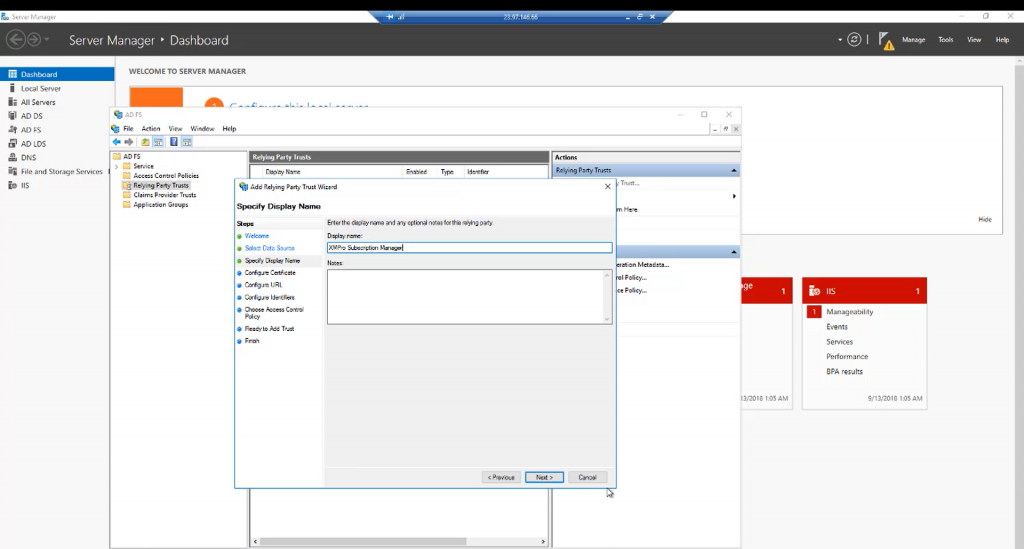
Step 9:
Choose a display name and click “Next” and then “Next” again.
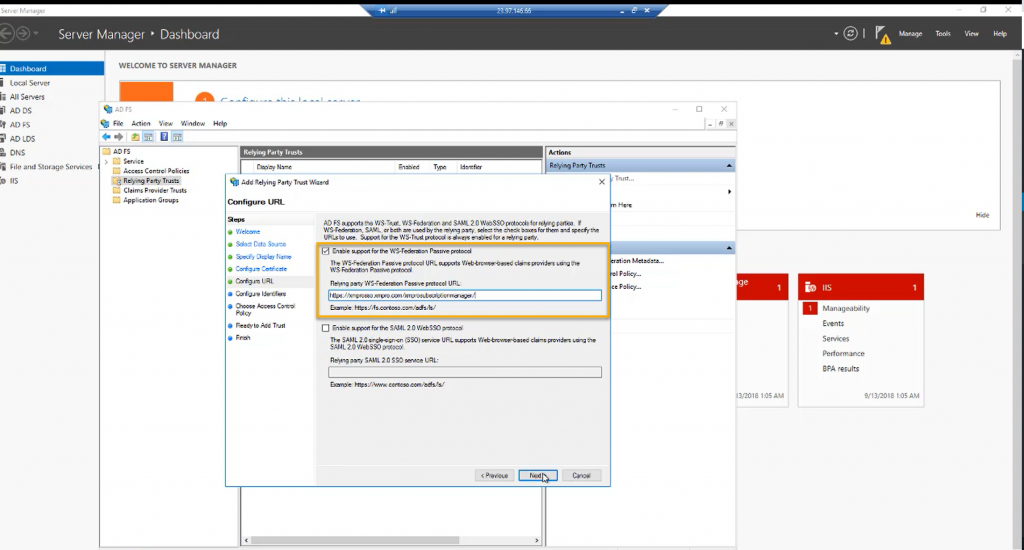
Step 10:
Select “Enable support for the WS-Federation Passive protocol“ and add the URL. This is the base URL you copied from the web.config file. Click “Next“.
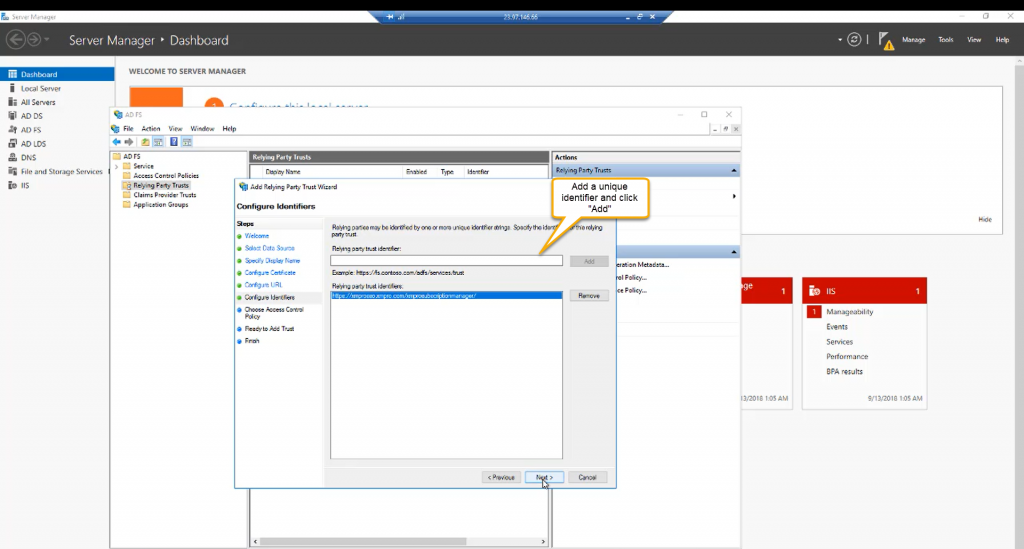
Step 11:
Now you have to add the identifier for the application. In this case we will just use the URL for Subscription Manager. Add the URL and click “Next”.
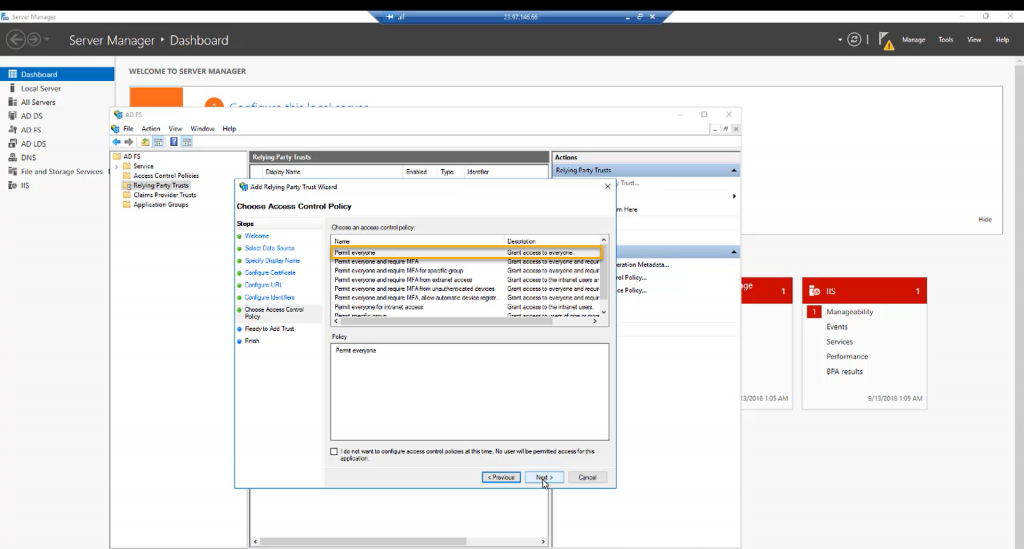
Step 12:
On the next screen, choose an access control policy. For this article, we are going to choose “Permit everyone” and click “Next”. Continue to the last screen.
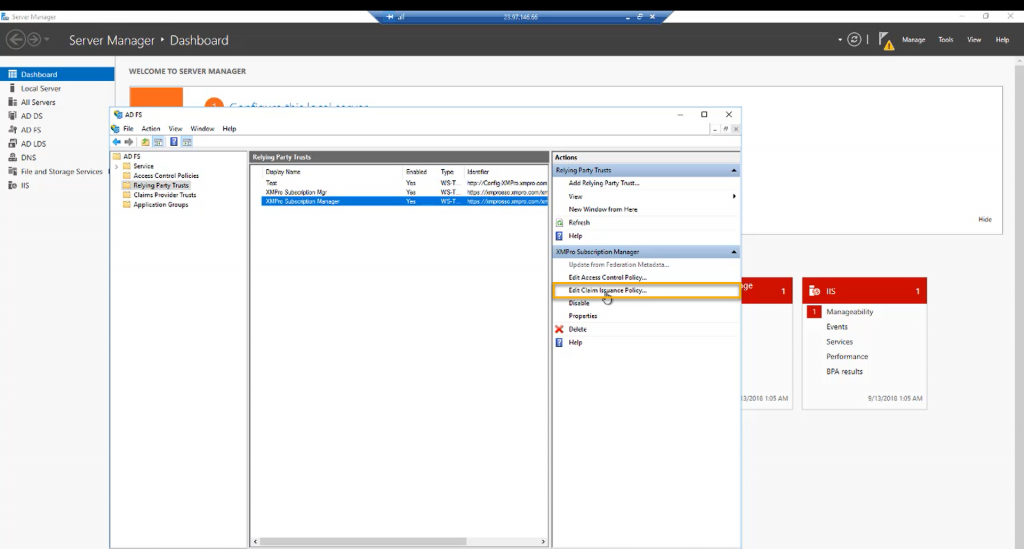
Step 13:
On the last screen, select “Configure claims issuance policy for this application” and finish.

Step 14:
In the AD FS Management window, click on “Edit Claim Issuance Policy…“ and click “Add Rule”.
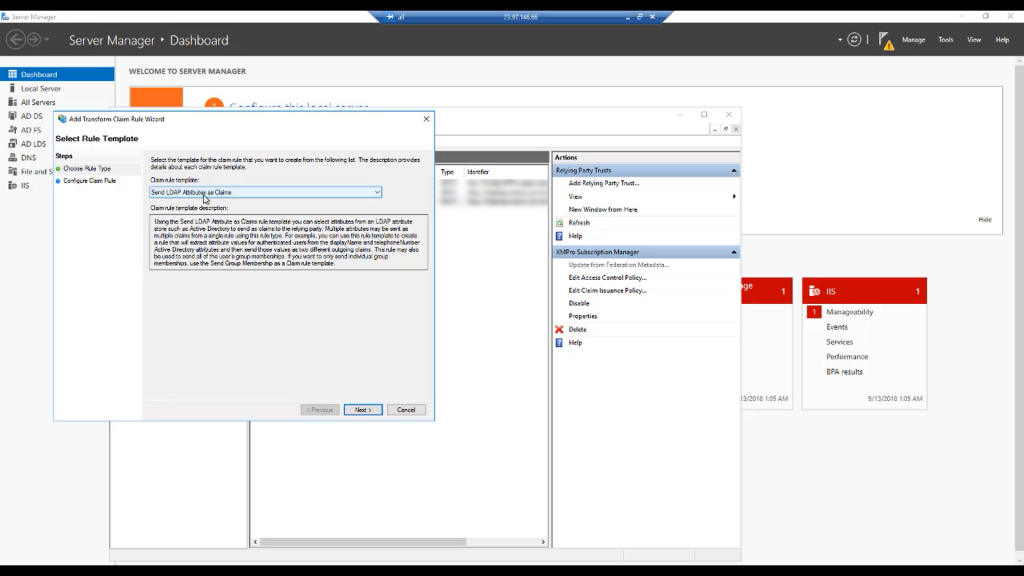
Step 15:
In the “Claim rule template” drop-down, select “Send LDAP Attributes as Claims” and click “Next”.
Step 16:
Choose a name for the rule and map the claims.


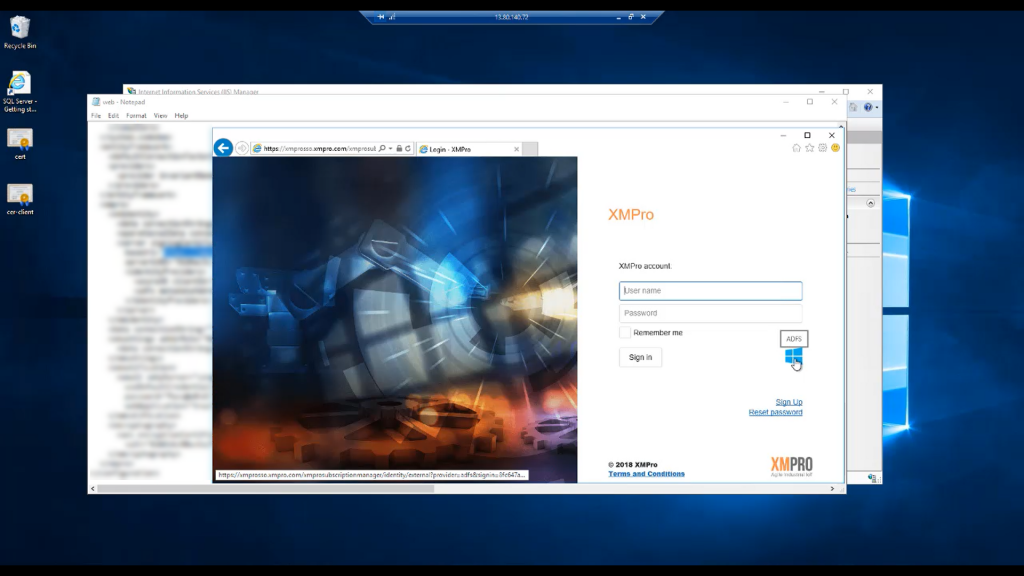
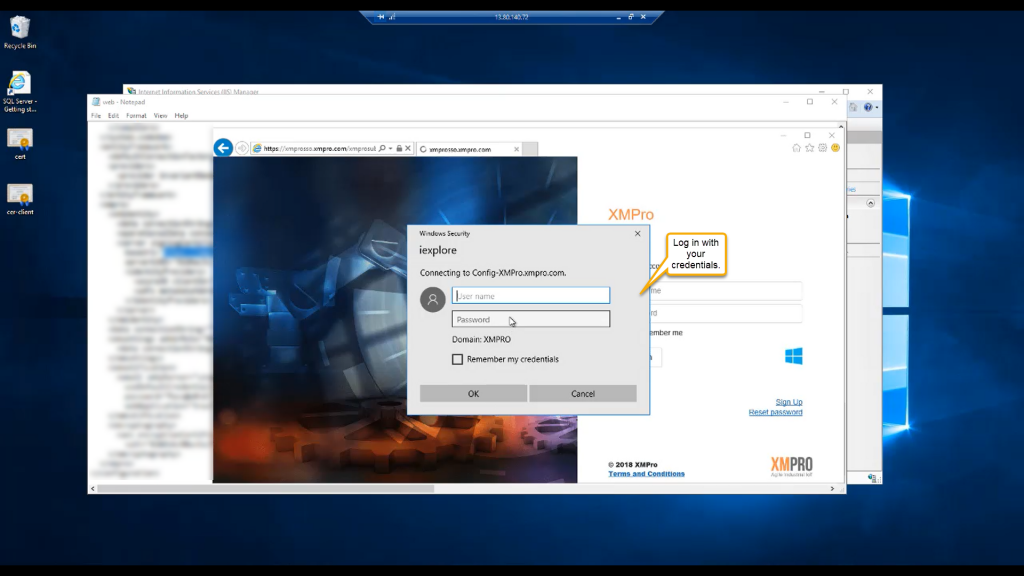
Step 17:
Now you should be ready. If you navigate to the Subscription Manager application, you will see the AD FS login option. Log in with your AD FS credentials. Please note that if you sign in for the first time, you will be asked to link your account. Fill in your information and click “Link Account”.