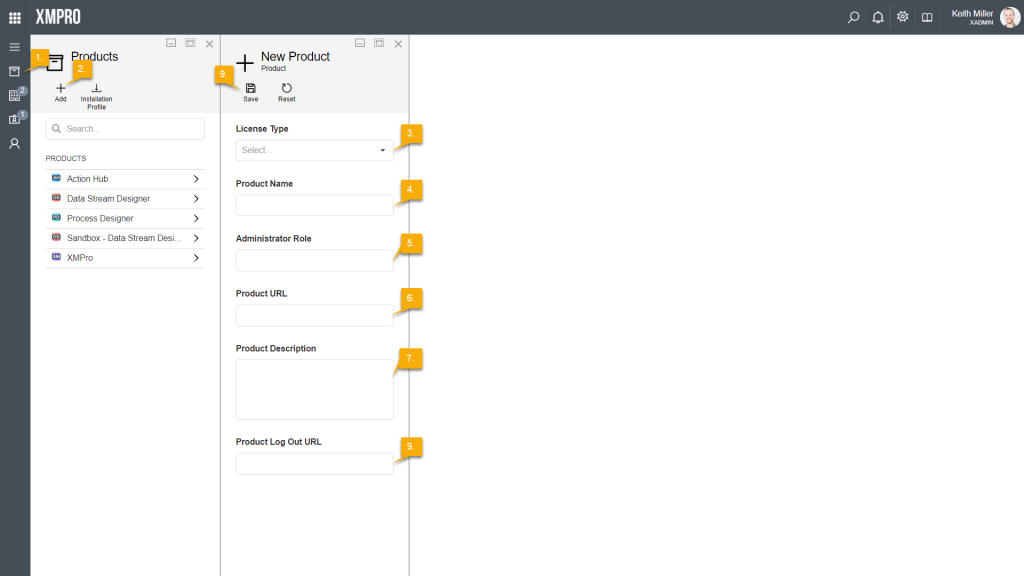
Adding New Products
To add a new product, please follow the steps below:
- Open the Products page from the left-hand menu.
- Click on the “Add” button.
- Choose a license type for the product from the drop down.
- Fill in the name of the product.
- Specify a name for the administrative role, for example “Administrator” or “Admin“.
- Add the URL for the product. Please note that the URL added in this field will be listed as the base URL.
- Add a more detailed description of the product.
- Add a URL that can be used to navigate to after logging out.
- Click Save.
Editing Product Information
To edit the information for a product, open the Products page from the left-hand menu and select the product you would like to edit.
The detail page is divided into several sections. Text fields can be updated by clicking inside the text field, editing the value and then saving your changes by clicking on the Save button.
If you would like to update the icon for a product, click on the icon and upload a new image file. Save your changes by clicking on the Save button.
The process of maintaining the roles, rights, scopes, and URL’s for a product is the same for all four types of information. Each of these information types are kept in their separate lists on the detail page of a product. Please see the sections below for instructions on how to maintain the information kept in these lists.
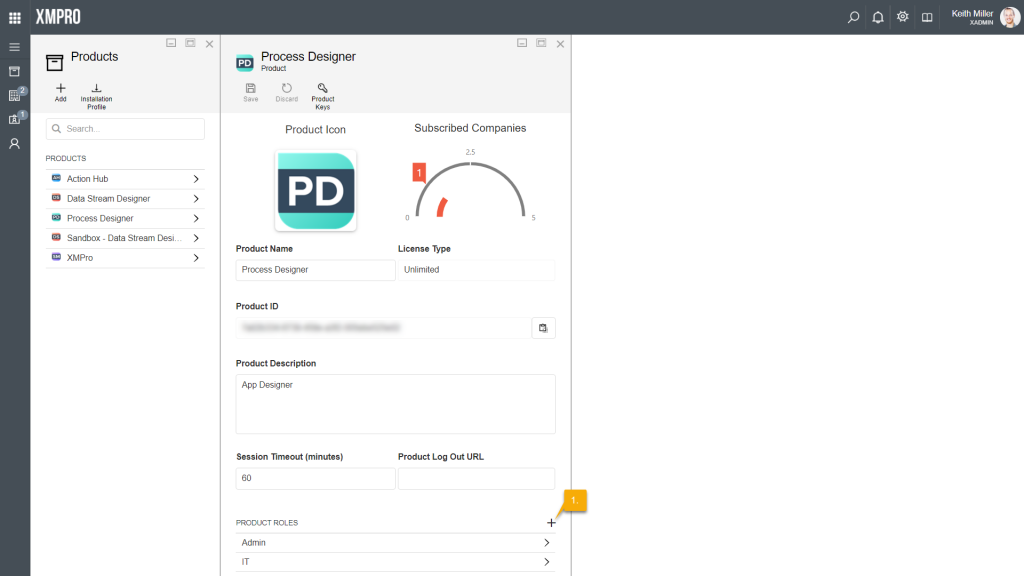
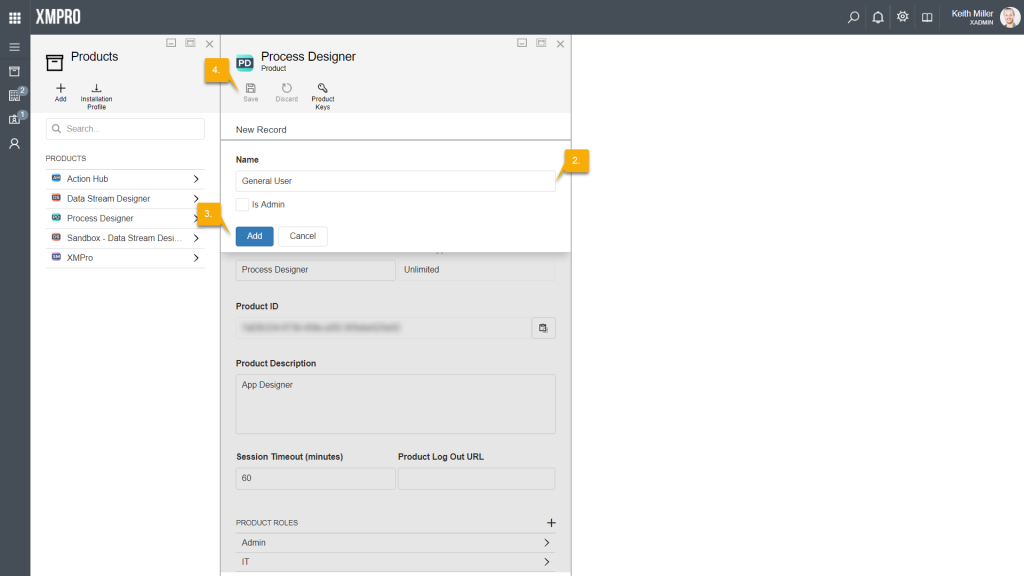
Adding List Items
If you would like to add an item to a list, follow the steps below:
- Click on the “+” button in the list where you would like to add the new item.
- Add the name or value of the item.
- Click on “Add”.
- Click “Save”.
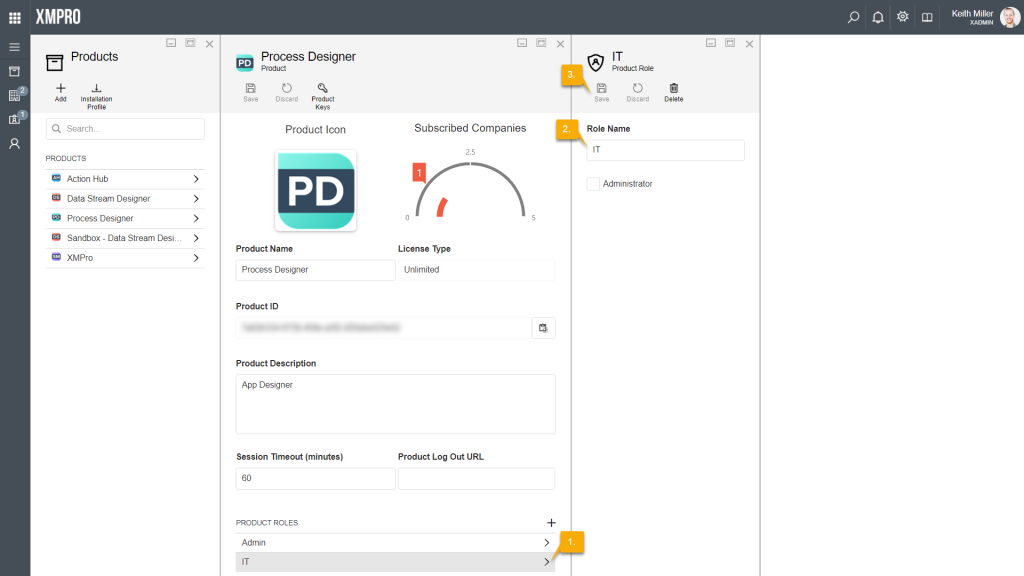
Editing or Removing List Items
To edit an item in a list, follow the steps below.
- Select the item that you would like to edit from the product’s detail page.
- Edit the item, as required.
- Click Save.
- The item that you have edited will automatically be updated on the product’s detail page.
If you would like to delete an item from a list, select the item that you would like to delete from the list and click on the Delete button. Confirm that you would like to delete the item.