In this article, we will look at how to set up Azure AD so that it can be used as an external identity provider for Subscription Manager, allowing single sign-on capability between Azure AD and Subscription Manager.
Follow the steps below:
Register application
Start by registering a new application in Azure AD by following these instructions.
Copy application (client) ID
Immediately after registering your application, an overview page will be opened for the new application. A unique application (client) ID would have been assigned to the application. Copy this ID. You will have to add it in Subscription Manager’s web.config file shortly.

Credentials
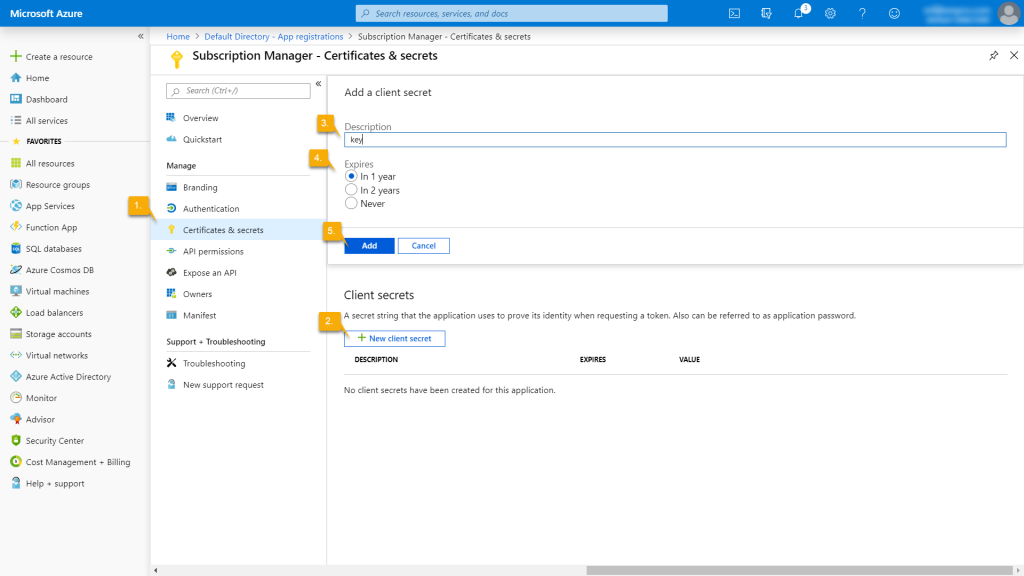
Next, you have to create a secret for Subscription Manager. Follow the steps below:
- On the left, click on Certificates & secrets.
- Click on New client secret.
- Add a description for your new client secret.
- Choose a duration.
- Click Add.
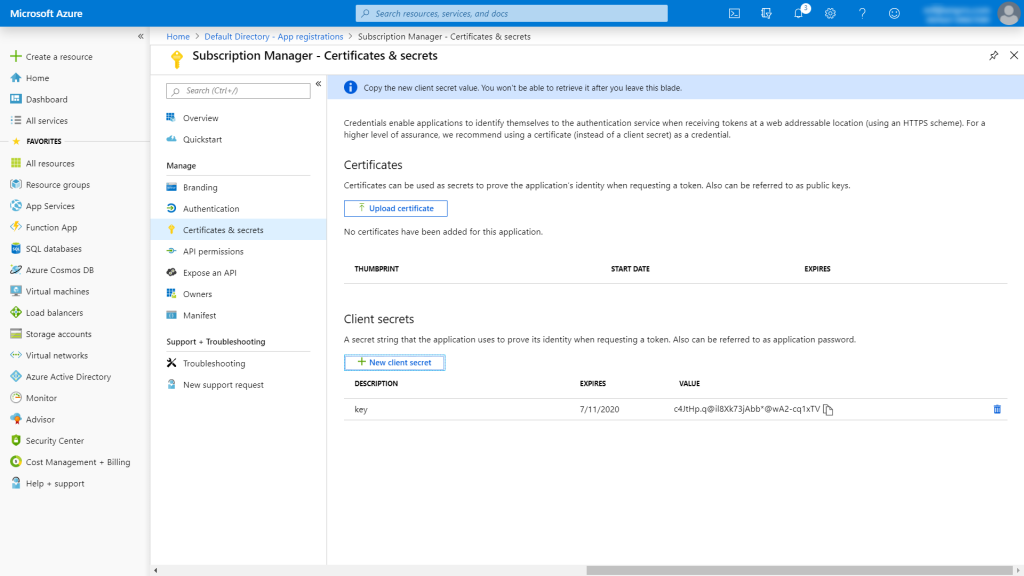
Both the application client ID and the secret needs to be added to Subscription Manager’s web.config file. Navigate to the IIS location where Subscription Manager has been installed and open the file web.config file of the application in Notepad or Notepad++. Next, scroll down to the “xmpro” section. This section might have to be decrypted, for which you can find instructions here.
Add the application (client) ID that you’ve copied earlier to the web.config. Copy the secret and add it to the web.config.
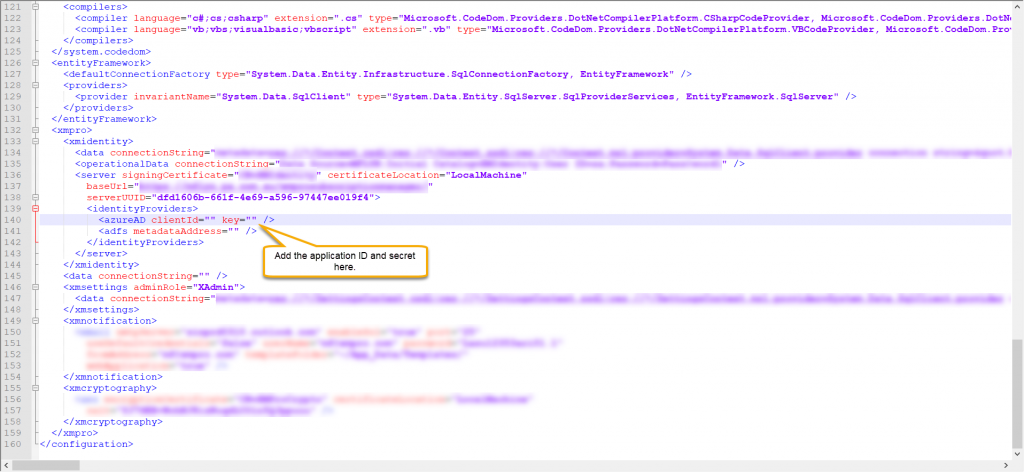
If you are using key store to manage app setting and secrets, add the following to the web.config instead:
<azureAD clientId="${ADClientID}" key="${ADSecret}" />
And define following secrets in the key store:
| Name | Value |
| ADClientID | Application Id |
| ADSecret | Application Secret |
Authentication
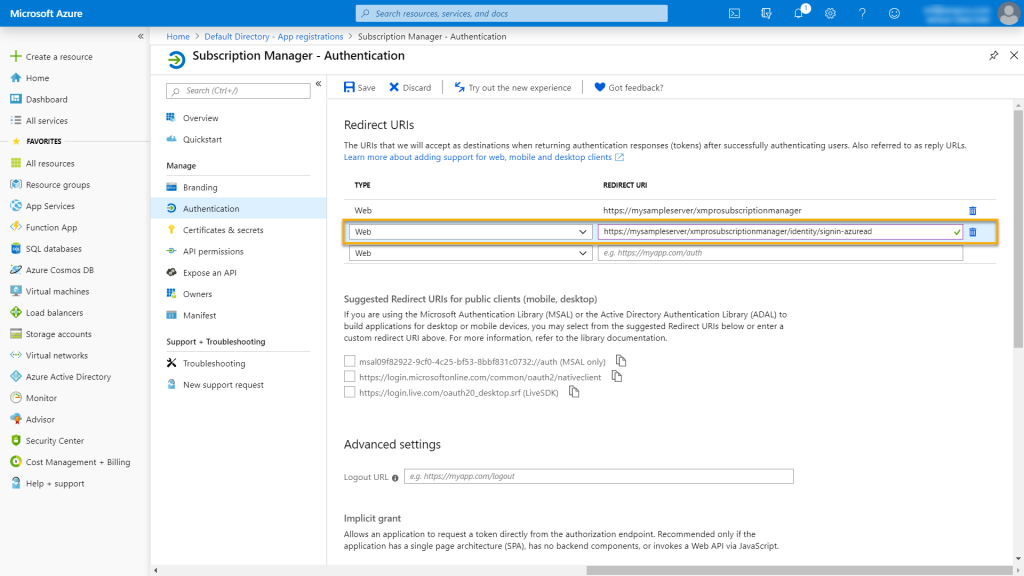
Next, locate the base URL in the web.config and copy the value.
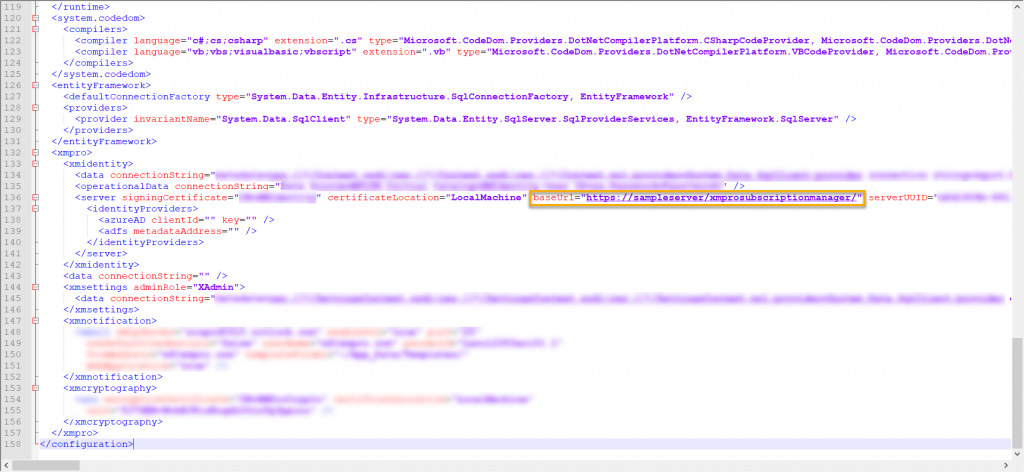
In Azure Portal, click on Authentication and add the following URL in the space provided:
- The URL where Subscription Manager is hosted (base URL, which you have just copied), ending in “identity/signin-azuread”
- Example: https://mysampleserver/xmprosubscriptionmanager/identity/signin-azuread
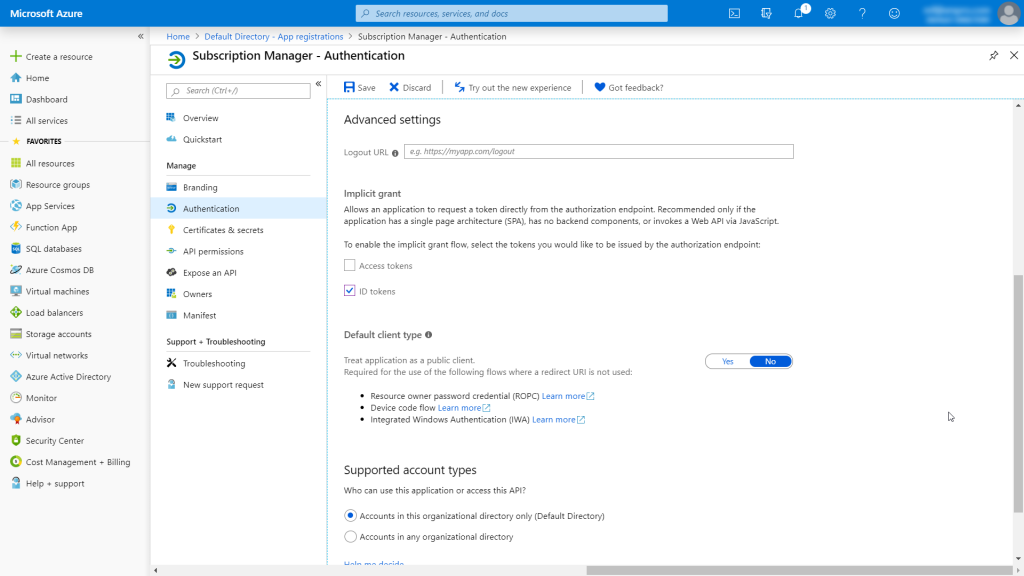
Now, on the Authentication page, scroll down until you see “Advanced Settings“. Select “ID tokens” and click Save.
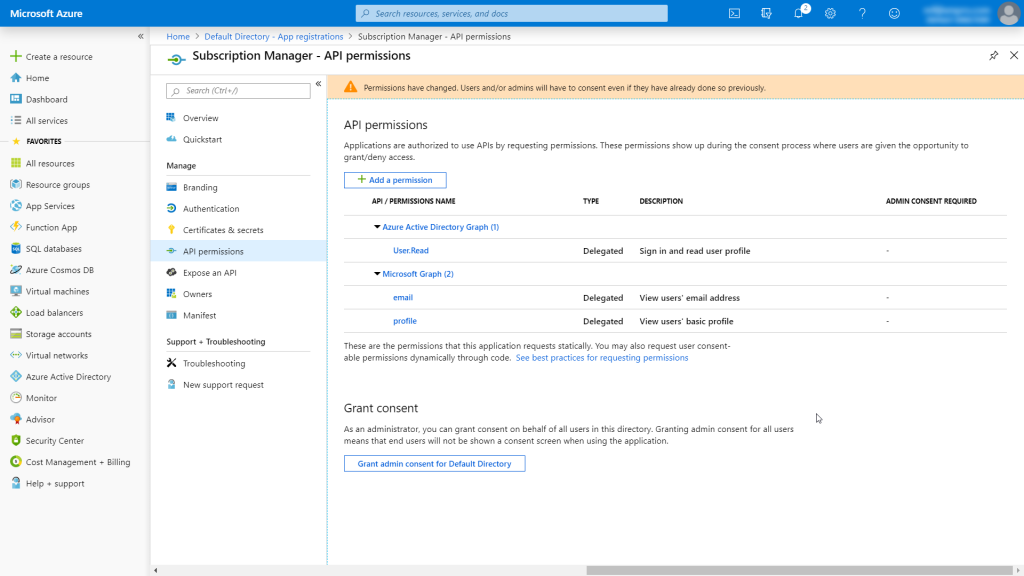
API permissions
Finally, select API permissions on the left-hand menu. In here, make sure that the permissions set on the application correspond to the image below.
Further reading
Quickstart: Configure a client application to access web API’s