How Can We Help?
Creating a custom application pool
When an XMPro application is installed a user might prefer to use Windows Authentication rather than SQL Authentication. Using Window Authentication requires the user to have a custom application pool already set up in IIS, but how to set up a custom application pool might not always be as obvious. The following steps would explain how to do this:
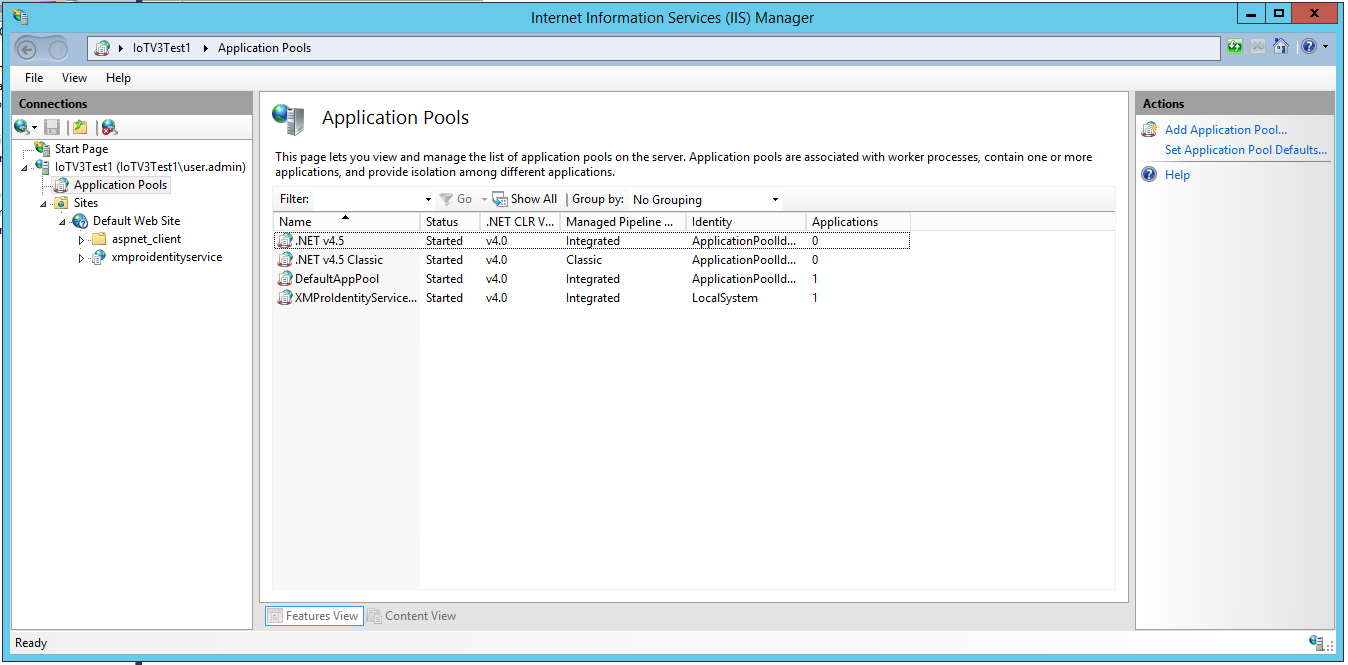
1) Open IIS and navigate to “Application Pools”
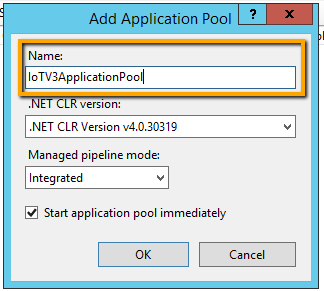
2) Click on “Add Application Pool”

3) Specify a name for the new application pool and click “OK”
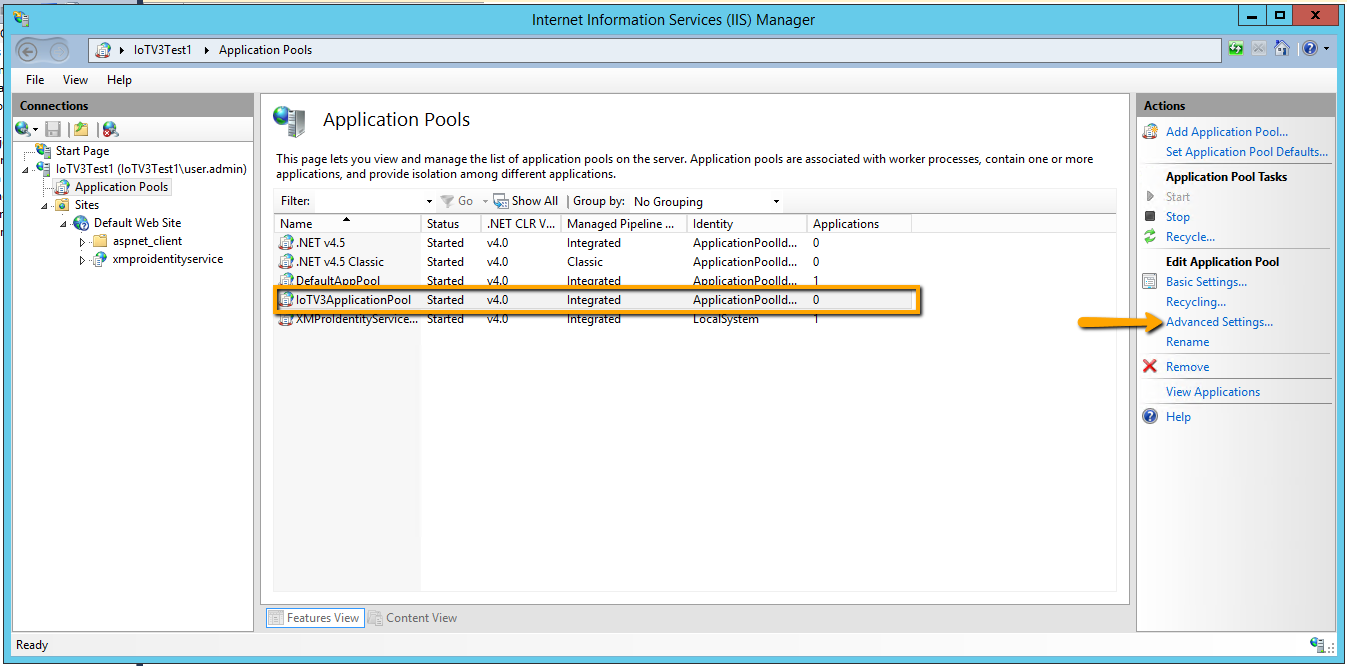
4) Select the newly created application pool and click on “Advanced Settings”
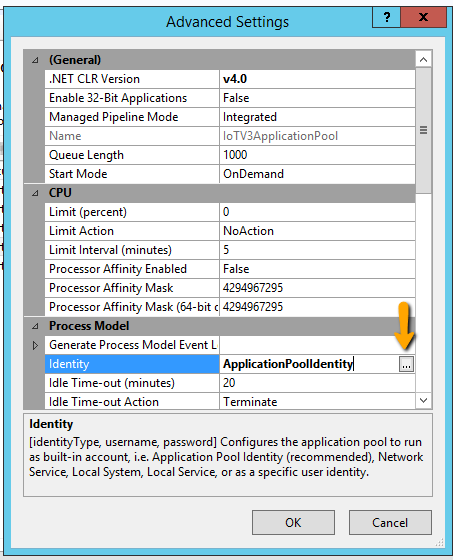
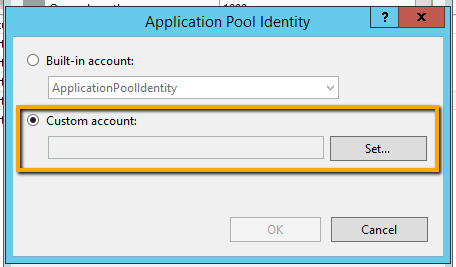
5) Click in the button next to the application pool name in the “Identity” field in the “Process Model” section
6) Select “Custom Account” and click on the “Set” button
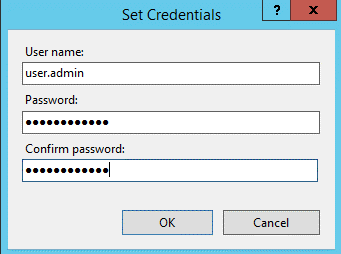
7) Specify the computer username and password and click “OK”. The credentials used for the custom application pool needs to be the same credentials as those that are used when the user logs onto the machine.
8) Click “OK” and then again “OK”
Enabling Batch Logon Rights
After setting up a custom application pool a user might still encounter problems if he tries to use that application pool. The typical behaviour, after a user installed an application that uses the application pool, would be that the application pool can be started but as soon as an application in that application pool is launched and a request is made, the application pool will immediately stop. To solve this problem, batch logon rights need to be enabled. The following steps can act as a guide on how to do this.
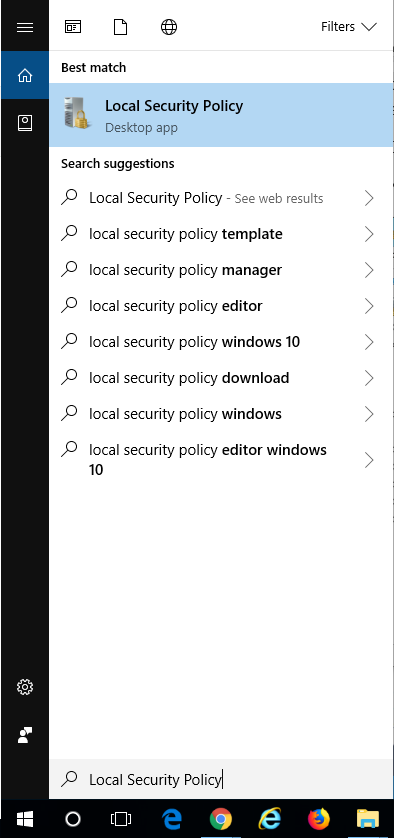
- Open the “Local Security Policy” application by searching for it in the Start menu
- Navigate to “Local Policies” –> “User Rights Assignment”

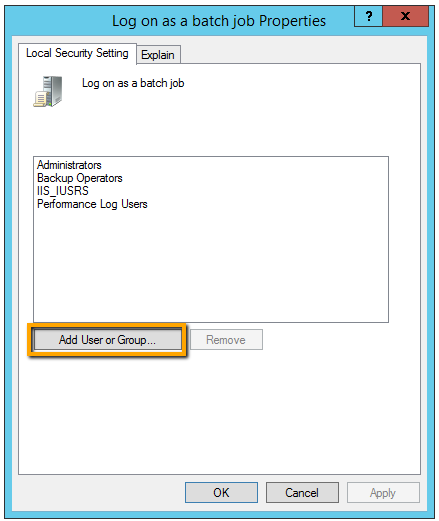
- Scroll down in the list on the right until you find the “Log on as a batch job” item and double click on it to open the properties for this item.

- Click “Add User or Group”
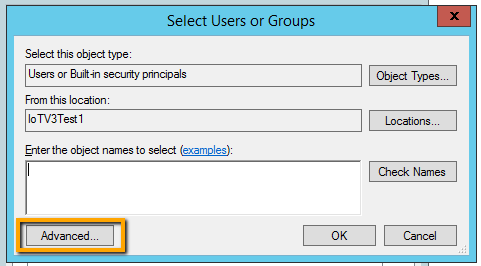
- Add the correct user by clicking on the “Advanced” button. Click “Find Now”, and then select the user that is logged in. Click “OK”. Click “Apply” and “OK”.

How to install XMPro using Windows Authentication
For this section, XMPro IoTThe Internet of Things (IoT) is the network of physical devices, vehicles, home appliances and other items embedded with electronics, software, sensors, actuators, and connectivity which enables these objects to connect and exchange data. V3 would be used to demonstrate how to use Windows Authentication when installing XMPro. Please note that the custom application pool that has been created in the previous section will also be used during this process.
- Run the XMPro IoT V3 setup as administrator and go through the installation, accepting the license agreement and providing an installation path.
- Run the XMPro IoT V3 installer as administrator from the Start menu
- Choose to install an instance of XMPro IoT V3
- Choose to install both the database and web application on the XMPro Components form
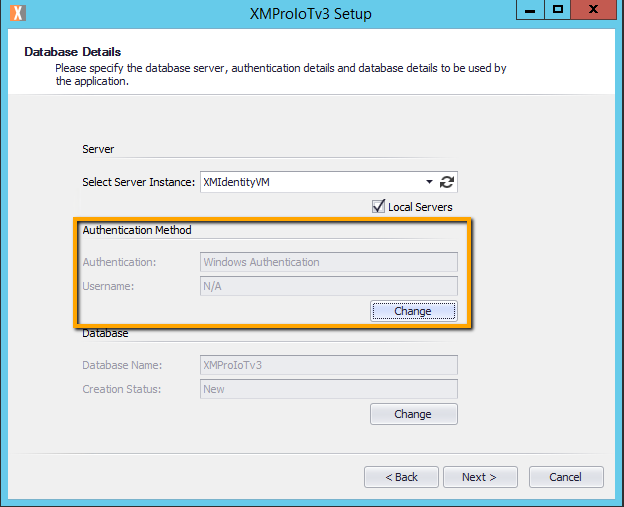
- On the Database Details form, choose the server instance to use and leave the Authentication Mode as Windows Authentication. Specify a unique name for the database to be created
6. On the Web Application Details form, click on the “Change” button next to the “Application Pool Name” field and select the application pool that was created in the first section. Click “OK”
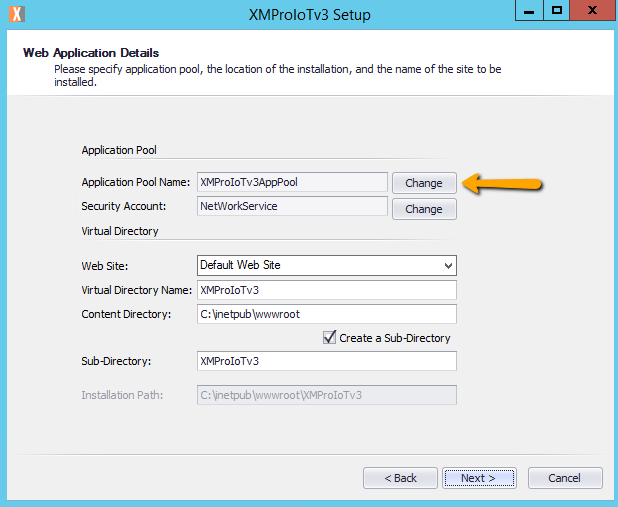

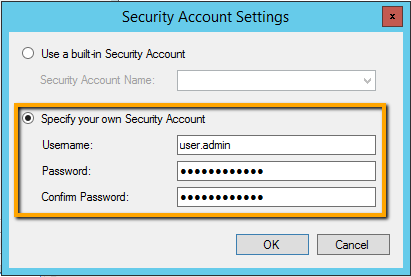
7. Click on the “Change” button next to the “Security Account” field
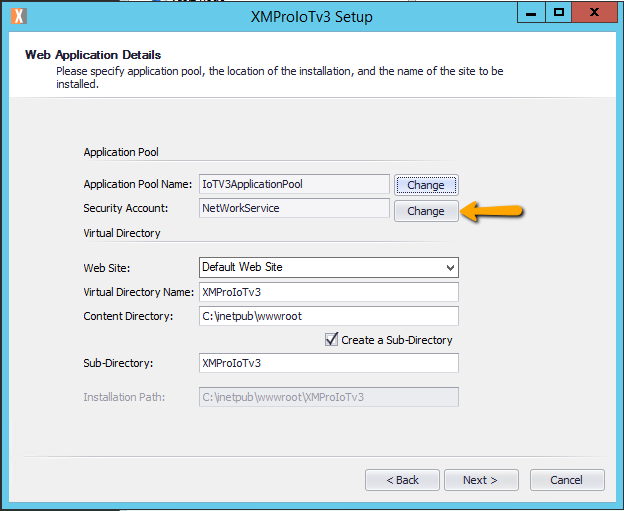
8. Choose to use your own security account and provide the logon credentials for the application pool that was selected in the previous step.
9. Click “OK” and navigate through the installer, providing the details for the instance of XMPro Identity Service that was installed as well as the Client ID and Shared Key that was created in XMPro Identity Service for this product.
10. Navigate to the newly installed instance of IoT V3 in IIS and click on Browse. Log in with the username and password used to log into XMPro Identity Service.
Comments are closed.