Getting Started
The Stream Integration Manager is a Windows 10 desktop application which enables you to package a new agent or update details for an existing agent. This application takes you through the process of specifying all the properties your agent requires, adding or changing the controls for each of the user settings, and uploading the DLL files of the agent code. It will provide you, upon completion, with a file that can be uploaded to Data Stream Designer after which you can build data streams using the agent.
You can download the software from the Microsoft Windows 10 Store or by clicking here. If you need to access a side loaded version, please contact [email protected].
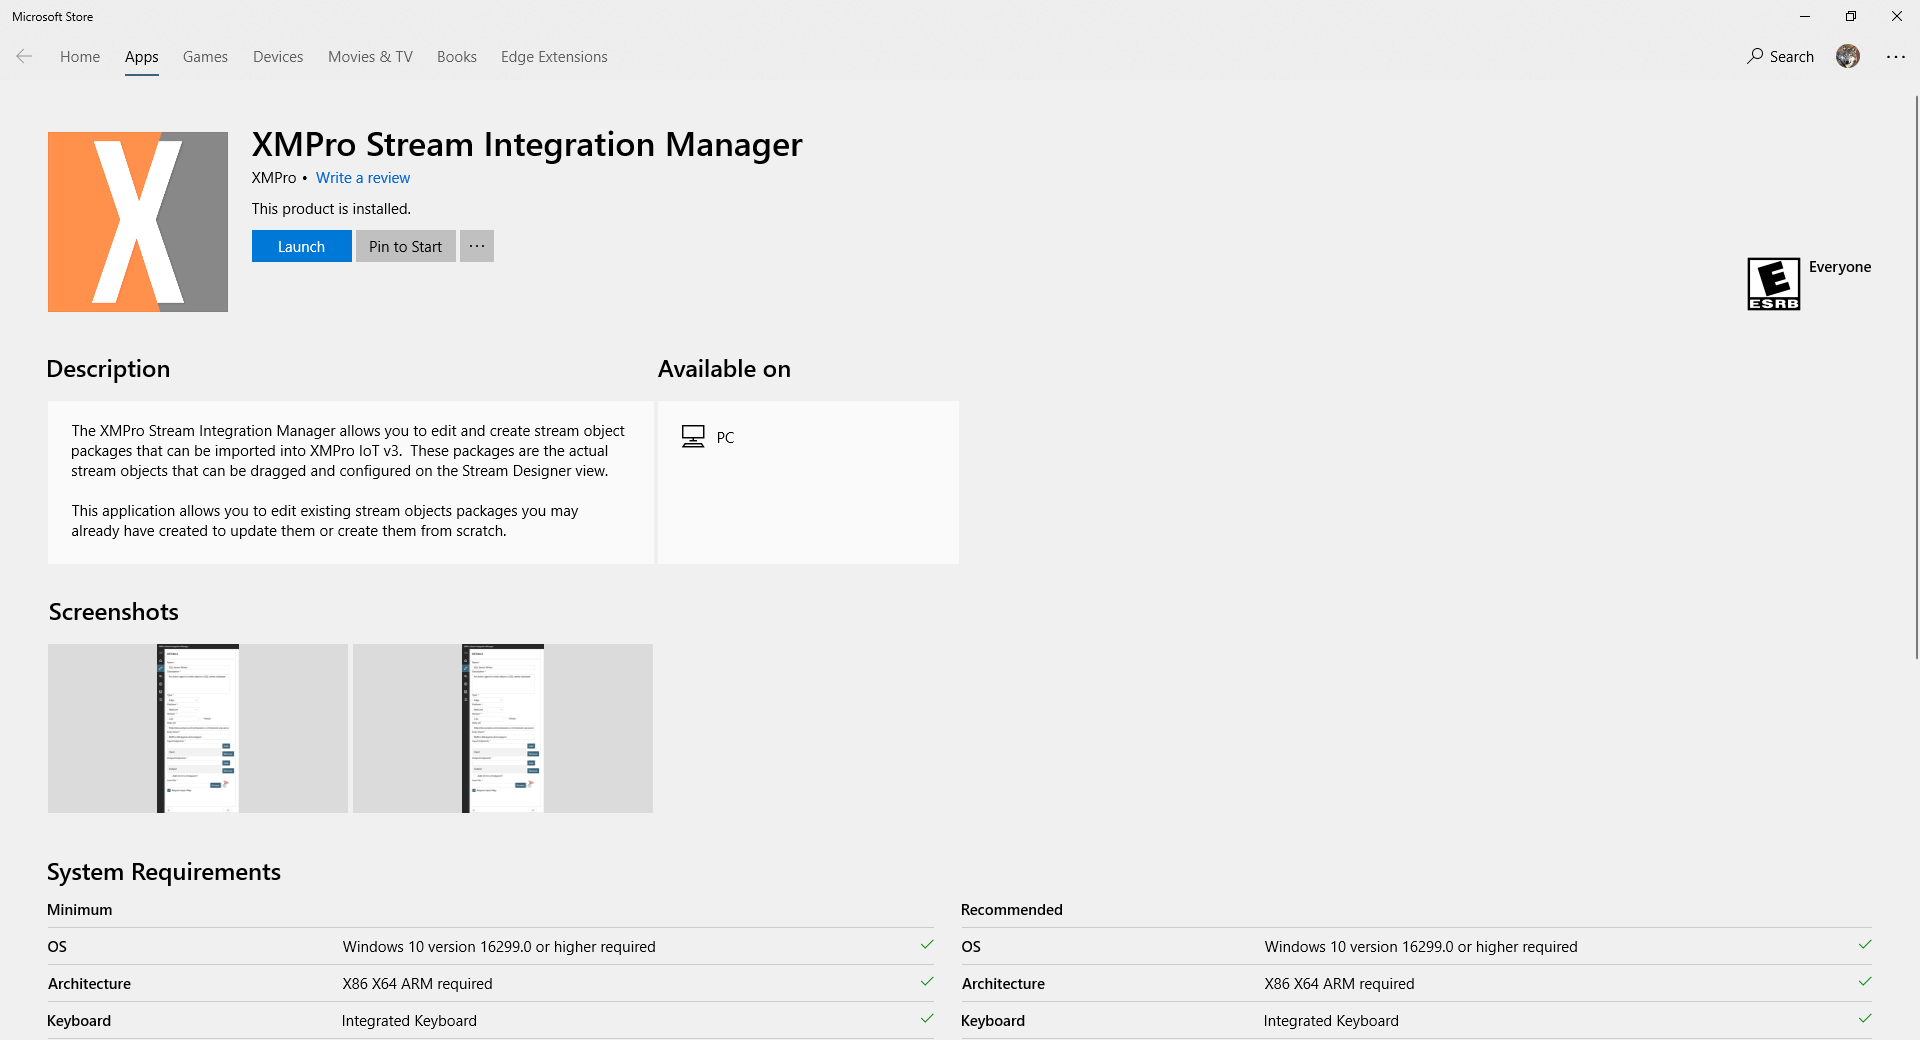
After installing the Stream Integration Manager, launch the application from the Microsoft Store or search for “Stream Integration Manager” in the Start menu and then click on “XMPro Stream Integration Manager”.

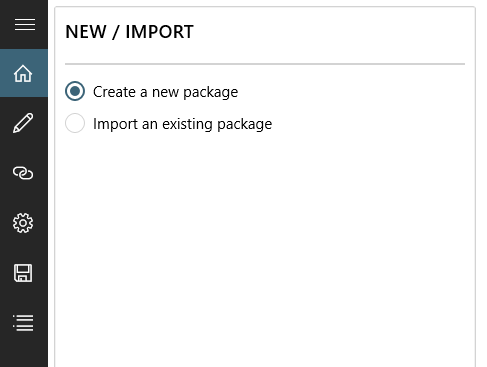
New / Import
The first screen that is displayed after you have launched the application will allow you to choose to either create a new package or import and update an existing one.
Details
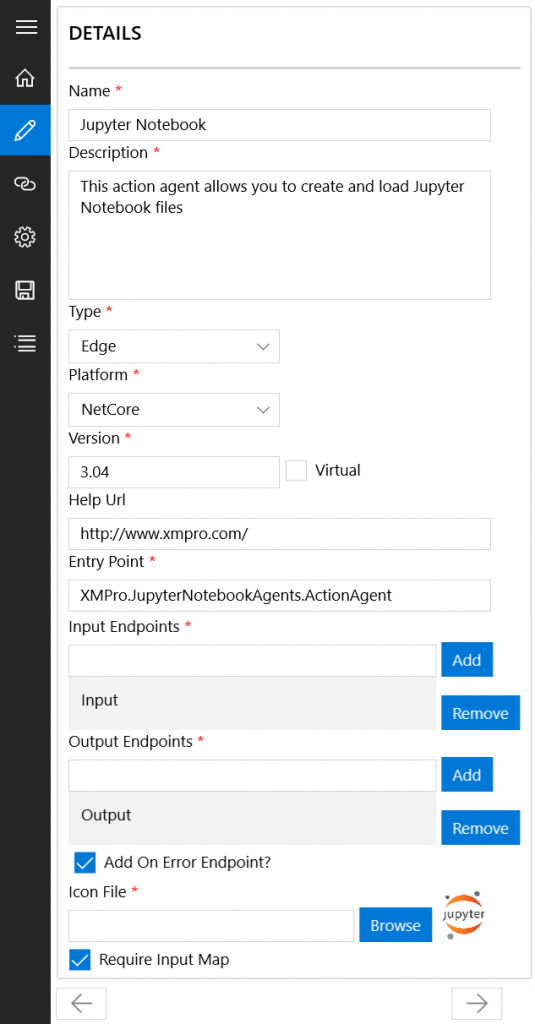
The Details form allows you to specify or edit the properties of an agent. Each of these properties are listed and explained below.
Name
The name of the agent is what the agent will be known as once it is uploaded to the Data Stream Designer platform, for example, “Jupyter Notebook” .
Description
The description is usually a brief explanation of what the agent does, for example, “This action agent allows you to create and load Jupyter Notebook files“.
Type
There are currently three types of agents available to choose from. Select the type that describes your agent best.
- Cloud
- Edge
- Hybrid
Platform
Agents can be developed using both or either of the following platforms:
- .Net Core
- Java (Private Preview)
Version
The version of the agent is defined within this field. Any real number is acceptable, e.g. 1.02.
Virtual
Agents can be classified as being either Virtual or Non-Virtual.
An agent is virtual if it is not specific to a certain environment and can be configured remotely. Non-Virtual agents have to be in their respective environments to be able to function correctly, e.g. the SQL Server Agent, which has to connect to SQL Server via the intranet.
Help URL
The Help URL is a URL that will navigate a user to the help document for this agent. This document will be opened in the Help pane in the Data Stream Designer when requested by the user.
Entry Point
The entry point is the namespace and class name of the actual agent’s DLL file.
For example, if an agent with class name “ActionAgent” is located in the XMPro.JupyterNotebookAgents namespace, the entry endpoint for it would be “XMPro.JupyterNotebookAgents.ActionAgent”.
Input Endpoints
These endpoints represent entry points to the agent, which will allow the agent to receive data or input from another agent. To add a new input endpoint, type the name of your endpoint in the text field and click on the Add button. The new endpoint will appear in the drop-down list below the text field. Please note that you may need to hover over the list and scroll down to see it. As per the image above, an input endpoint named “Input” has been added.
To remove an existing endpoint, scroll down in the list until you see it, select the endpoint and click on the Remove button.
Output Endpoints
Output endpoints represent exit points from an agent and allows you to connect your agent to another agent, making it possible to pass data from your agent to another agent. Output endpoints can be added in a similar way to the input endpoints. To add an output endpoint, type the value in the text field provided and click on Add. The list will contain the endpoint after you clicked on the button. Please note that you may need to hover over the list underneath the text field and scroll down before being able to see the new value. In the image above, “Output” has been added as an example output endpoint.
To remove an existing endpoint, scroll down in the list until you see it, select the endpoint and click on the Remove button.
Add on Error Endpoint?
This check-box allows you to add an additional output endpoint, called an Error Endpoint. Error endpoints will output error information when your stream is running and something goes wrong, making debugging easier. You can also define actions that will be executed after error data is sent to the next agent in the stream by your agent, for example when a certain record is not valid.
Icon File
The icon that you upload in this field will be used to represent your agent. To change an existing image or upload a new one, click on the Browse button, navigate to where you’ve stored the file via the Explorer and select the new image file.
Require Input Map
The Require Input Map feature allows you to specify that your agent will be receiving events in a certain defined structure. This enables the arrows leading to your agent to be made configurable and will allow the user to map the inputs of your agent to incoming attributes.
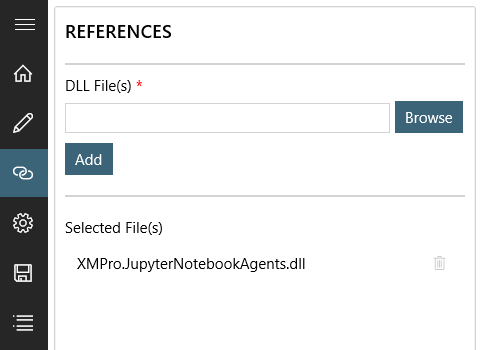
References
After completing the Details form, you will be presented with the References screen where you will be asked to upload the DLL file(s) that were generated when you built the project containing your agent. You are only required to upload your agent’s DLL file; there is no need to upload the XMIoT.Framework.dll file as this DLL is automatically included.
To upload a file, click on the Browse button next to the DLL File(s) field and navigate to where your the files are located and select them. When you’ve selected all the files needed, click on the Add button to add them to the Selected File(s) list. Please note that only files in the Selected File(s) list will be included in the package. To remove a DLL from the list, click on the trash-icon next to the DLL name in the Selected File(s) list.
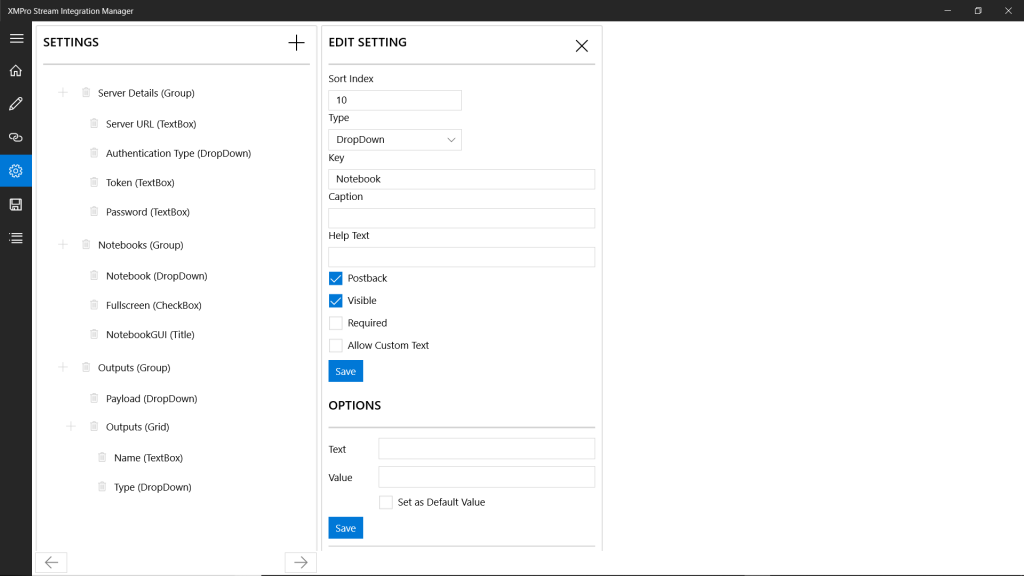
Settings
Depending on what your agent does, it might require that the user provide certain information, such as a server URL, username or password. For each of these information fields (or settings), you need to specify which control should be used and what each control represents, for example, the Jupyter Notebook agent will require the user to add a server URL. The user should provide this value using a text-box control. Thus, you need to create a control with a type of “TextBox” and a caption that reads “Server URL” in the Stream Integration Manager application.
The following controls are available to be used to capture user input:
- FileUpload
- Filter
- Grid
- Group
- HtmlEditor
- ScriptBox
- TextBox
- Title
- TokenBox
Each control can have a number of properties that has to be set. However, not all properties apply to all controls, for example, you don’t need to add options for a text-box control as it is only intended to be available for a drop-down control to allow the user to select an option from the drop-down menu. The table below contains a list of all the available properties, along with their description, and an indication to which controls each property will be applicable to.
| Property Name | Control Type | Description |
| Allow Custom Text | Drop-Down | Allows the user to type custom text in the drop-down field, if checked. |
| Allow Custom Tokens | Token Box | Allows the user to add custom tokens, if checked. |
| Caption | All | Text that will be displayed with the group or setting. The caption is usually one or two words, describing the value that should be provided by the user, for example “Server URL”. |
| Default Value | Title | Default value of the title. |
| Font Size | Script Box | Size of the font in the Script Box. |
| Help Text | All, excluding Groups | If you need to provide the user with any additional information about the purpose of the setting or helpful instructions, specify it in this field. |
| Key | All | Uniquely identifies the group or setting. |
| Keywords | Script Box | Define your variables or other custom keywords here, so that they will be available in the editor’s intellisense. |
| Options (Drop Down) | Drop-Down | Use the Options-area to add values to the drop-down menu by specifying the Text and Value fields and then clicking Save. You may also choose an option to be used as the default option by checking the “Set as Default Value” box. |
| Options (HTML Editor) | HTML Editor | Allows you to specify placeholders that can be mapped to input fields in the input received by the agent. |
| Postback | All | If checked, will cause the form to do a post back to retrieve values from the server when the field loses focus (when the user clicks out of the field). |
| Required | All, excluding Groups | The control will be validated to make sure that a value has been specified if this box is checked. |
| ScriptBox Height | Script Box | Height of Script Box. |
| ScriptBox Mode | Script Box | Language in which script has to be written. |
| ScriptBox Theme | Script Box | Theme of the Script Box. Themes available include the following:
|
| ScriptBox Width | Script Box | Width of Script Box. |
| Secure | All | The value of the control will be treated as a secure value if this box is checked (encrypted and not displayed on the form in plain text). An example of a secure value is a SQL Server password. |
| Show Grid Lines | Grid | The grid lines of the grid will be shown, if checked. |
| Show Header | Grid | The header of the grid will be displayed, if checked. |
| Sort Index | All | This is used to determine the group or setting’s position and works with increments of 10. Adjust this value to move the group or setting up or down on the form. |
| Unique Key | Grid | Mark a specific column as being unique, for example, an identity column. |
| Visible | All | This field sets the initial visibility of the group or setting. |
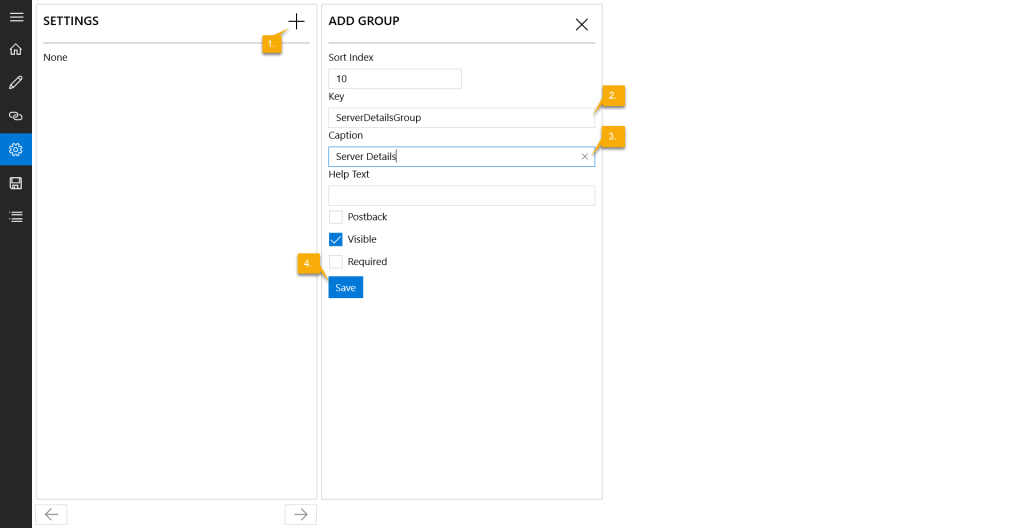
Adding Settings
All settings that are added need to belong to a group. Thus, you have to create a group first. You will then be able to add controls for settings to the group. To do this, follow the steps below:
- Click on the plus-icon (top right, next to the Settings header). A form section will open, allowing you to specify a group for the settings.
- Specify a unique value that can be used as the key for the group.
- Add the caption you would like to use.
- Click Save.
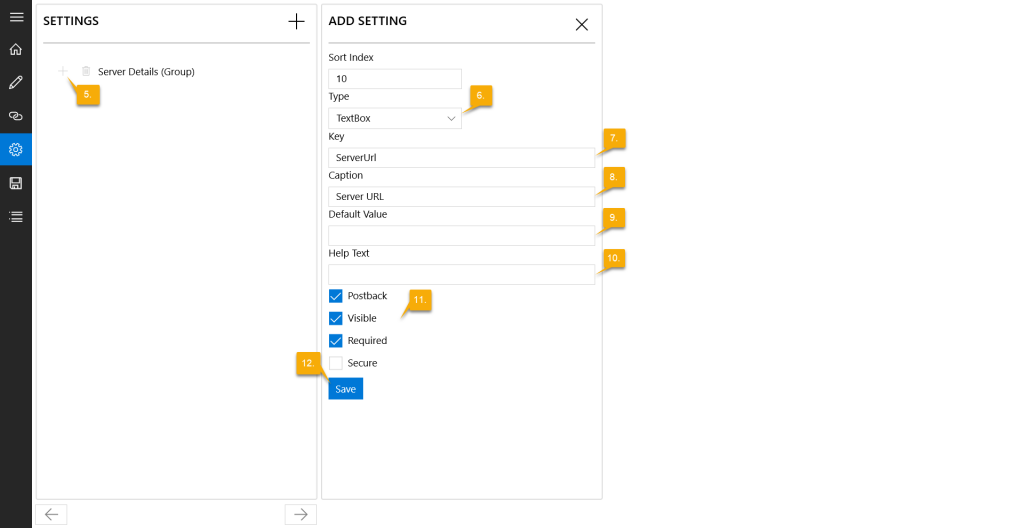
- Next, we are going to add a setting. Click on the plus-icon next to the group you’ve created.
- Choose the type of control you would like to use.
- Add a unique key for your control. Please note that this key needs to correspond to what you defined in your code.
- Add a caption for your control.
- If needed, add a default value.
- If required, add help text.
- Select the options that apply from the list of check-boxes.
- Click Save.
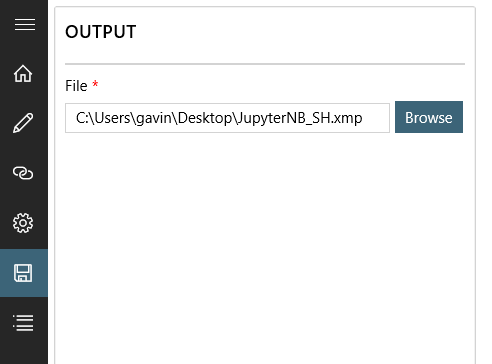
Output
The second last step is to provide the location on the file system where you would like the package to be created. Click on the Browse button and navigate to the folder where you would like the package to be exported.
Review: Details
Lastly, review all the details that you’ve specified so far to make sure the values are correct. If you are satisfied, continue with the wizard. When you click on the check mark-button at the bottom, your package will be created as a file with an “.xmp” extension.

Data Stream Designer: Uploading the package
To upload your new agent to Data Stream Designer, follow the steps below:
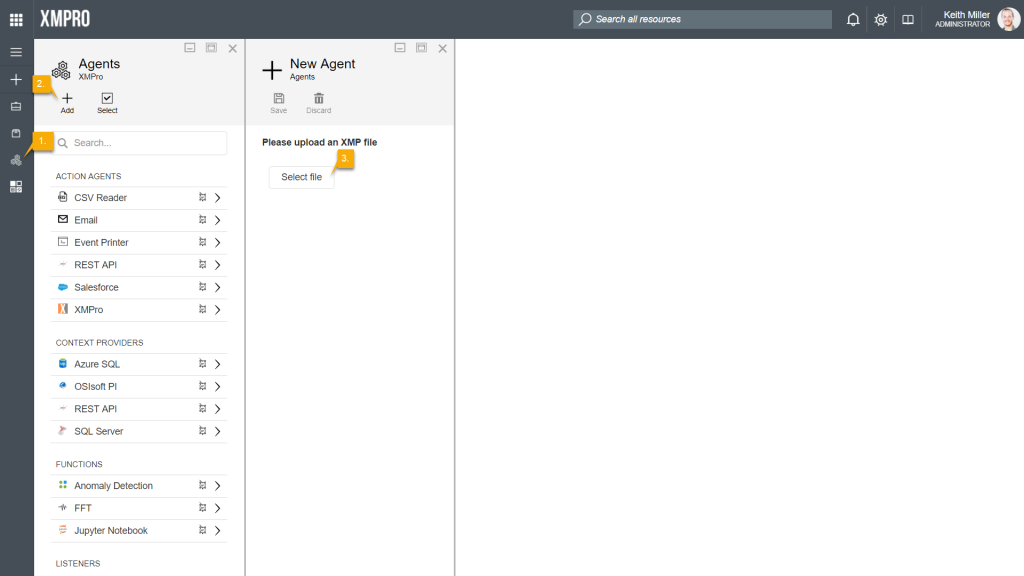
- In Data Stream Designer, open the Agents page from the left-hand menu.
- Click Add.
- Browse to the .xmp file that you’ve created with the Stream Integration Manager.
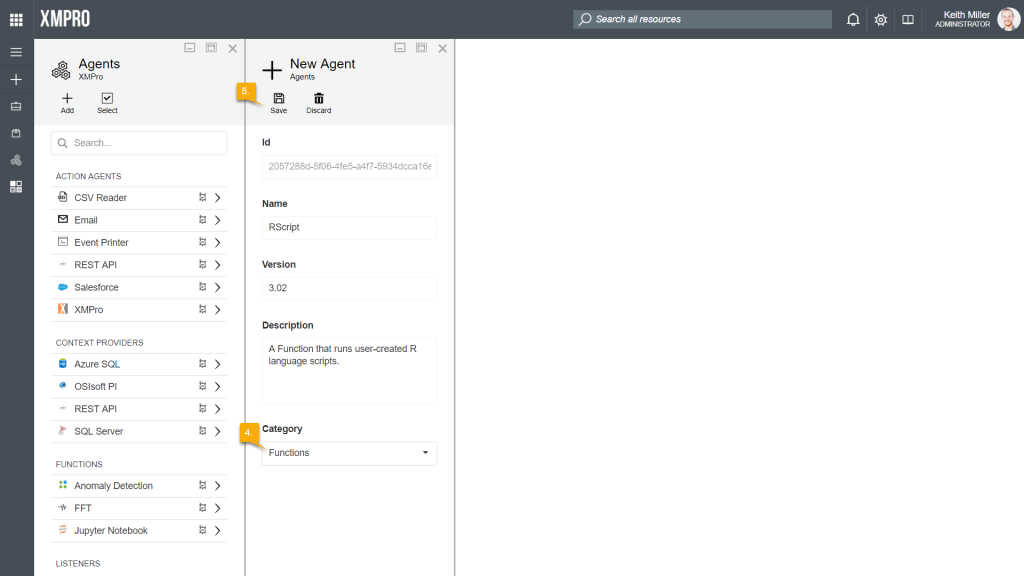
- Choose the correct category for the agent.
- Click Save.