Prerequisites
- Action Hub v6.7+
- Subscription Manager v2.2+
Enabling Process Designer
The Process Designer has been released as part of Action Hub v6.7+, meaning that it will automatically be installed with Action Hub.
The process you will have to follow to successfully enable Process Designer will depend on the state of the Action Hub instance that have been installed on your machine. If Action Hub has not been installed yet, follow the instructions, as listed here. Please make sure that you choose to use Subscription Manager authentication during installation.
If an instance of Action Hub is already installed using custom or Windows Authentication or the installed instance is older than Action Hub v6.7, the Site Manager will have to be used to upgrade the Action Hub installation to the latest version of Action Hub as well as to use Subscription Manager authentication.
Site Manager
To upgrade an XMWorspace (known as Action Hub from v6.7 onwards) site to the latest version, follow the steps below. In the steps below we will also enable Subscription Manager authentication.
Step 1: Downloading the application
Download the Site Manager from here. Please note that the Site Manager version you download has to be v6.7 or later. Run the downloaded executable file by double-clicking on it.
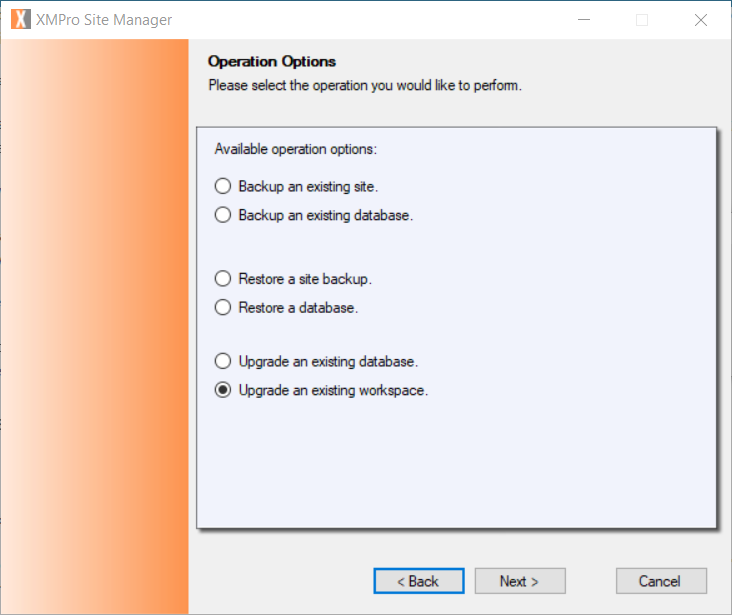
Step 2: Operation Options
The first screen after the Welcome screen will present a few options of actions that may be performed. To install Process Designer, you have choose “Upgrade an existing workspace”. Click Next.
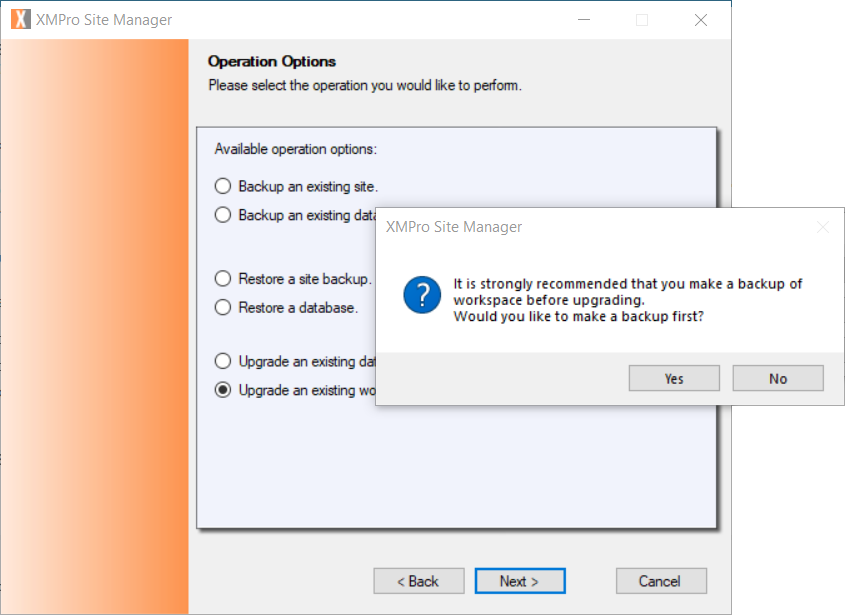
Step 3: Making a back-up
It is strongly recommended that you make a back-up of your workspace before continuing any further. Select “Yes” when the Site Manager prompts you to do this and follow the steps outlined by the wizard.
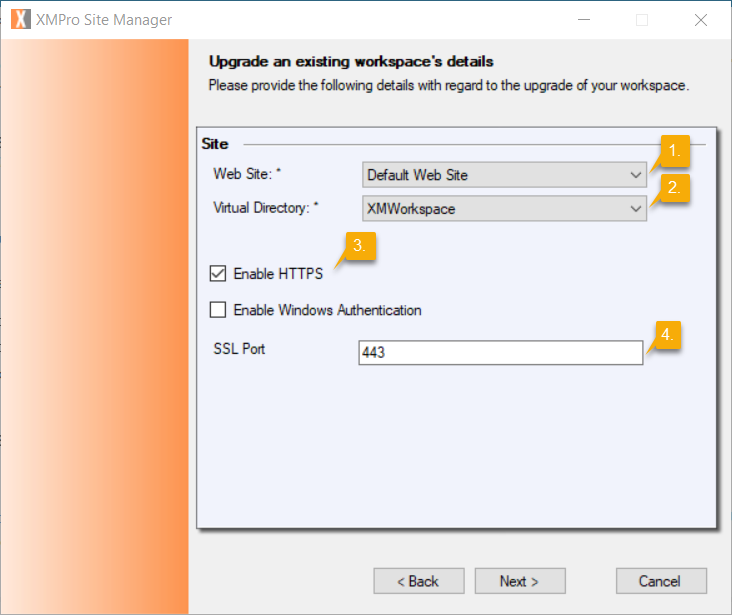
Step 4: Upgrade details
After making a back-up of your workspace, you will be asked for the details of the site.
- Choose which IIS Web Site should be used from the drop-down.
- Choose the Virtual Directory of your workspace
- If you would like to enable HTTPS or enable Windows Authentication, select the appropriate boxes.
- If you are enabling HTTPS, please specify the SSL port that should be used. The default port for HTTPS is 443.
- Click Next.
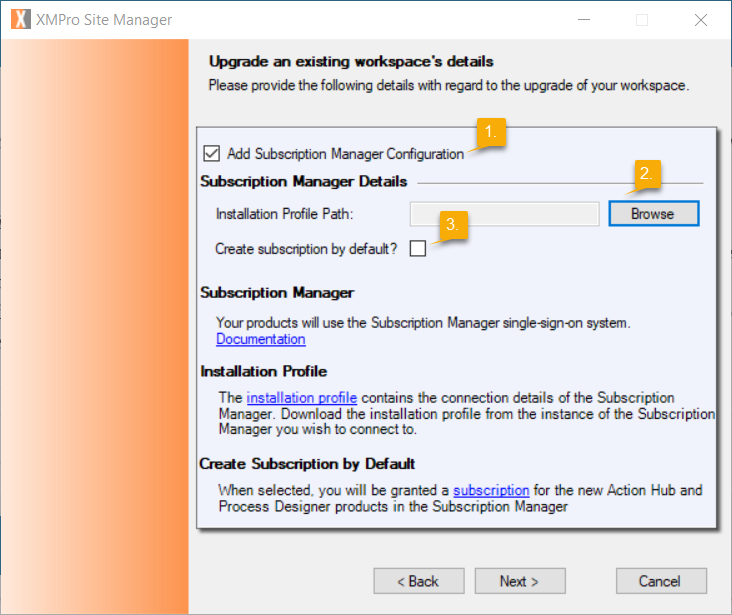
Step 5: Subscription Manager
Next, we are going to configure Subscription Manager, which is an XMPro application that will provide you Single Sign-On capability between Action Hub, Process Designer, Subscription Manager, and other products. The licenses and access you need to access Action Hub and Process Designer will also be handled by Subscription Manager. Follow the steps below.
- Make sure that the “Add Subscription Manager Configuration” check-box is selected.
- Upload an installation profile for Subscription Manager. An installation profile can be seen as a file that contains details that identifies the Subscription Manager instance that should be connected to. You can read more about how to download it by clicking here.
- Select the “Create subscription by default?” box. This will allow the installer to add Action Hub and Process Designer to the list of products you have a subscription for and grant you with administrative access.
- Click Next.
You will be presented with a screen, prompting you to log into the Subscription Manager. Fill in your details and click Sign in. Please note that the user you log in with will be the user that is granted administrative access to for Action Hub and Process Designer. Click Next and let the wizard complete the installation.

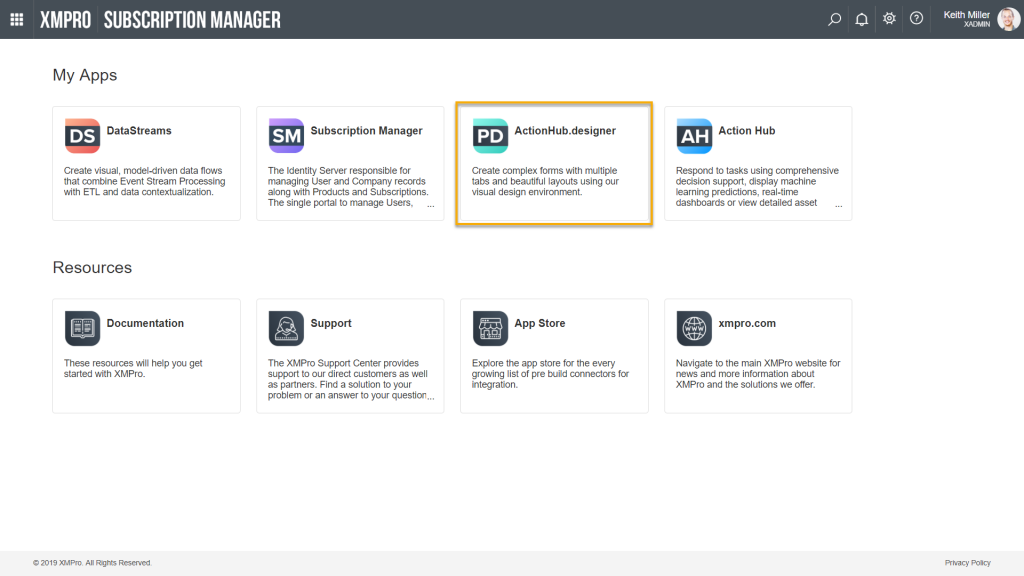
Step 6: Accessing Process Designer
After successful installation, open Subscription Manager in your browser. On the landing page, click on the item that ends in “.designer“. This will open your Process Designer environment in a new tab in your browser.