How Can We Help?
Readings from sensors can easily be simulated by using MQTT, which might be especially helpful when trying out the Data Stream DesignerIs a model-driven approach to connect, transform and action real-time “streaming” data in a visual, drag and drop manner. or when building your own agents. According to the definition available on the MQTT test broker webpage, MQTT can be described as a lightweight prototype that uses a publish/subscribe model that can be used for “machine to machine“ messaging. If you are not familiar with MQTT, you can find more information on their website.
This article aims to provide more context around how to simulate events by using the MQTT listenerIs a Stream Object that is responsible to ingest data from sensors and third party systems. agent in Data StreamConsists of a combination of Stream Objects allowing real-time data to flow through. It is created to address a particular use case. Designer by explaining where to find the broker address and topic as well as how to specify the payload and how to simulate data readings from a sensor on a machine using MQTT.fx. In the example solution below, we will be simulating temperature readings from a sensor on a machine.
Prerequisites
- Download and install MQTT.fx
Preparation
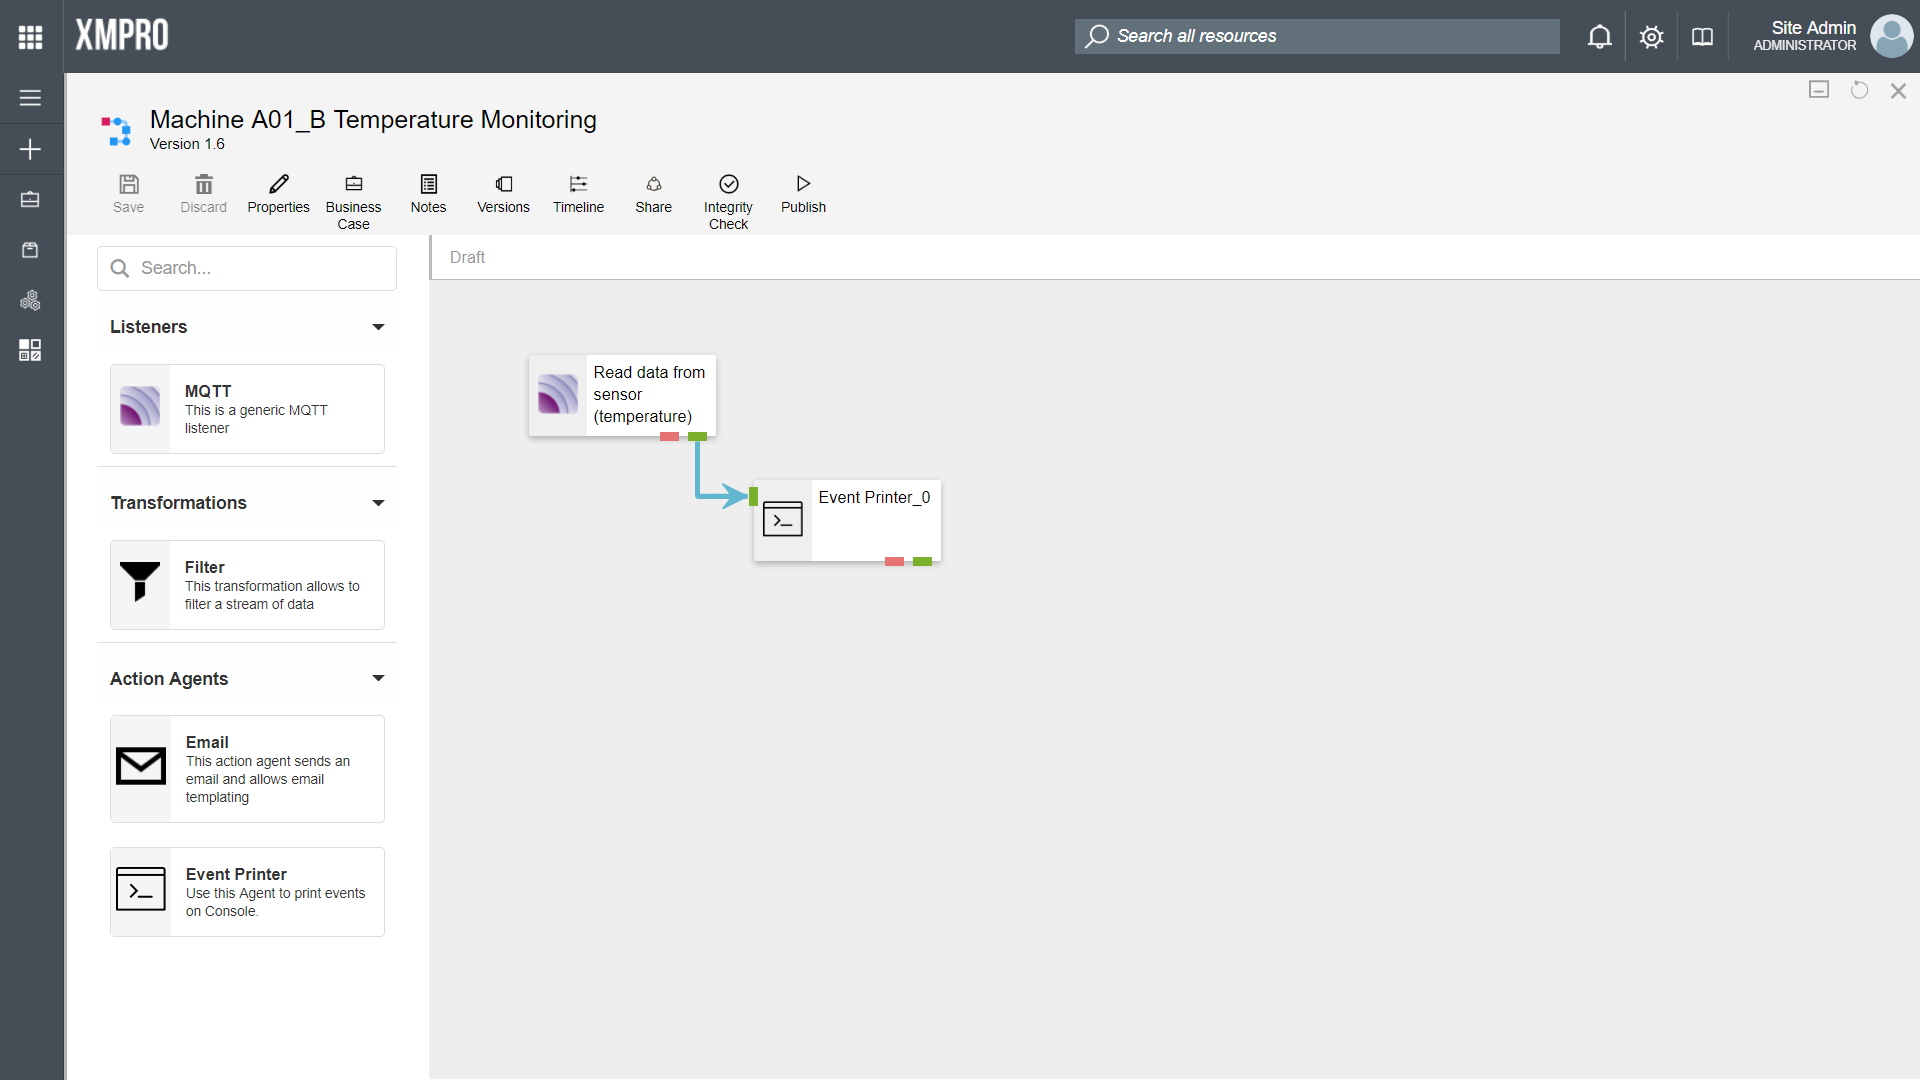
In the example solution below, a simple data stream will be used. This data stream has been designed according to the “Create your first data stream” quick-start guide and consists of the agents listed below. It is recommended that you build a similar data stream to follow along.
- MQTT listener (this agent will listen for data/sensor readings posted to MQTT)
- Event Printer action agentIs a Stream Object that is responsible to consume events in a stream to perform possible internal or external/third-party actions (e.g. data warehouse updates, sending notifications etc.). Once an event is consumed by an Action Agent, its relative response is pushed back onto the stream, upon which further processing is done (if required). (This agent will print the events received from the MQTT listener on the screen; these events can be viewed in the Live View)
Example Solution
When using an MQTT listener or action agent in Data Stream Designer, you are required to specify the following:
- CollectionIs a virtual grouping of Stream Hosts. All Stream Hosts in a collection are broadcasted the same instructions from the IoT Portal. This way a Use Case can be mass deployed to all the Stream Hosts in a given Collection.
- Broker address
- Topic
- Payload format
- Payload definition
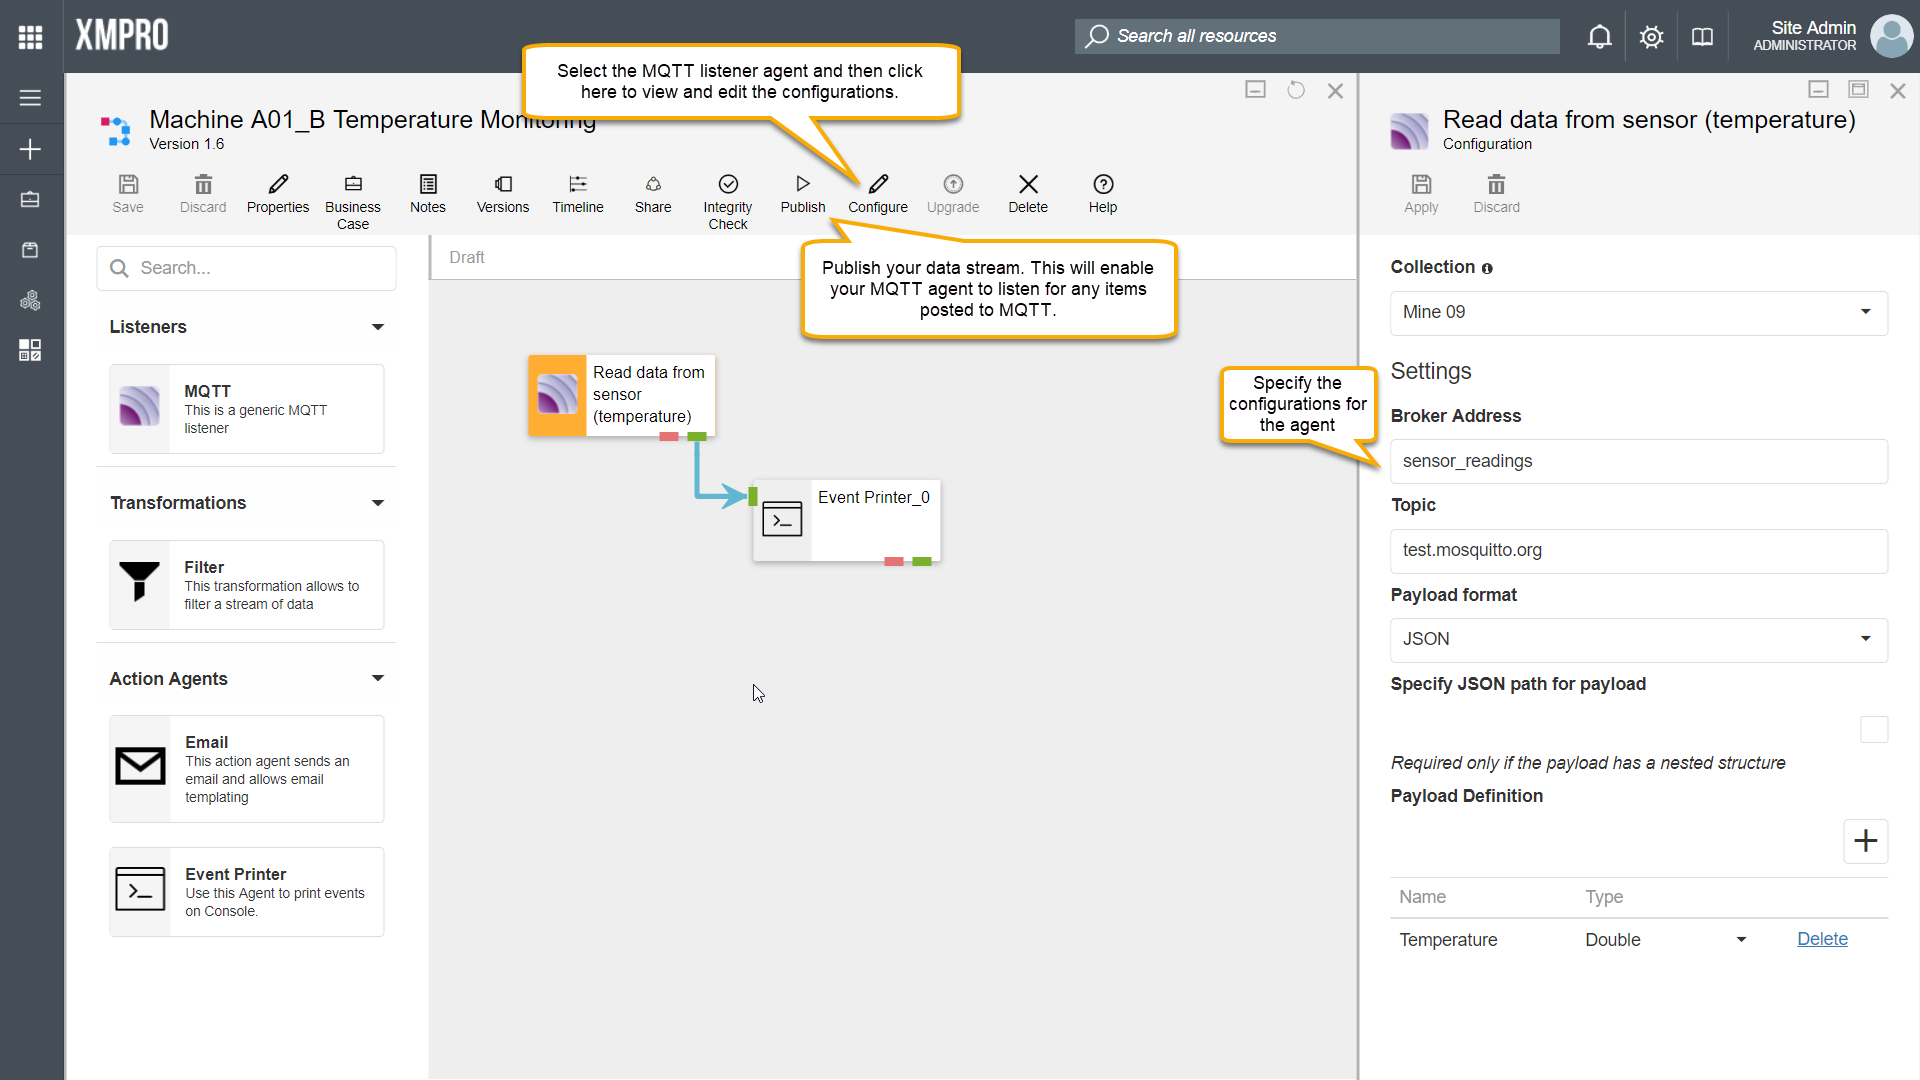
To access the configuration for an agent, click on the agent and click on the “Configure” button on the Data Stream Designer canvas. In this example, the agent is configured as described below.
- Collection
- Choose which collection your agent needs to be associated with. For more information on what a collection is, please refer to the documentation.
- Broker address
- The broker address is the address of a MQTT server. We are going to use one of the public MQTT test servers. The address for this broker is test.mosquitto.org.
- Topic
- The topic is usually a subject that describes the data that is being published to MQTT. Choose any subject for the data that you would like to simulate, for example, “sensor_readings”.
- Payload format
- For this example, we are going to post the data to MQTT in a JSON format; thus, the payload format will be left as “JSON”.
- Payload definition
- This refers to the structure of the data items that will be received by the agent as it is posted to MQTT.
- Click on the “+” button to add a new row and specify the name of the data item the agent will be receiving along with the type, for example:
- Name: “Temperature”
- Type: “Double”
- When you have configured the MQTT agent, you may click “Apply” and then “Save”.
MQTT.fx Settings
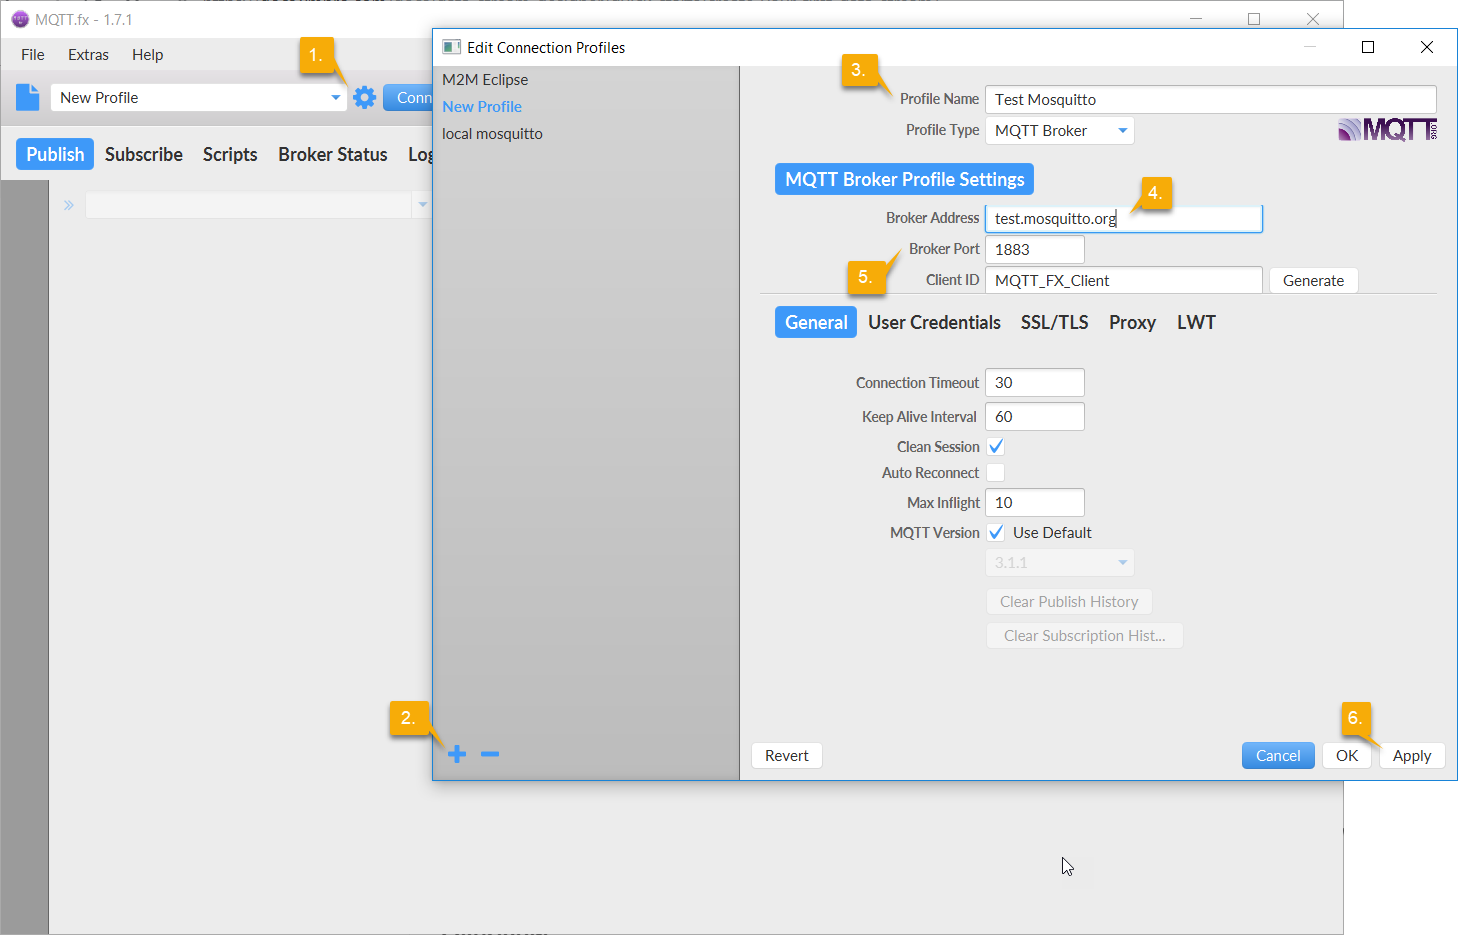
Next, open MQTT.fx. You now have to set up a profile for the broker in MQTT. Follow the steps below:
- Click on the settings-icon
- Click on the “+” icon to add a setting
- Choose any friendly name for the profile
- Specify the broker address
- Check the broker port and change it, if needed. There are a few ports available that you can specify, as described here. For this example, we will leave it as port 1883, which is MQTT, unencrypted.
- Click “Apply”
- Close the window
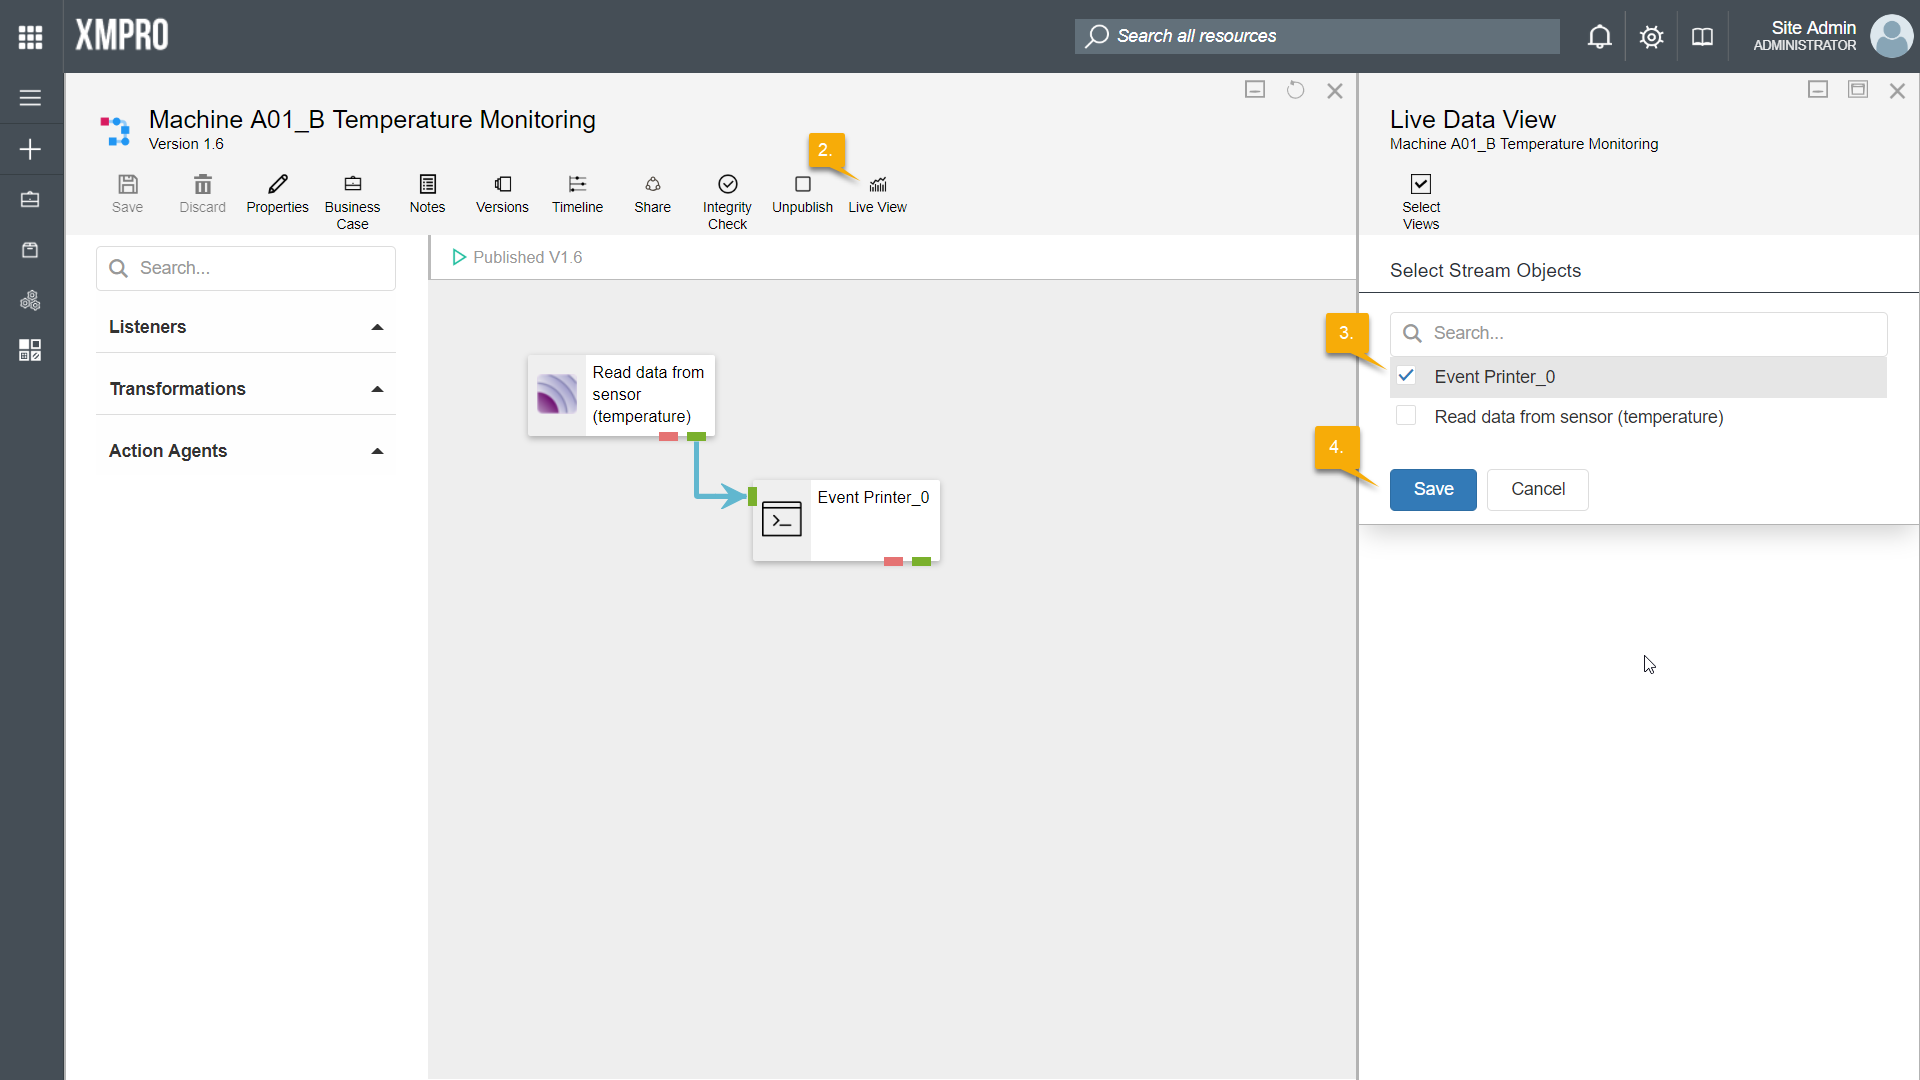
Configuring the Live View
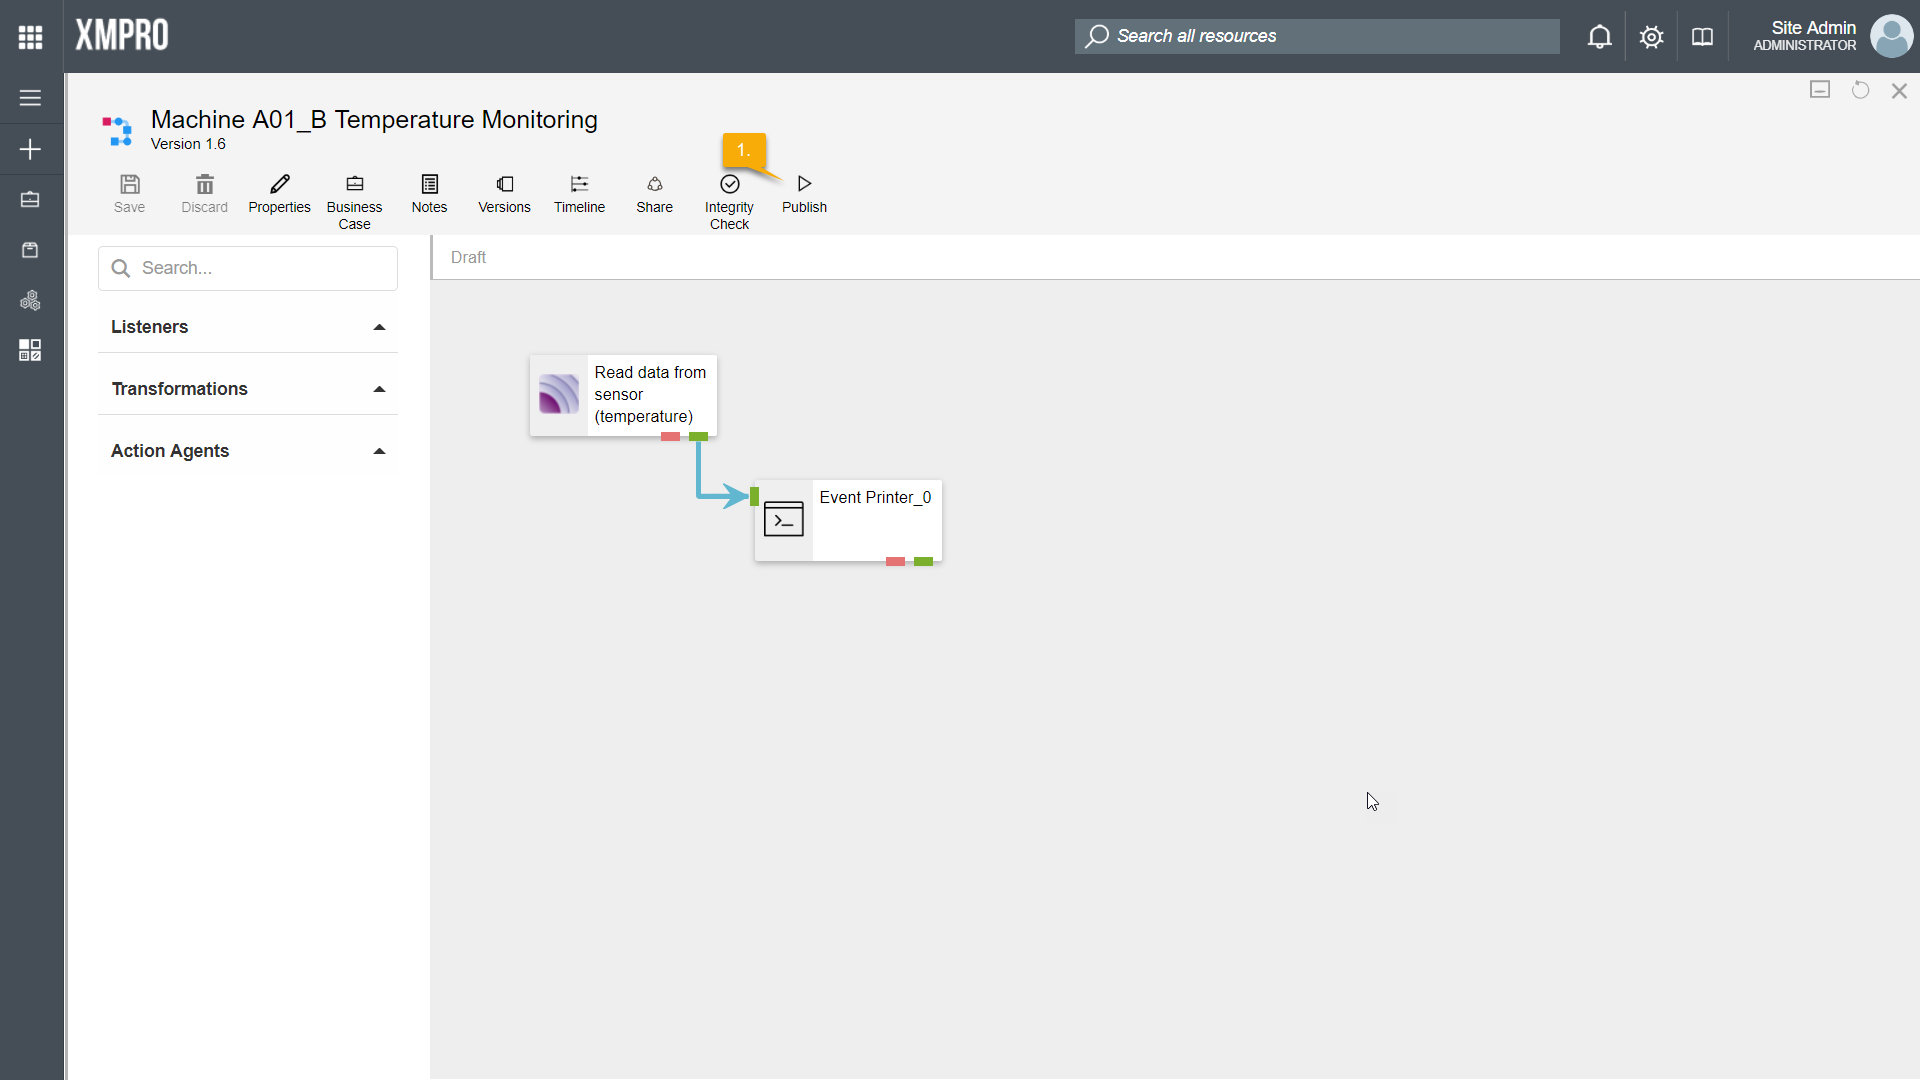
In the Data Stream Designer, follow the steps below:
- Publish your data stream by clicking on “Publish”.
- Click on “Live View”.
- Select your Event Printer agent.
- Click “Save”.
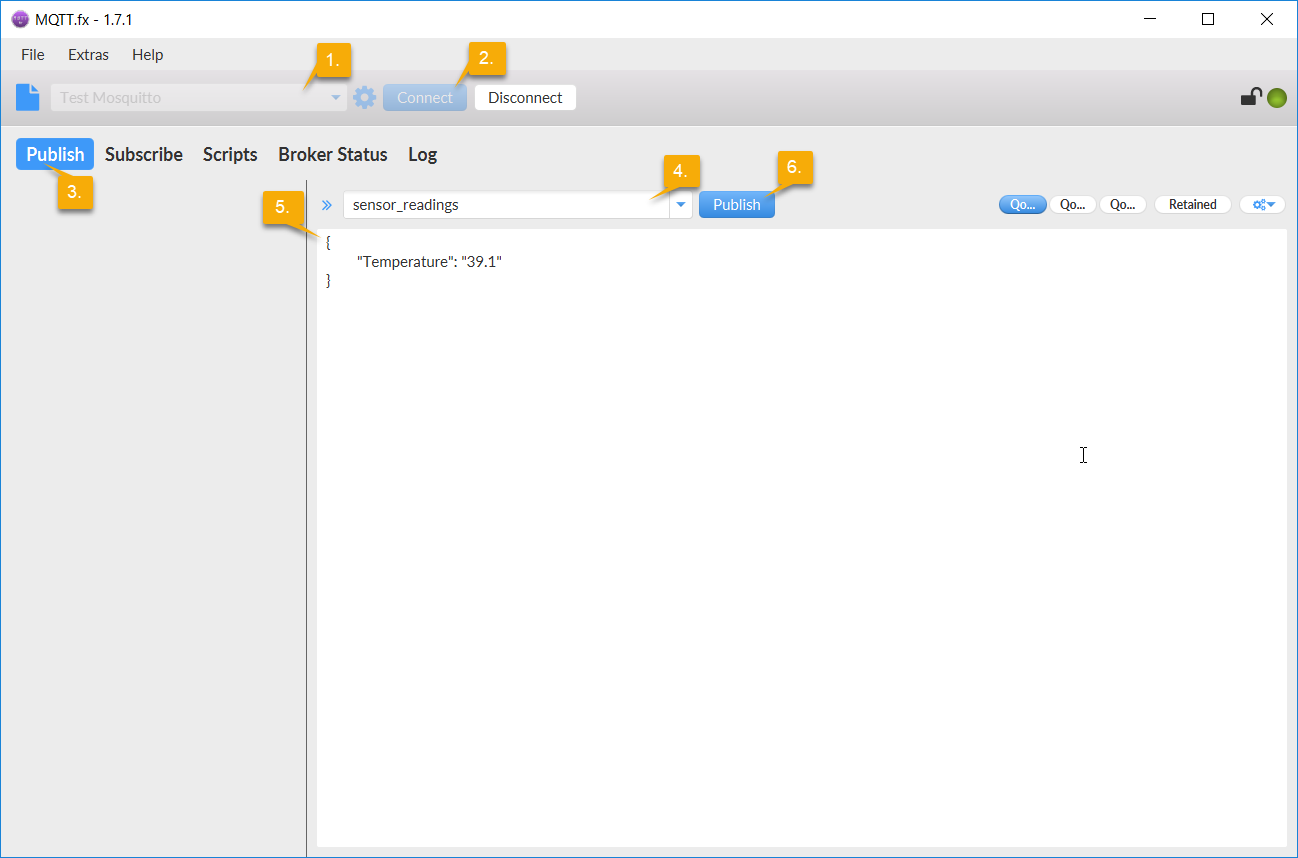
Publish
Next, we will publish the simulated temperature readings to MQTT using MQTT.fx. In MQTT.fx, to publish an item to a topic, follow the steps below:
- Make sure the correct profile is selected.
- Click on “Connect”.
- The publish tab should already be selected. If not, click on “Publish”.
- Add the name of the topic you want to publish the data to.
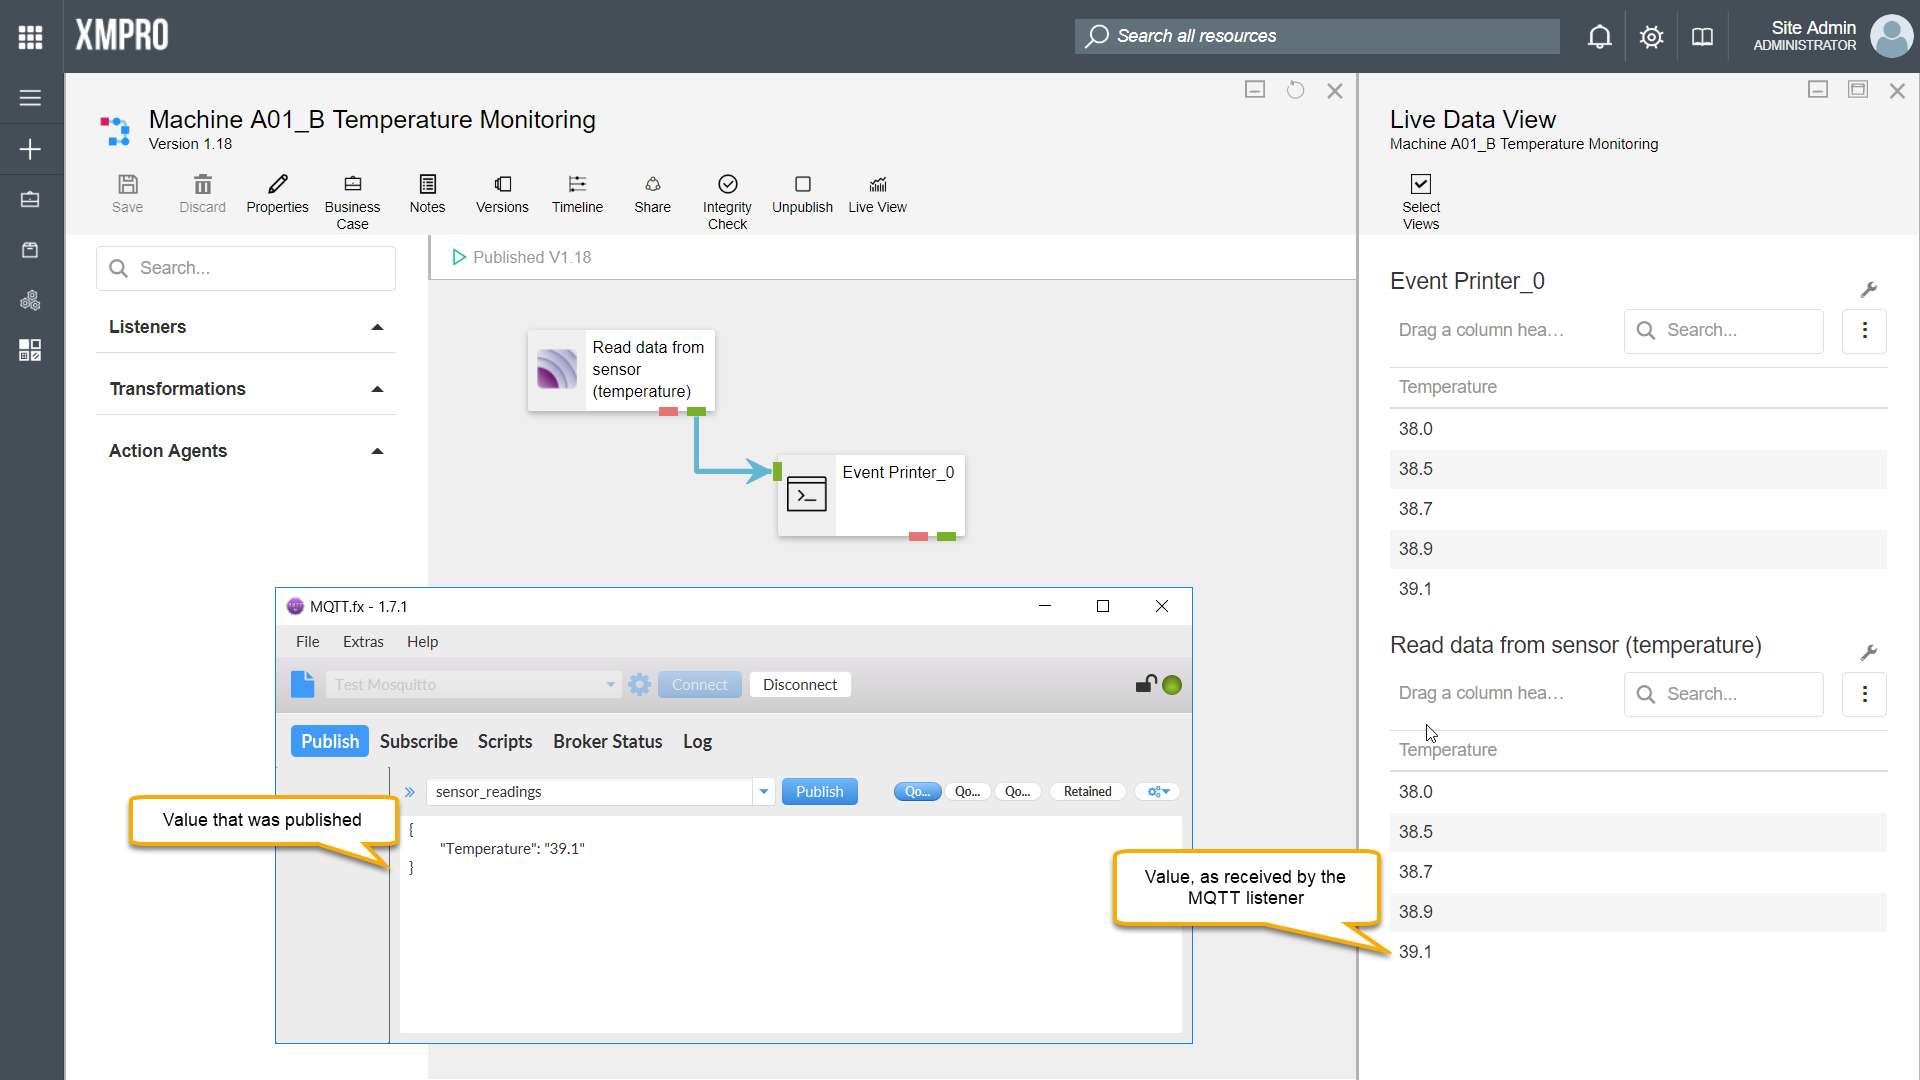
- Add a value that you would like to publish, for example:
{ "Temperature":"35.7" } - Click “Publish”.
Related Resources
- GitHub: MQTT Listener agent code
- GitHub: MQTT Action Agent code
- Article: Create your first data stream
Comments are closed.