How Can We Help?
Background
Dashboard Parameters allow the user to filter or display data according to the values passed through. For example, a dashboard can show data based on a user’s role, location, or region etc.
Use Case
When accessing the dashboard from the menu in XMPro v6.6, the user can provide values for dashboard parameters by invoking the Dashboard Parameters dialogue. This can be achieved by clicking the ‘Parameters’ button in the dashboard title bar. However, this will only work if the user knows which values to provide – and this might not be the case in most scenarios. In such scenarios, a dashboard can be loaded in an XMPro activityA specific step in a process. It will be the user interface for that step (web form or a screen), for example, the Leave Application (screen interface or web form) will be the first Activity in the Leave Requisition process. The Leave Application Authorization will be the second step or Activity in the Leave Requisition process. One Process can have multiple activities., and form controls can be used to pass in the dashboard parameter values.
Implementation
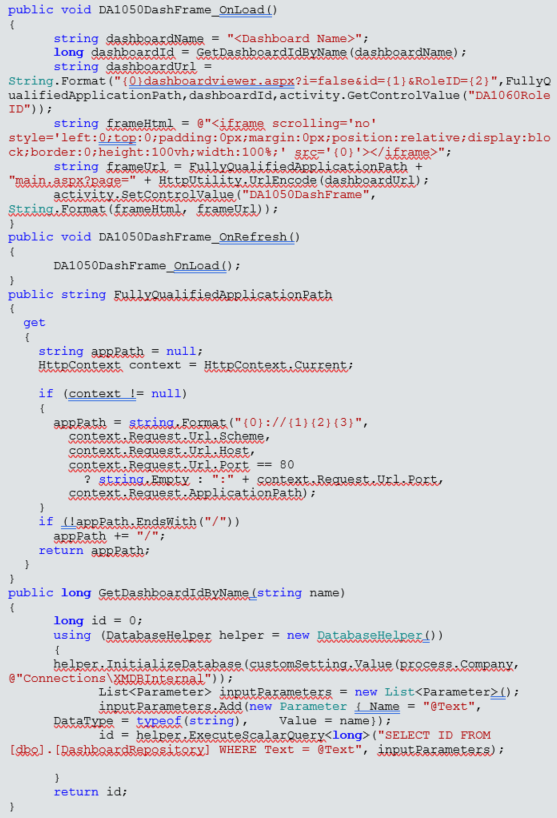
Add a reference label control to the activity which will be used to load the dashboard in an IFrame. Use the sample code provided below for the reference label, and modify the dashboard URL parameters as needed.
Dashboard URL Parameters
- i=false (Required)
This is required to hide the header and menu within the dashboard IFrame.
- id=<dashboardId> (Required)
This is used to specify the ID of the dashboard to be loaded in the IFrame. The ID is retrieved automatically based on the dashboard name specified in the ‘dashboardName’ variable.
- RoleID=<Role ID> (Optional)
This is used to pass the value for the Dashboard Parameter named ‘RoleID’.
Note: The name of the parameter in the URL should match the name of the dashboard parameter. Any number of dashboard parameters can be used by specifying the name and value in the URL query string.
Script
Comments are closed.