Description
Allows you to read data from the OData system to apply context.
Limitations
- None at this time
Release Notes
| Version: | 1.1 |
| Released: | 1-May-2017 |
| Release Notes: | IoT framework changes |
Configuration
To add the OData Context Provider to a stream, follow the steps below:
- Ensure you have a use case open in the stream designer, this can be a new use case or an existing use case
- From the toolbox on the left expand the Context Providers option and scroll down until you can see “OData”
- You can also use the search in the header to find the agent quickly
- Click and drag the OData agent from the toolbox onto the canvas
- Rename the agent by clicking into the text area to the right of the icon
- Save the stream by clicking the save button in the action bar
- Hover over the icon for the agent until it turns orange and then double click to open the configuration page
- You can also click on the configure option in the action bar after selecting the agent
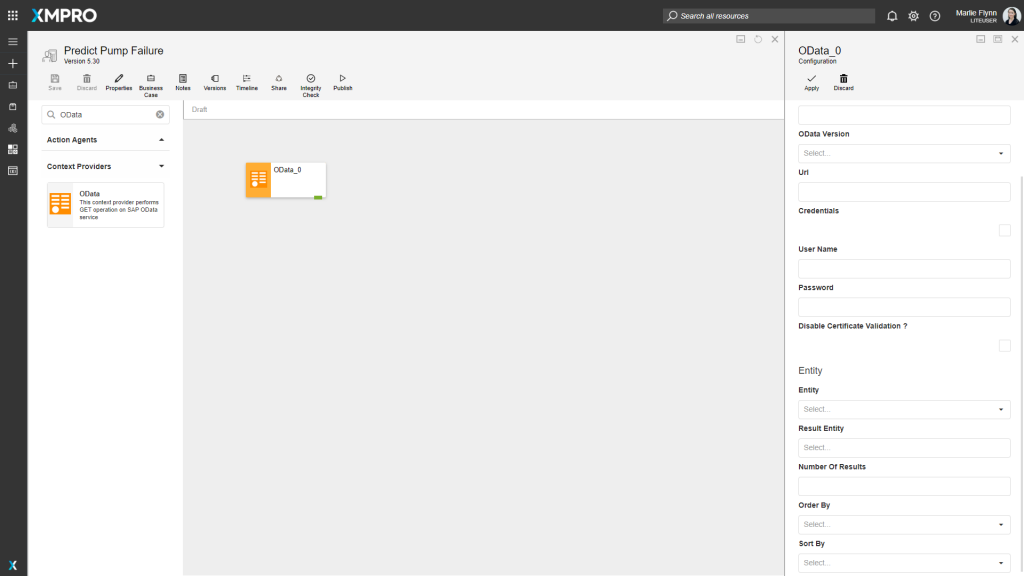
- Configuration options
- The Collection drop-down allows you to associate this agent with a specific collection. The selected option would be, by default, the same as the collection that was selected for the use case. If you do need to change it to another collection, select a different collection from the drop-down.
- Service Options
- Specify your Polling Interval (in seconds)
- Context Providers get the data they need and then store it in memory. The Polling Interval is the rate at which the cache will be refreshed. For example, if the Polling Interval is set to 30 seconds, the cache will be refreshed every 30 seconds.
- Select your OData version. Two options are available:
- V3
- V4
- If required, select the “Credentials” checkbox and specify your User Name and Password.
- If you would like to disable validation for the certificate, select the “Disable Certificate Validation?” checkbox.
- Specify your Polling Interval (in seconds)
- Entity Options
- Select the Entity you would like to perform the operation on
- Specify your Result Entity
- Specify the number of results you would like to have returned
- Select the field by which you want to order the data from the “Order By” drop-down
- Select the field by which you want to sort the data by from the “Sort By” drop-down
- Click Apply on the action bar, and then save the stream using the Save button