Allows a user to receive data from a device or other source by listening to a specific MQTT topic as the device publishes the data to that same MQTT channel or topic.
Configuration
To add the MQTT Advanced Listener to a stream, follow the steps below:
- Ensure you have a use case open in the stream designer, this can be a new use case or an existing use case
- From the toolbox on the left expand the Listener option and scroll down until you can see “MQTT Advanced”
- You can also use the search in the header to find the stream object quickly
- Click and drag the MQTT Advanced Listener from the toolbox onto the canvas
- Rename the Listener by clicking into the text button un the action bar
- Save the Stream by clicking the save button in the action bar
- Hover over the icon for the stream object until it turns orange and then double click to open the configuration page
- You can optionally use the configure option on the action bar once you have selected the specific stream object and then clicking this option
- Configuration options
- The drop down allows you to associate this stream object with a specific collection. The default option is derived from the default specified against the specific use case and is generated left as the same option. If you do need to change it to another collection make the change by selecting the new collection in the drop down.
- Enter a value for the Polling Interval (the interval at which new records are accessed/checked for, in seconds)
- Enter Broker Settings
- Specify the Address
- Specify the Channel
- Specify the Port
- Specify the Client ID
- Specify the QoS (Quality of Service).
- Select the Clean Session. Tick if non- persistent session required
- Select Channel Settings
- Secure Channel. Default blank
- Enter Authentication Settings
- Specify Username
- Specify Password
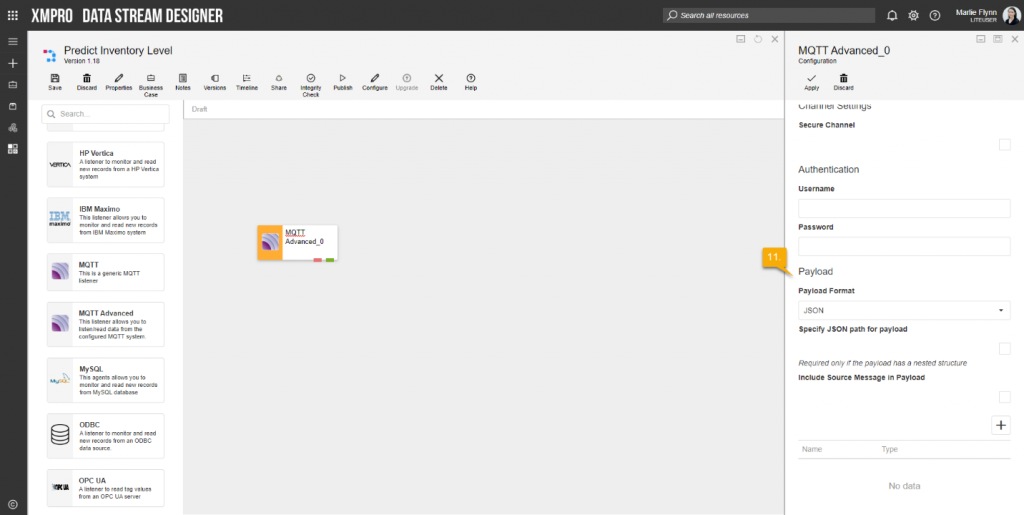
- Enter Payload Details
- Select Payload format – JSON
- Specify the JSON path for payload. This is only required if the payload has a nested structure
- Select Include Source Message in Payload
- Add Names in Payload Table
- Select Payload format – For each column
- Enter Column Name
- Enter Index
- Select Payload format – JSON
- Click Apply on the action bar, and save the stream using the Save button.


Limitations
None at this time.
Release Notes
| Version: | 3.5 |
| Released: | 16-Oct-2019 |
| Release Notes: | Added option to return source message in the payload. |
| Version | Released | Release Notes |
| 3.4 | 08-May-2019 | * Added checkbox to specify whether to use Clean Session or not * Handle re-connection after Broker connection drop – Agent tries to reconnect every 5 seconds until connection is established. |
| 3.22 | 4-March-2019 | Updated help URL. |
| 3.21 | 07-Nov-2018 | Added exception handling to receive method |
| 3.2 | 15-Aug-2018 | Added Checkbox option to specify JSON Path for nested payload. |
| 3.12 | 14-Aug-2018 | Modified listener to handle messages with format as JSON Object as well as JSON Array. |
| 3.1 | 30-May-2018 | Modified listener to handle messages with nested structure. |
| 3.0 | 18-May-2018 | Initial Release. |