Description
This agent allows you to send data to the configured MQTT system.
Configuration
To add the MQTT Advanced Action Agent to a stream, follow the steps below:
- Ensure you have a use case open in the stream designer, this can be a new use case or an existing use case
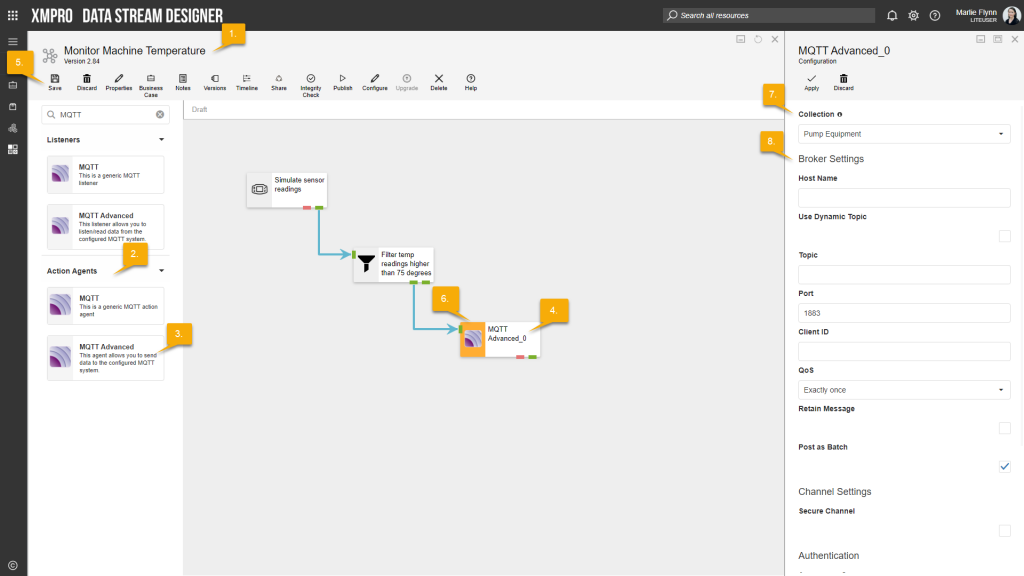
- From the toolbox on the left expand the Action Agents option and scroll down until you can see “MQTT Advanced”
- You can also use the search in the header to find the agent quickly
- Click and drag the MQTT Advanced Action Agent from the toolbox onto the canvas
- Rename the action agent by clicking into the text area to the right of the icon
- Save the Stream by clicking the save button in the action bar
- Hover over the icon for the action agent until it turns orange and then double click to open the configuration page
- You can optionally use the configure option on the action bar once you have selected the specific agent and then clicking this option
- Configuration options
- The Collection drop-down allows you to associate this agent with a specific collection. The selected option would be, by default, the same as the collection that was selected for the use case. If you do need to change it to another collection, select a different collection from the drop-down.
- Broker Settings
- Specify the name of the broker you would like to connect to in the Host Name textbox
- If you would like to use a Dynamic Topic, select the “Use Dynamic Topic” checkbox and select the field that should be used as the dynamic topic, or
- If you would like to use a static topic, leave the “Use Dynamic Topic” checkbox unchecked and specify your topic in the Topic textbox
- Specify the Port you would like to use
- Specify a unique Client ID
- Select your Quality of Service (QoS) from the drop-down. Three options are available:
- Exactly Once
- At Least Once
- At Most Once
- If you would like to retain messages, select the “Retain Message” checkbox.
- If you would like to post the messages as a batch, select the “Post as Batch” checkbox.
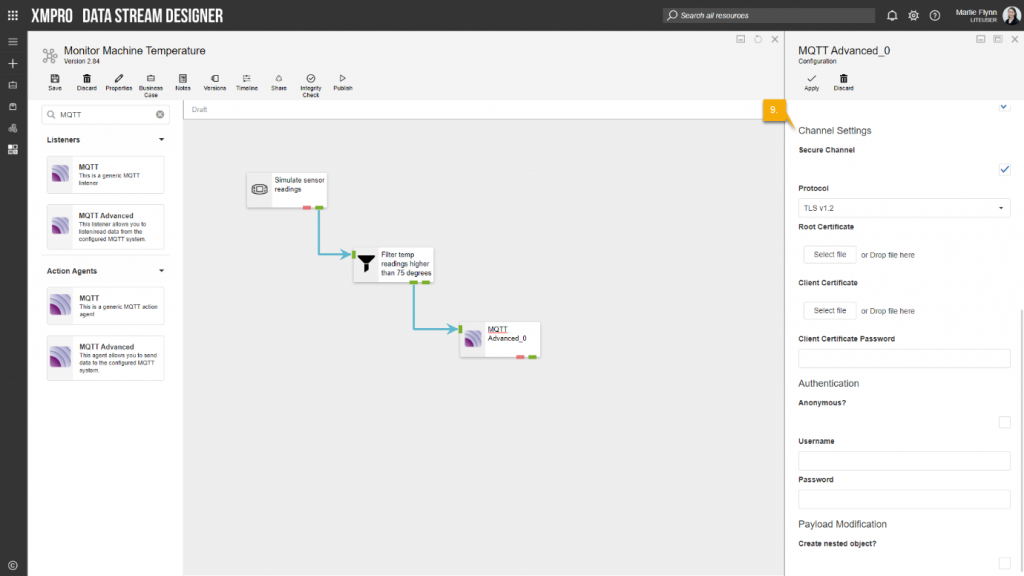
- Secure Channel options
- If you need to use a secure channel, select the “Secure Channel” checkbox.
- Select the Protocol you would like to use from the drop-down.
- Upload the Root Certificate and Client Certificate that you would like to use.
- Specify the password for your Client Certificate.
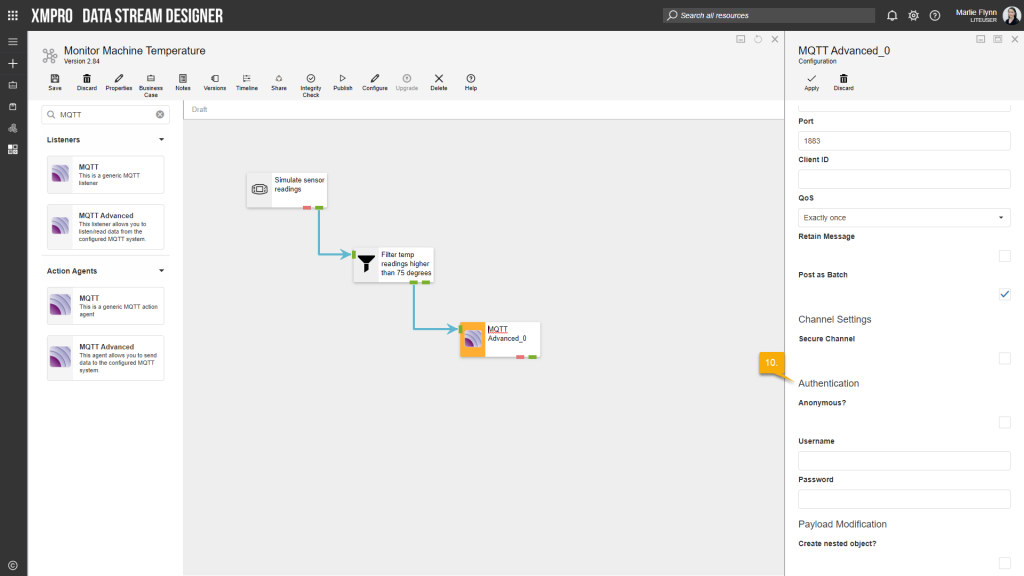
- Authentication
- If you would like to use Anonymous Authentication, select the “Anonymous?” checkbox, or
- If you wish to use a username and password for Authentication, leave the “Anonymous?” checkbox unchecked and specify your Username and Password.
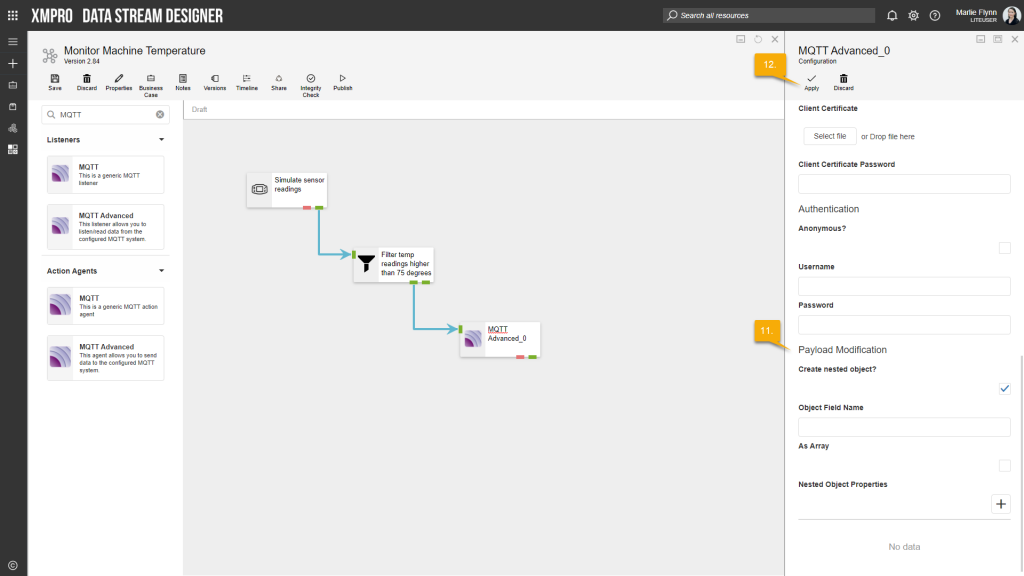
- Payload Modification options
- If you would like to create a nested object in your payload, select the “Create nested object?” checkbox.
- Specify the Object Field Name.
- If required, select the “As Array?” checkbox.
- Add your nested properties in the “Nested Object Properties” grid by clicking on the “+”-icon to add a new row and then add in the properties individually.
- If you would like to create a nested object in your payload, select the “Create nested object?” checkbox.
- Click Apply on the action bar, and then save the stream using the save button
Limitations
- None at this time.
Release Notes
| Version: | 3.3 |
| Released: | 17-Oct-2019 |
| Release Notes: | Added additional payload options: Multi-Column JSON and Single-Column Text. |
| Version | Released | Release Notes |
| 3.22 | 07-May-2019 | Added option to clear retained messages based on a new drop-down option to specify an input column that contains a Boolean value. |
| 3.21 | 18-Apr-2019 | Added a checkbox to choose whether to specify a static topic or dynamic topic and then provide topic name as a static value or select from drop-down respectively. |
| 3.2 | 08-Apr-2019 | Changed Topic to a drop-down to allow for dynamic topic name. Added checkbox option to Retain message. |
| 3.02 | 4-March-2019 | Updated help URL. |
| 3.01 | 21-Aug-2018 | Added ability to reconnect to broker if the connection drops while a use case is running. |
| 3.01 | 28-May-2018 | Removed repeated startup logic. |
| 3.0 | 17-May-2018 | Initial Release. |