Description
Fires Ethereum smart contract functions.
Limitations
- None at this time
Release Notes
| Version: | 1.02 |
| Released: | 4-March-2019 |
| Release Notes: | Updated help URL |
| Version | Released | Release Notes |
| 1.01 | 4-Feb-2019 |
|
| 1.0 | 1-Feb-2019 | Initial Release |
This agent requires input mapping. To map the inputs, click on the arrow connected to the agent’s input endpoint and click on Configure.
Configuration
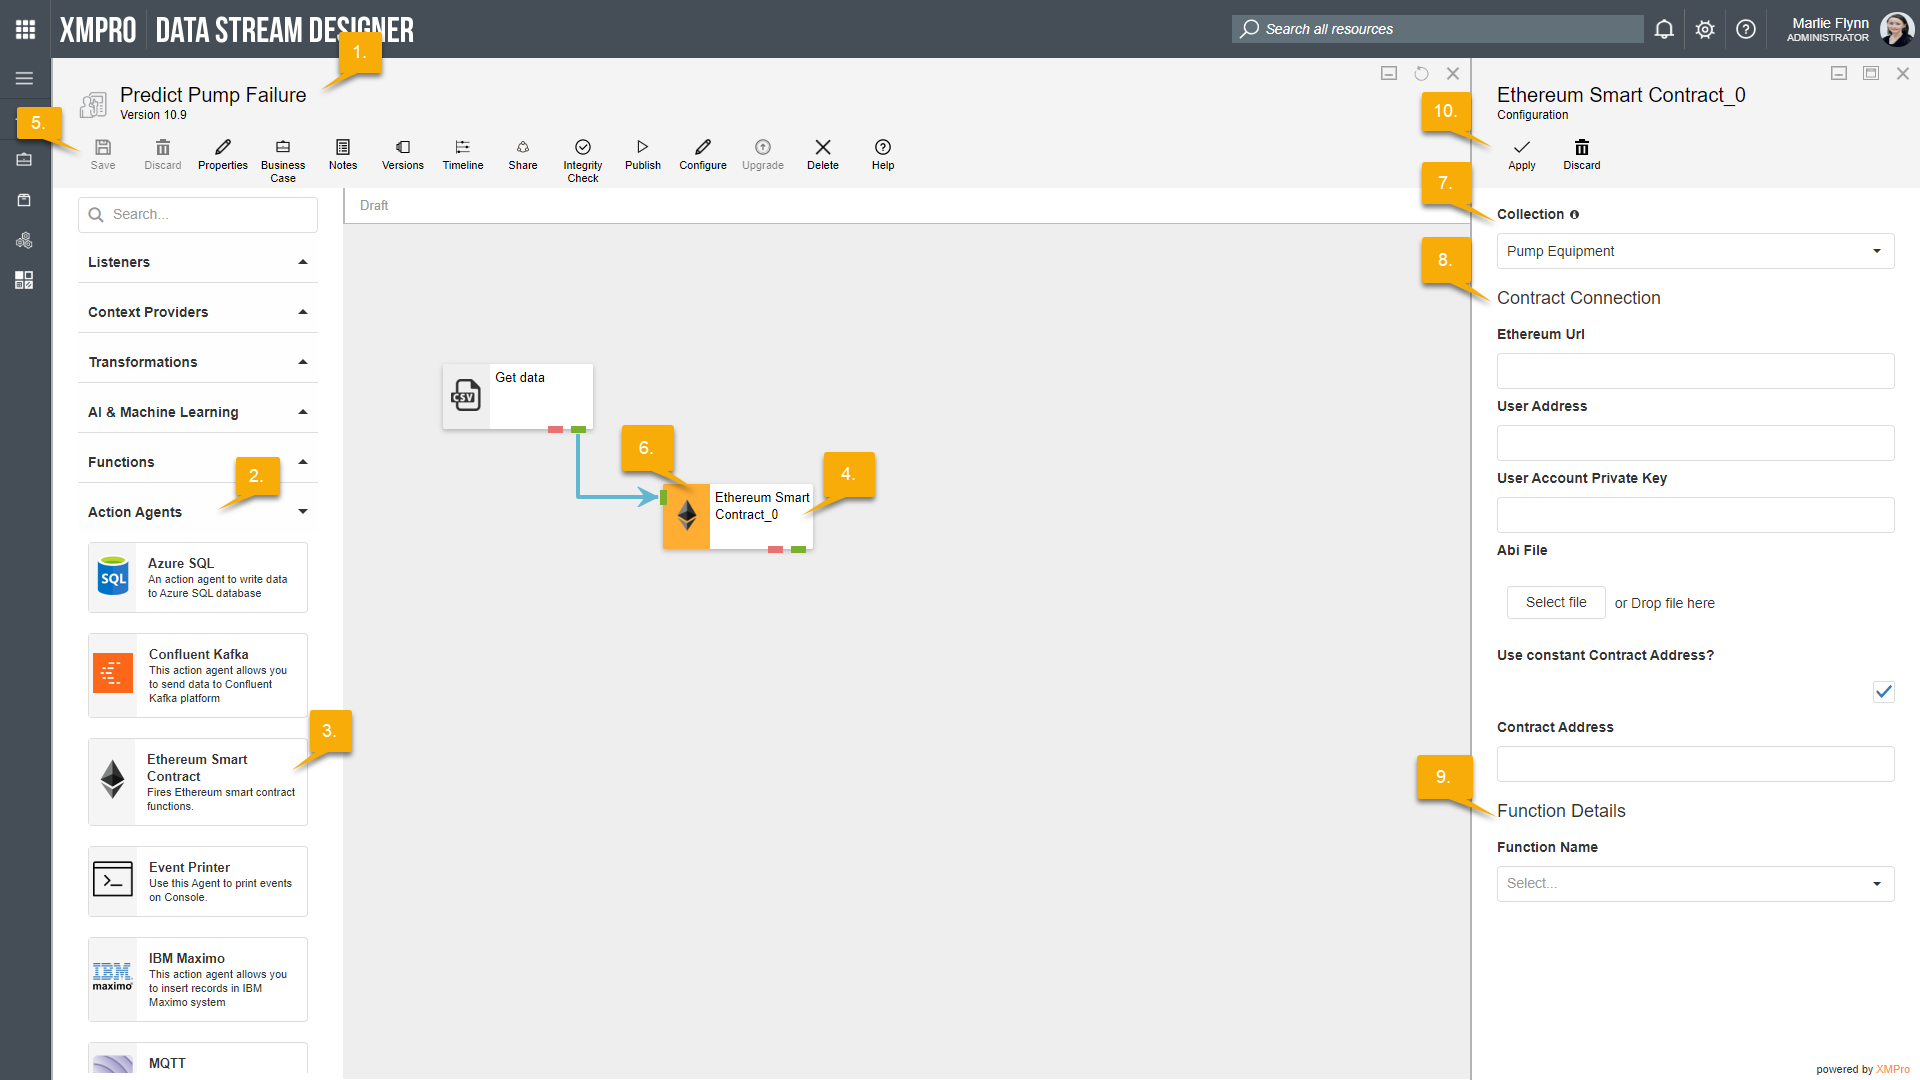
To add the Ethereum Smart Contract Action Agent to a stream, follow the steps below:
- Ensure you have a use case open in the stream designer, this can be a new use case or an existing use case
- From the toolbox on the left expand the Action Agents option and scroll down until you can see “Ethereum Smart Contract”
- You can also use the search in the header to find the agent quickly
- Click and drag the Ethereum Smart Contract action agent from the toolbox onto the canvas
- Rename the action agent by clicking into the text area to the right of the icon
- Save the stream by clicking the save button in the action bar
- Hover over the icon for the agent until it turns orange and then double click to open the configuration page
- You can also click on the configure option in the action bar after selecting the agent
- Configuration options
- The Collection drop-down allows you to associate this agent with a specific collection. The selected option would be, by default, the same as the collection that was selected for the use case. If you do need to change it to another collection, select a different collection from the drop-down.
- Contract Connection options
- Enter the URL of the Ethereum server you would like to connect to.
- Enter your User Address.
- Enter your User Account Private Key.
- Upload your .api file
- If required, select the “User constant Contract Address” checkbox.
- Specify your Contract Address.
- Function Details
- Select the Function you would like to use from the drop-down.
- Click Apply on the action bar, and then save the stream using the Save button

