The XMPro Integration Wizard provides a user-friendly way to integrate XMConnect Plugins with XMPro Activities. It allows users to create activities based on structures specified by a connector and to map the existing ActivityA specific step in a process. It will be the user interface for that step (web form or a screen), for example, the Leave Application (screen interface or web form) will be the first Activity in the Leave Requisition process. The Leave Application Authorization will be the second step or Activity in the Leave Requisition process. One Process can have multiple activities. objects to the connectors.
Wizard Features
The Wizard is available on three levels in the XMDesignerIs used to configure XMPro BPM solutions.:
- Activity Level
- Trigger Level
- Control or Object Level
A User-friendly way to map controls to a data source is by means of Predictive Mapping.
Automatic Control creation, which includes:
- Automatic Data type constraints.
- Automatic Required constraints.
- Create, Read, Update, Delete (CRUD) on Object Groups which updates all line items to the Source Object in one operation.
Browse Page features includes:
- Populating the page.
- Automatic Browse objects creation.
- Configuration of target objects.
- Lookups are populated.
- Chart Controls are populated.
- Define conditions for which an operation should execute.
- Define a Where clause consisting of Constants, Table Columns, and Controls.
How to use the XMPro Integration Wizard

- Right-click the relevant Activity or Trigger or Control.
- Click XMPro Integration.
The Connector Tab
The XMPro Integration Wizard, Connector Tab will be displayed as shown in the following figure. The Connector page lists all the plugins, registered in XMConnect Administration, to which the user has access rights.

- Select a plugin from the Configure Connector drop-down menu.

- Once the plugin is selected, its initialization parameters appear, as defined in the Plugin.
- Provide the expected parameters.
- Click Next. The Wizard will attempt to, in the background, retrieve a list of Objects supplied by the Plugin.
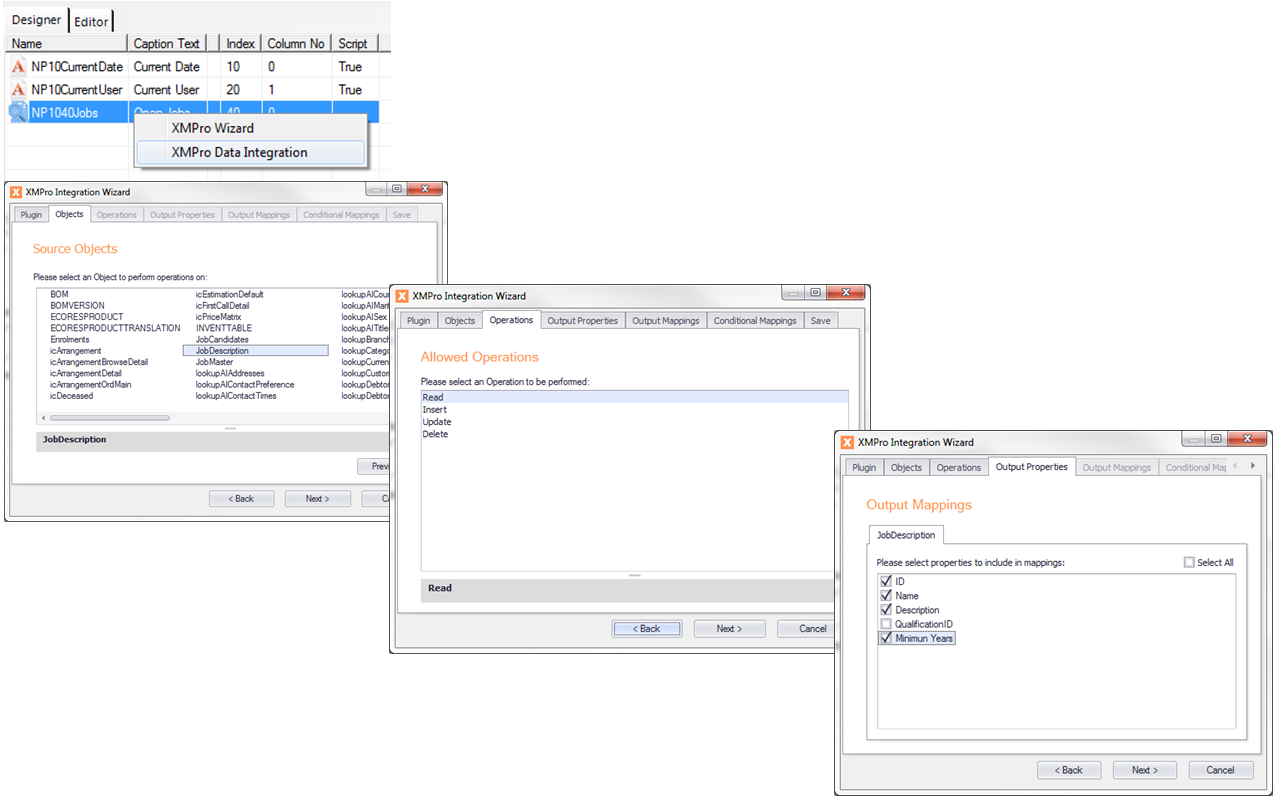
The Objects Tab

- Select an Object from the list. A Preview functionIs a Stream Objects that performs mathematical and statistical operations. is available, if supported by the Plugin. The Preview window shows the first 200 records of the selected object.
- Click Next.
The Operations Tab
The Operations tab allows the user to select the operation to be performed on the selected Object. The Insert, Delete, and Update functions are the same regardless of the level the Integration is called. However, the Read operation’s outcome depends on following:
- Look Up – If Integration is performed on a Lookup control and the control is mapped to at least one Column then the Lookup is filled with the retrieved Dataset.
- Browse Page – If Integration is performed on a Browse Page control, the outcome of the operation is used to populate the Browse Page.
In all other cases, the Read Operation just fills the mappings, which will be demonstrated later in this document.
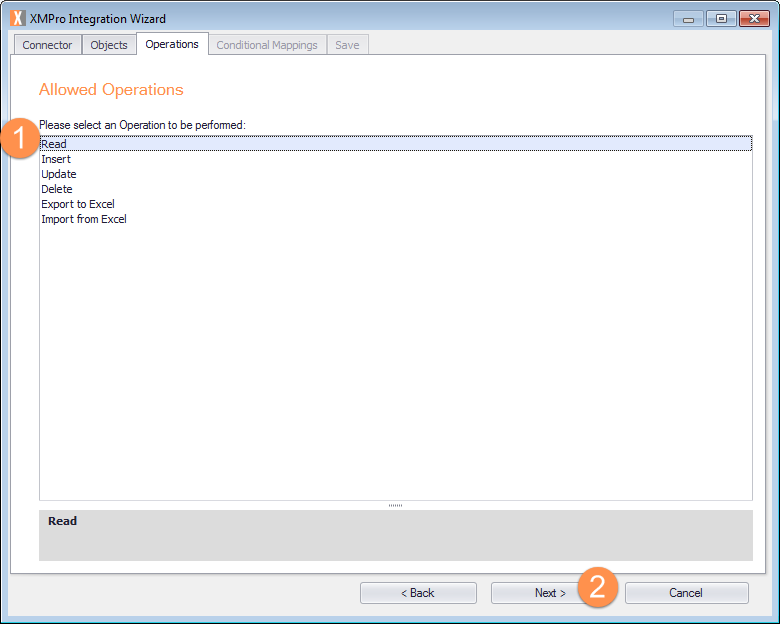
- Select the operation to be performed.
- Click Next.
The Output Properties Tab

The Output Properties tab lists all the Properties of the selected Object. Only input properties appear for Non-Returning Operations.
- Select the properties to include in mappings or click Select All check box.
- Click Next.
The Output Mappings Tab
The Output Mappings tab allows the selected properties to be mapped to Activity Controls, Objects, or <New> which means the Control or Object will be created for the property.
Users can add new mappings here or delete any of the existing ones. However, duplicate columns are not allowed in input mappings while duplicate controls are not allowed in output mappings. The user can add new mappings even if the Control is Identity of delete a Not Null mapping, but such scenarios must be avoided by reconsidering the business logic.

- Select the Mapped Control from the drop-down list for the object or leave as <<New>> to generate a new control.
- Click Next.
The use of Object Groups in Output Mappings
If the operation is to be performed on multiple Records, then an Object Group can be selected from the List. If a Control is specified in the mappings, which belongs to an Object Group then the selected operation is performed for every line in the Object Group. Non-Returning operations run for all the rows while Returning operation fills the Object Group with all the records retrieved from Database.
Controls mappings can be mixed between Object Group controls and Non-Object Group controls, operations still run for all the line items, but the Non-Object Group controls become constants for each line item.
The Object Group column can be checked. The <<New>> Control will be created in the selected Object Group.
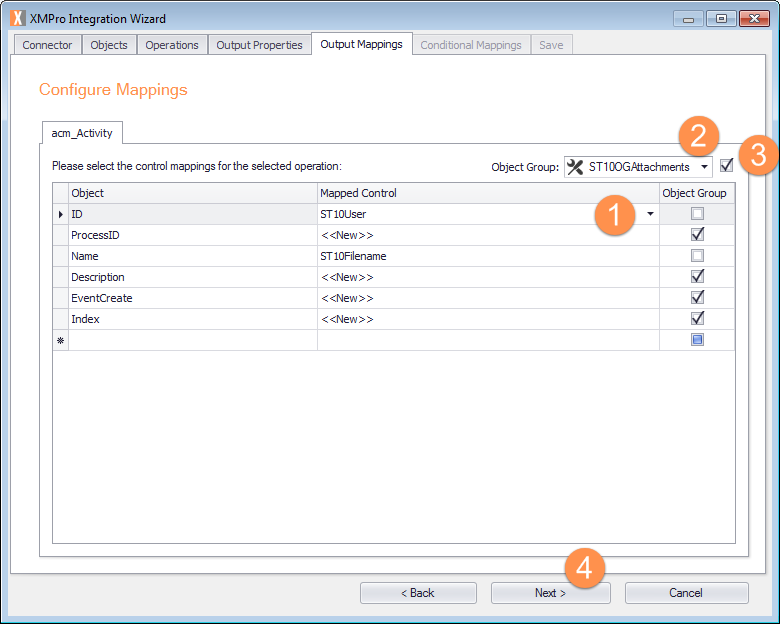
- Select the Mapped Control from the drop-down list for the object or leave as <<New>> to generate a new control.
- Select the relevant Object Group from the drop-down list.
- If required, select the Object Group check box to add all new controls into the selected group or individually select each control by selecting the Object Group check box.
- Click Next.
The Conditional Mappings Tab
Conditional Mappings allow user to define the Where clause for the Operation, if the selected operation is Conditional. The User can define conditions on both the Columns and Control Values. Names starting with @ represent activity controls.
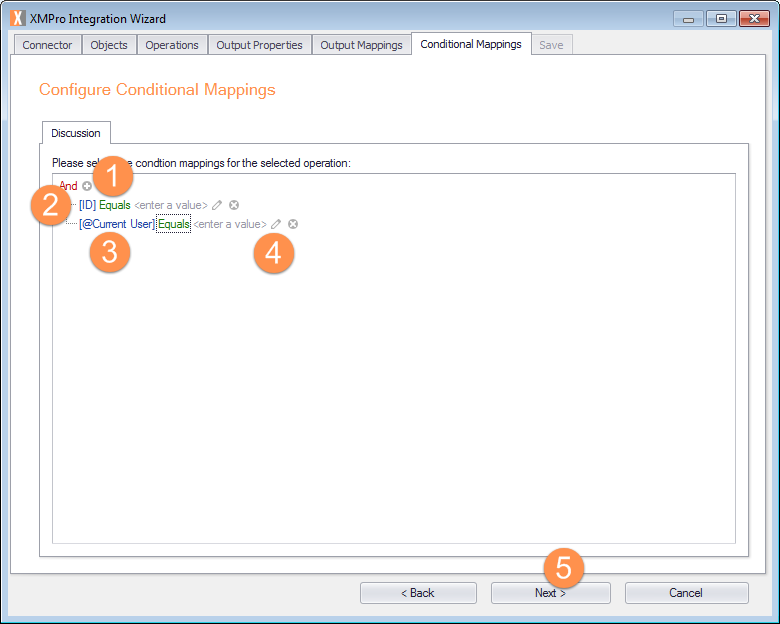
- Select the icon to add a new condition for the selected operation.
- Click the left-hand side of the condition to select the appropriate object or activity control, for example, [ID].
- Click the conditional to select the respective condition for example, [@Current User].
- Click the right-hand side of the condition to enter a static value alternatively or click the pencil to turn it into a drop-down to select the appropriate object or activity control, for example, [@Current User]. Repeat Steps 1-4 to add additional conditions.
- Click Next.
The Save Tab
Execution Conditions have been added to improve integration.
Integration to non-XMPro databases to create, read, update, or delete information can be performed during the on-load of an activity (or a screen) or when a screen is refreshed. Prior to version 6.1, the refresh integration occurred for all the controls (objects) on the screen with integration to another database, which is not necessary, for example, when only one object’s value changes. It is a more efficient way of managing integration to databases. This function is provided in the XMPro Integration Wizard.
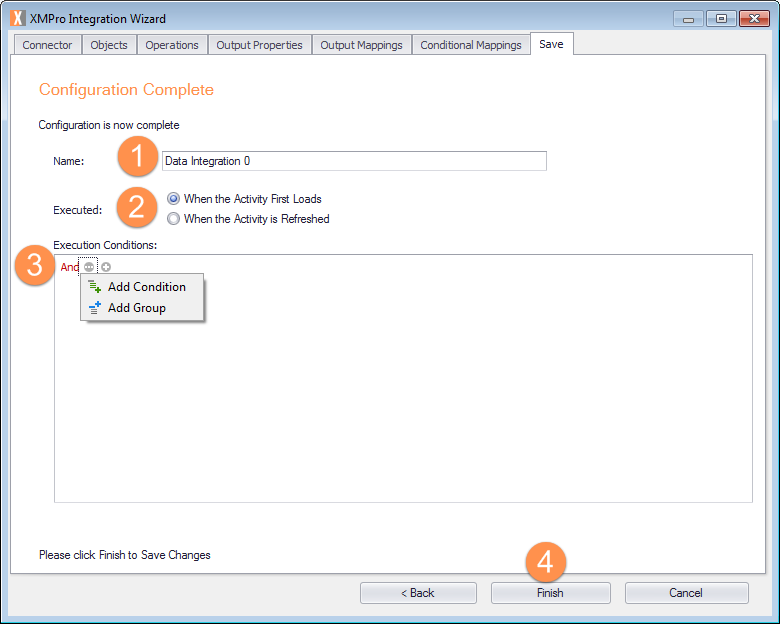
Execution Conditions Illustrated

- Click the Name text field to change the name, if required.
- Select when to execute the activity either When the Activity First Loads or When the Activity is Refreshed.
- Click the
 Action icon and select either Add Condition or Add Group execution condition.
 - Click the left-hand side of the condition to select the appropriate object or activity control, for example, [Address].
- Click the conditional to select the respective condition for example, [Address ].
- Click the right-hand side of the condition to enter a static value alternatively or click the pencil to turn it into a drop-down to select the appropriate object or activity control, for example, [Address]. Repeat Steps 1-6 to add additional conditions.
- Click Finish to save changes. Integration for the control (object) will only be performed if the conditions, as specified, are met.
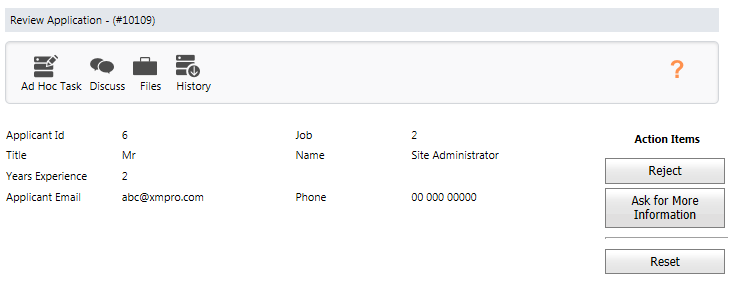
Example
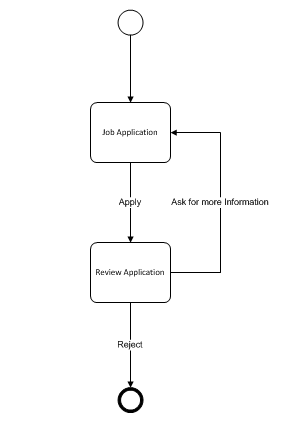
The process as shown in the previous figure has a simple flow, which includes a First Activity for a user to fill in a job application for the available positions and send it for Assessment. On the second activity, the Review Panel can ask for more information from the Applicant, Reject, or Accept the application. In following steps, we will configure the Integration for the flow.
Setting up a Browse Page
Let us say we want to display all the available jobs on the screen as a Browse Page. Once a job is selected, the user can fill in rest of the details and Apply for the Job. We add a Browse Page on the Activity and setup Read Integration on it as follows:
Setting up a Trigger
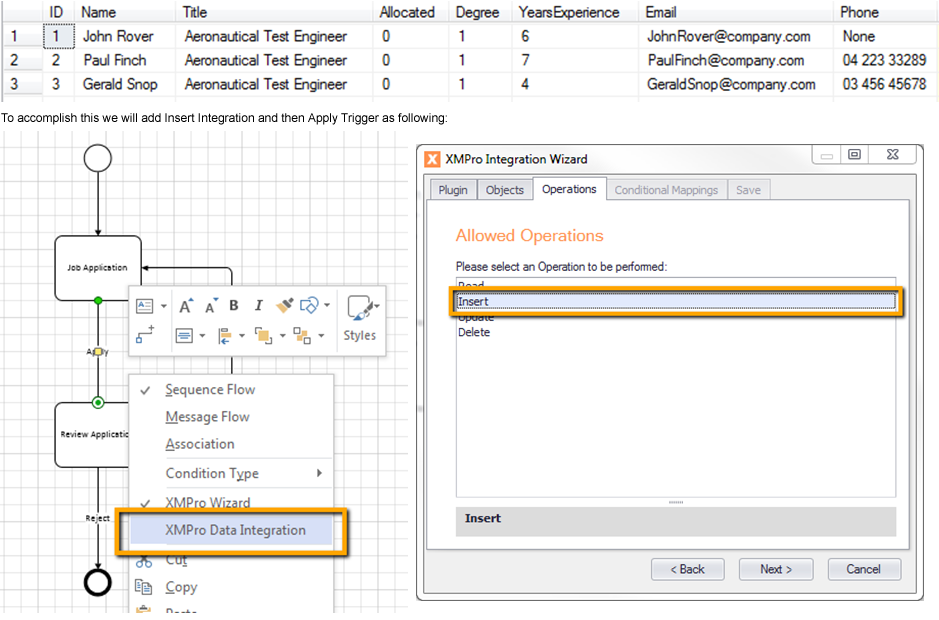

The user is required to provide details according to the structure of the previous Table in the Database:
The Apply Trigger will insert Data into the Database by the SQL Plugin and submit the activity to the Reviewer.
Retrieving Data from the Database
Now that the data has been stored, we can retrieve it on the Second Step of process by Configuring a Read Integration.
The first step will be that we load a value from the previous Activity, which uniquely identifies the Record; a GUID type can be used if no such attribute exits. In the following figure, we assume the Email address will always be unique.
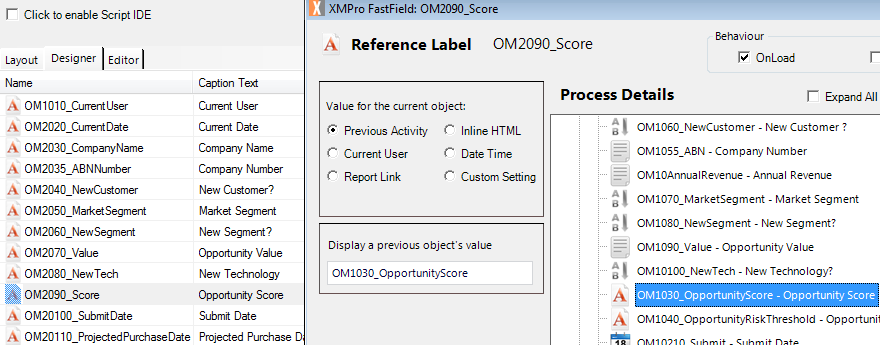
Once we have the identifier we can add Read Integration on any of the controls appearing after our identifier. This is necessary so that identifier gets its value populated before we use it to identify Database Records.
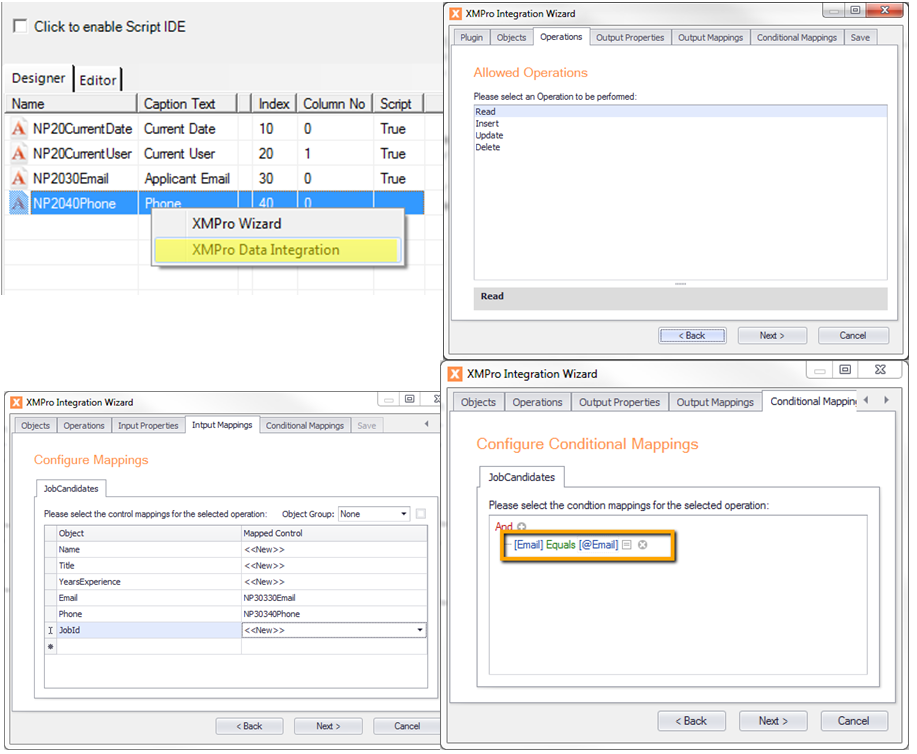
The above Data Integration results into following screen:
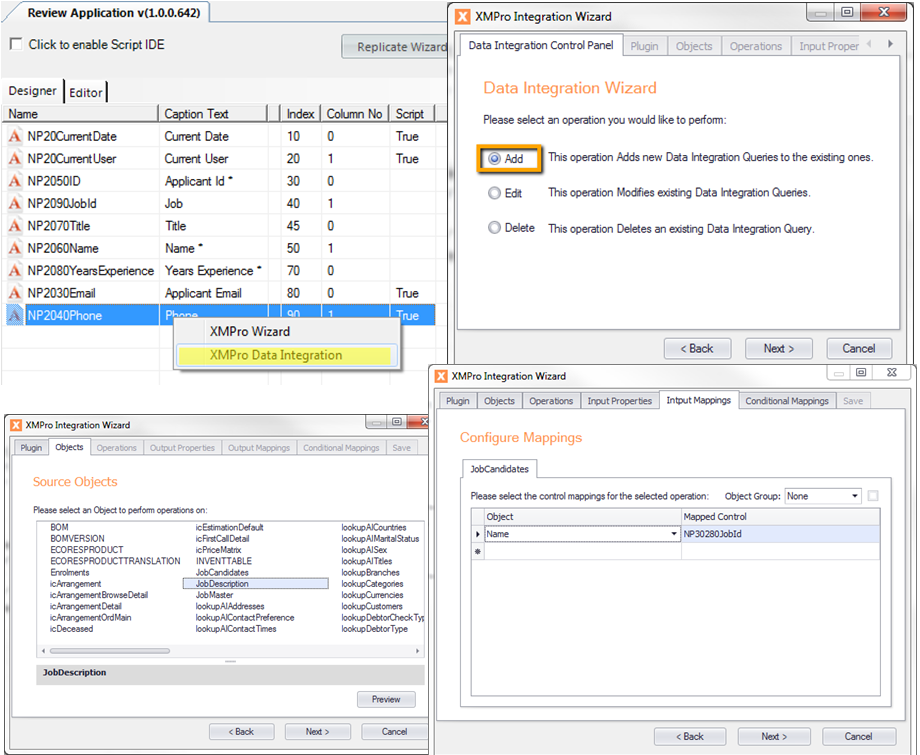
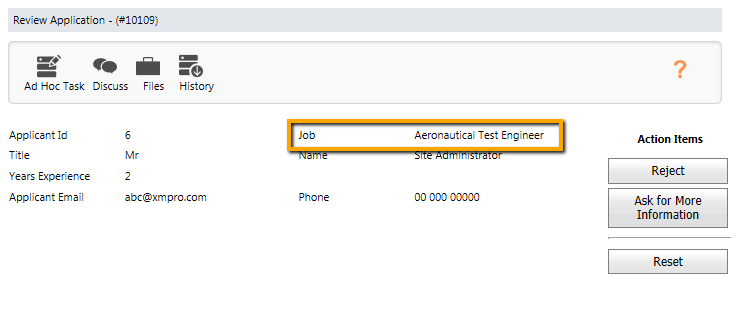
To get the Job Title we will add another Read Integration as follows:
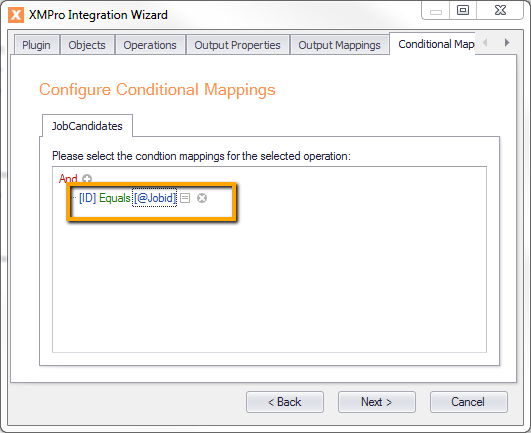
The Updated Job Title can be seen in the following figure.
Deleting a Record
Let us assume we want to delete the record if the Reviewer decides to Reject the application. To accomplish this we can add Delete Data Integration on the Reject Trigger as follows:

Updating a Record
In case the Reviewer decides to put the application on hold, we can update the status of application by using Update Data Integration on Trigger as follows:

The Value specified in the Status control will be updated in the Database.