The purpose of a Fast Field is to reduce the amount of scripting that might be required in configuring a solution.
The following objects or controls currently have Fast Fields:
- Reference Label
- Chart Control
- Lookup
- Trigger
Note: The Click to enable Script IDE must be un-checked. Double-click the control as indicated in the following figures. Only previously, saved values will be displayed when you click the Script button in the left, bottom corner.
How to use a Reference Label Fast Field
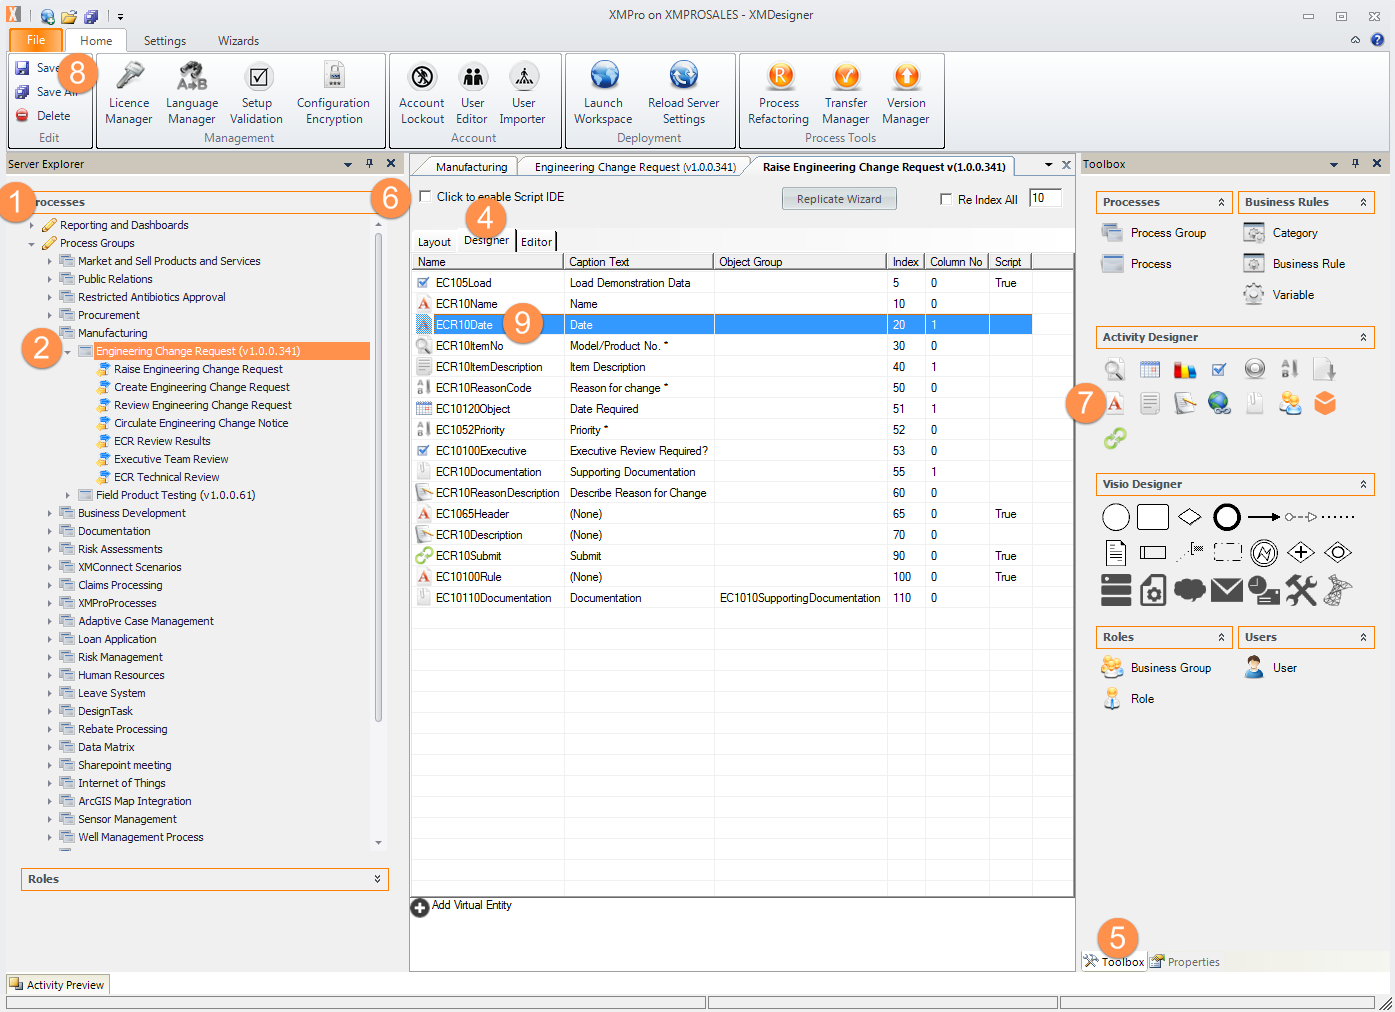
- Click Processes
- Click the relevant Process Group. This will open up all the existing Processes associated to this Process Group in the Work Area, for example, Engineering Change Request.
- (Not shown) Double-click the control, for example, Raise Engineering Change Request ActivityA specific step in a process. It will be the user interface for that step (web form or a screen), for example, the Leave Application (screen interface or web form) will be the first Activity in the Leave Requisition process. The Leave Application Authorization will be the second step or Activity in the Leave Requisition process. One Process can have multiple activities..
- Click Designer
- Click Toolbox.
- Ensure that the Click to enable Script IDE check box is not selected.
- Drag the Reference Label in your Toolbox into the Work Area.
- On the ribbon, click the File tab then click Save or press CTRL+S to save your changes.
Note: If you did not save your changes, you will receive the message, “Please save before editing the controls.”
- Double-click the new Reference Label in the Work Area.
The Fast Field Wizard will be displayed as shown in the following figures.
Configure a Previous Activity
This procedure describes how to configure a Previous Activity for a Reference Label.
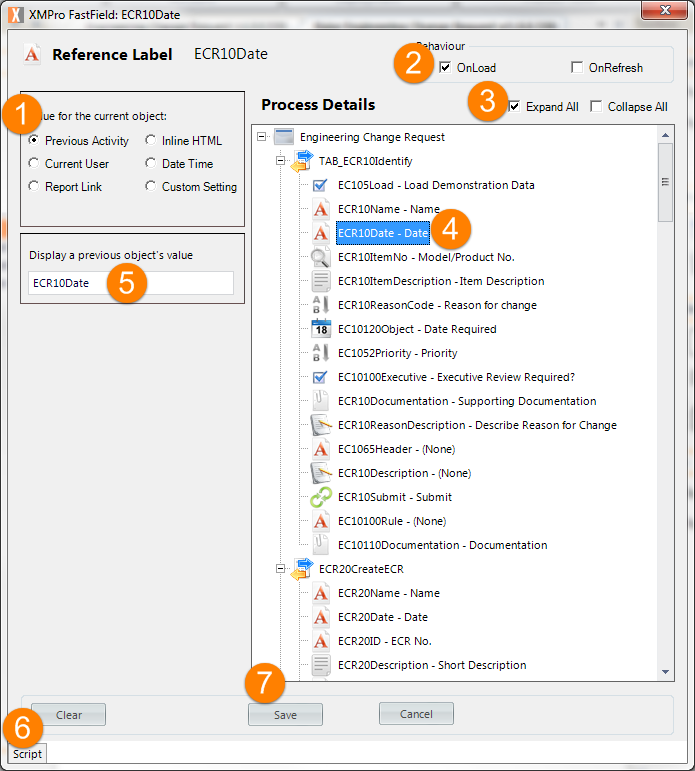
- Select the Previous Activity value radio button.
- Select the Behaviour OnLoad or OnRefresh check box.
- Select the Expand All check box.
- Select a Reference Label from the Process Details.
- Type a value in the Display a previous object’s value text field.
- Click Save.
- (Not shown) On the ribbon, click the File tab then click Save or press CTRL+S to save your changes.
Configure a Current User
This procedure describes how to configure a Current User for a Reference Label.

- Select the Current User value radio button.
- Select the Behaviour OnLoad or OnRefresh check box.
- Select a radio button to Display the current user’s (Full Name, User Name, Email, Metadata, Role Description, or Role ID).
Note: For the Metadata option, click the drop-down and select one of the available options.
- Click Save.
- (Not shown) On the ribbon, click the File tab then click Save or press CTRL+S to save your changes.
Configure a Report Link
This procedure describes how to configure a Report Link for a Reference Label.

- Select the Report Link value radio button.
- Select the Behaviour OnLoad or OnRefresh check box.
- Type a Report Name, Width, and Height.
- Select the Connection.
- Click Save.
- (Not shown) On the ribbon, click the File tab then click Save or press CTRL+S to save your changes.
Configure an Inline HTML
This procedure describes how to configure an Inline HTML code for a Reference Label.
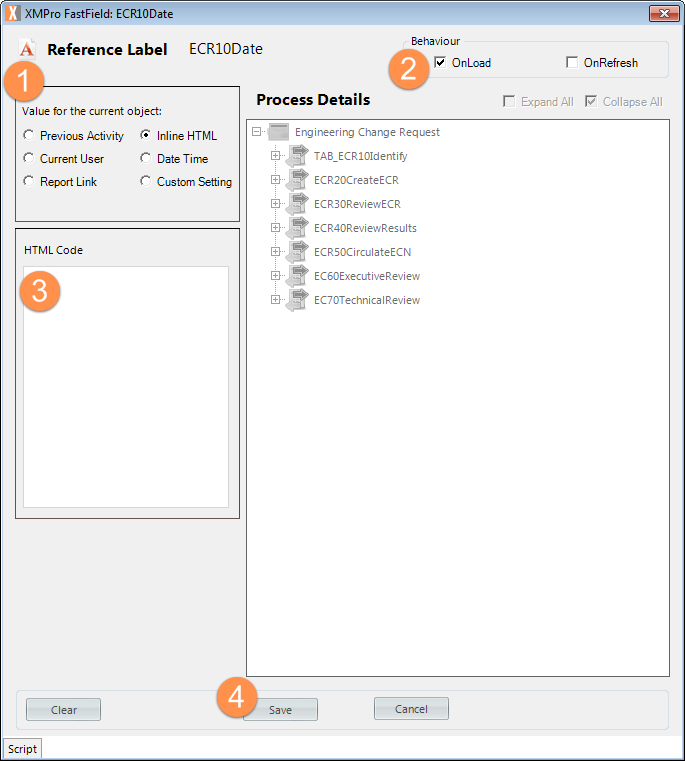
- Select the Inline HTML value radio button.
- Select the Behaviour OnLoad or OnRefresh check box.
- Type an HTML Code in the HTML Code text box.
- Click Save.
- (Not shown) On the ribbon, click the File tab then click Save or press CTRL+S to save your changes.
Configure a Date Time
This procedure describes how to configure a Data Time for a Reference Label.

- Select the Date Time value radio button.
- Select the Behaviour OnLoad or OnRefresh check box.
- Select either Display Current Date or Display Current Date with below mask.
- If you selected Display Current Date with below mask, use the Format specifier as shown in the previous figure.
- Click Save.
- (Not shown) On the ribbon, click the File tab then click Save or press CTRL+S to save your changes.
Configure a Custom Setting
This procedure describes how to configure a Custom Setting for a Reference Label.
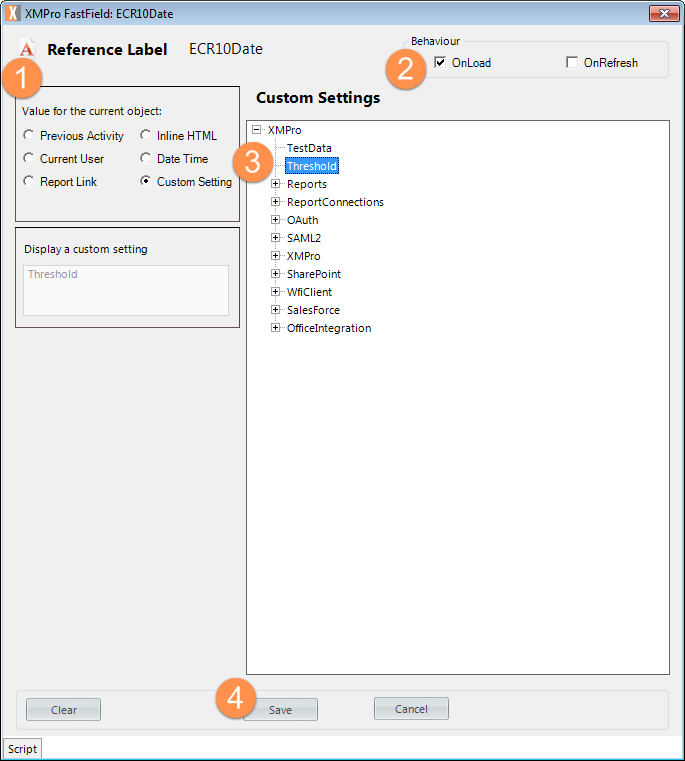
- Select the Custom Setting value radio button.
- Select the Behaviour OnLoad or OnRefresh check box.
- Select a Custom Settings.
- Click Save.
- (Not shown) On the ribbon, click the File tab then click Save or press CTRL+S to save your changes.
How to use a Chart Control Fast Field
- (Not shown) Drag the Chart Control in your Toolbox into the Work Area.
- (Not shown) On the ribbon, click the File tab then click Save or press CTRL+S to save your changes.
- (Not shown) Double-click the new Chart Control in the Work Area.
The Fast Field Wizard will be displayed as shown in the following figure.
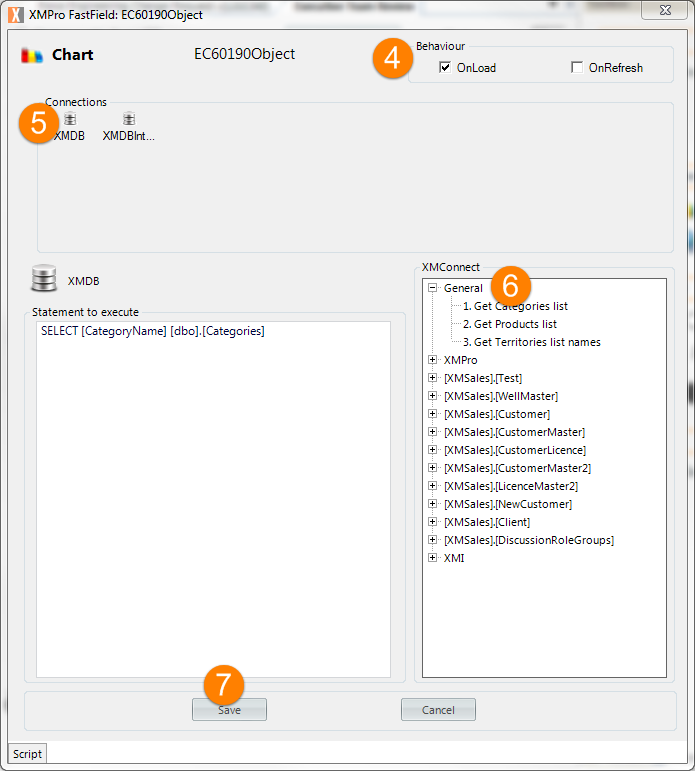
- Click the relevant Behavior check box – OnLoad or OnRefresh.
- Select the relevant database. In this example, XMDB was selected.
- Click the relevant XMConnect statement to execute. The statement will be displayed.
- Click Save.
How to use a Lookup Fast Field
- Drag the Lookup Control in your Toolbox into the Work Area.
- On the ribbon, click the File tab then click Save or press CTRL+S to save your changes.
- Double-click the new Lookup Control in the Work Area.
The Fast Field Wizard will be displayed as shown in the following figure.
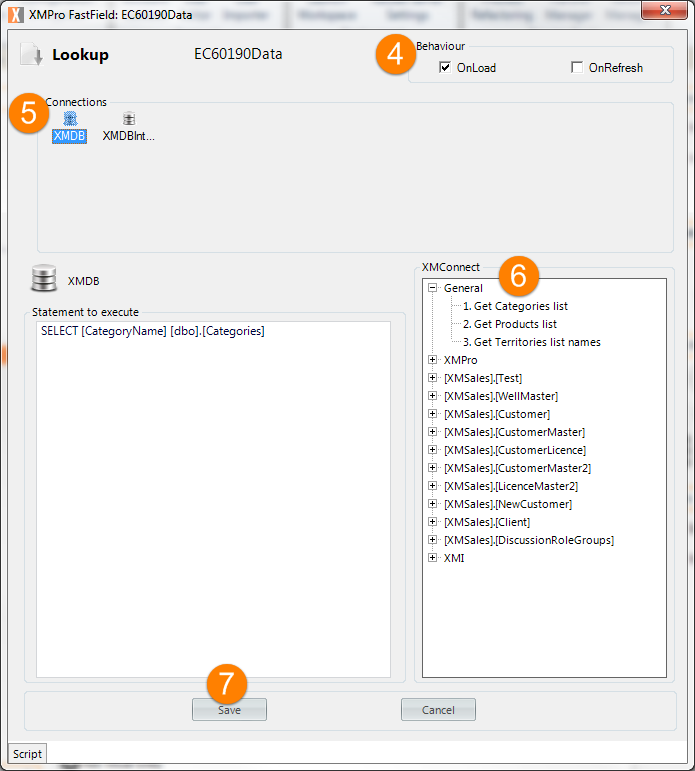
- Click the relevant Behavior check box – OnLoad or OnRefresh.
- Select the relevant database. In this example, XMDB was selected.
- Select the Statement to execute from the XMConnect window. The statement will be displayed.
- Click Save.
How to use a Trigger Fast Field
- Drag the Command Option in your Toolbox into the Work Area.
- On the ribbon, click the File tab then click Save or press CTRL+S to save your changes.
- Double-click the new Command Option control in the Work Area.
The Fast Field Wizard will be displayed as shown in the following figure.
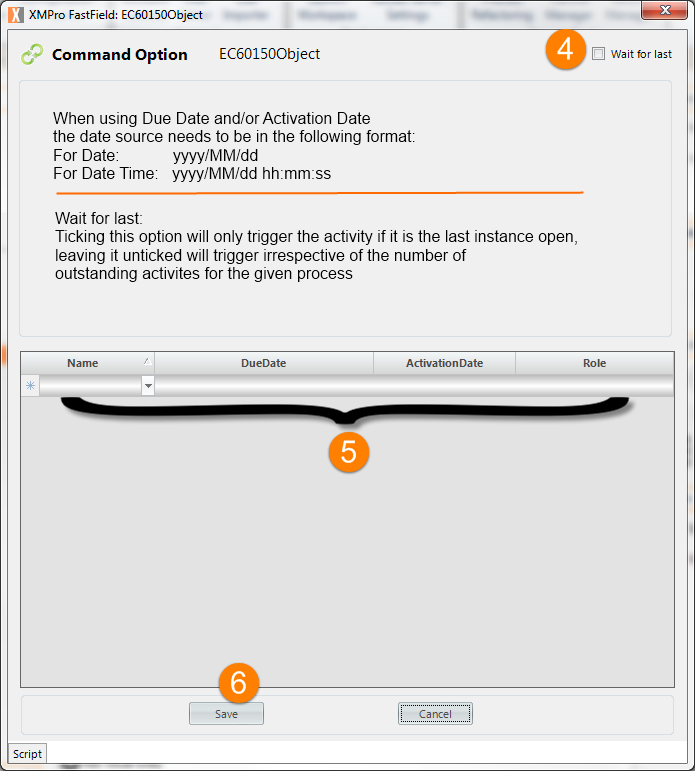
- Select the Wait for last check box, if required.
- Select the Name, DueDate, ActivationDate, and Role drop-down options to provide values for as indicated in the previous figure.
- Click Save.
The Script button in the left bottom corner will display any previously saved script.