Skip to main content
How Can We Help?
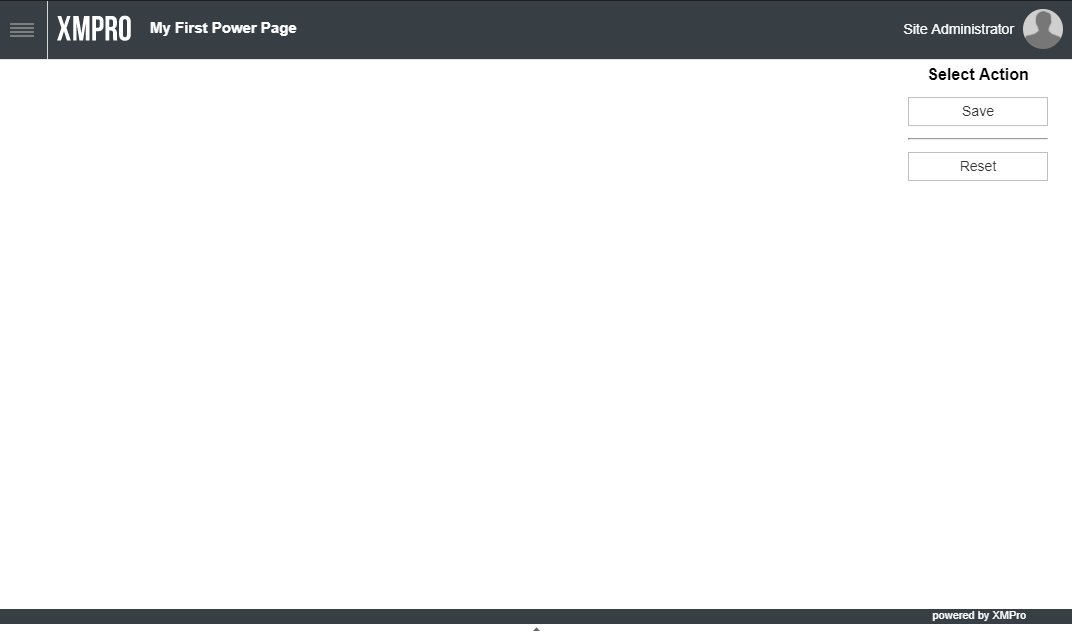
If you would like to add action buttons similar to the ‘Select Actions’ column available on XMPro tasks, the below snippets will add the necessary markup for a Save and Reset button.
1. Add the following to your markup (.aspx) file:
Note: This should wrap your content, so look for the <!– Your content goes here –> comment!
     <div class="formcontainer">
          <div id="detailNoWidget" class="formtask">
               <div id="container" class="formcontainer" xmlns:dx="remove">
                   <div class="formwrapper">
                        <!-- BEGIN Action Buttons -->
                        <div id="trigger" class="RowButtonTrigger">
                             <table class="triggerDetail">
                                  <tbody>
                                       <tr class="triggerHeader">
                                            <td class="triggerHeader">Select Action</td>
                                       </tr>
                                       <tr>
                                            <td class="RowButton"><span>
                                                 <dx:ASPxButton ID="btnSave" runat="server"
                                                      ClientInstanceName="btnSave" Text="Save"
                                                      Width="140px" OnClick="btnSave_Click">
                                                      <ClientSideEvents Click="function(s,e){loadingPanel.Show();}"/>
                                                 </dx:ASPxButton>
                                            </span></td>
                                       </tr>
                                       <tr>
                                            <td class="RowButton"><hr /></td>
                                       </tr>
                                       <tr>
                                            <td class="RowButton">
                                                 <dx:ASPxButton ID="btnReset" runat="server"
                                                      ClientInstanceName="btnReset" Text="Reset"
                                                      Width="140px" OnClick="btnReset_Click">
                                                      <ClientSideEvents Click="function(s,e){loadingPanel.Show();}"/>
                                                 </dx:ASPxButton>
                                            </td>
                                       </tr>
                                  </tbody>
                             </table>
                        </div>
                        <!-- END Action Buttons -->
                        <div id="detail" class="formdetailtrigger">
                             <!--- Your content goes here -->
                        </div>
                   </div>
              </div>
         </div>
    </div>
2. Add the following to your code (.aspx.cs) file to handle the click events on the buttons
     //Reset button click handler
     protected virtual void btnReset_Click(object sender, EventArgs e)
     {
          base.Response.Redirect(Request.Url.AbsoluteUri, true);
     }

     //Save button click handler
     protected virtual void btnSave_Click(object sender, EventArgs e)
     {
          //Your logic here
     }
3. This will add an action column on the right side of your page.
Comments are closed.