How Can We Help?
Background
Let’s say you have an XMPro ActivityA specific step in a process. It will be the user interface for that step (web form or a screen), for example, the Leave Application (screen interface or web form) will be the first Activity in the Leave Requisition process. The Leave Application Authorization will be the second step or Activity in the Leave Requisition process. One Process can have multiple activities./Task where you have included the Digital Signature Control. Once the activity is completed you might want to Include the Digital Signature captured in the activity into a XMPro Report.
Steps
To include Digital Signature in a report, the following pre-requisites need to be completed:
Develop an XMPro process with two steps:

- A first activity mobile enabled form where you have a digital signature control. On click of submit, the next activity ‘Print Report’ will be initiated.
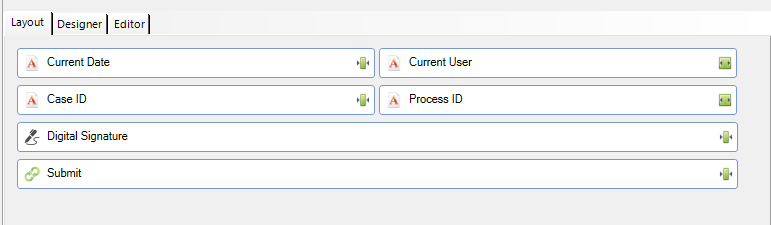
- Second activity (Print Report) which will be initiated from a command control of the first activity. The Second activity controls are as follows.
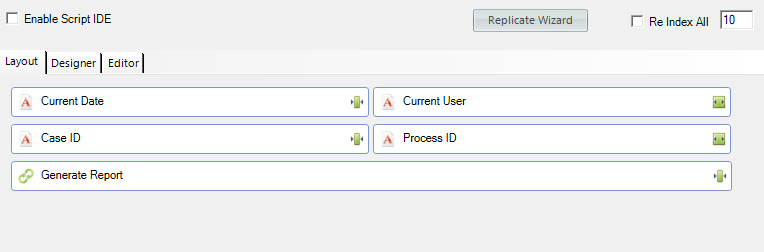 We want to generate a report on click of ‘Generate Report’.
We want the report to contain the digital signature captured in the first activity.
Develop an XMPro Report Template:
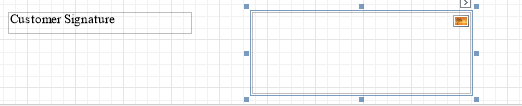
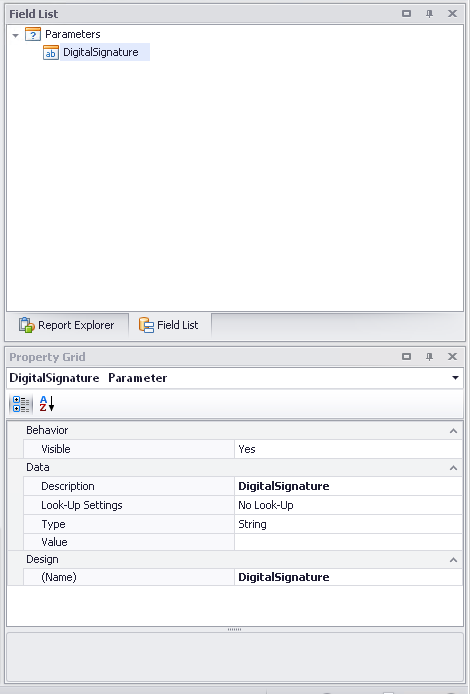
Develop a XMPro Report Template using XMPro report designer. Include a Picture Box in the report and Include a Parameter field called ‘DigitalSignature’ to accept input from the ‘Print Report’ form.
How to include digital signature in report:
- Login to XMDesignerIs used to configure XMPro BPM solutions..
- Report Changes
- Launch Report Designer and open the report already created as per the pre-requisites.
- Click on the Picture Box and change the Sizing to Squeeze.
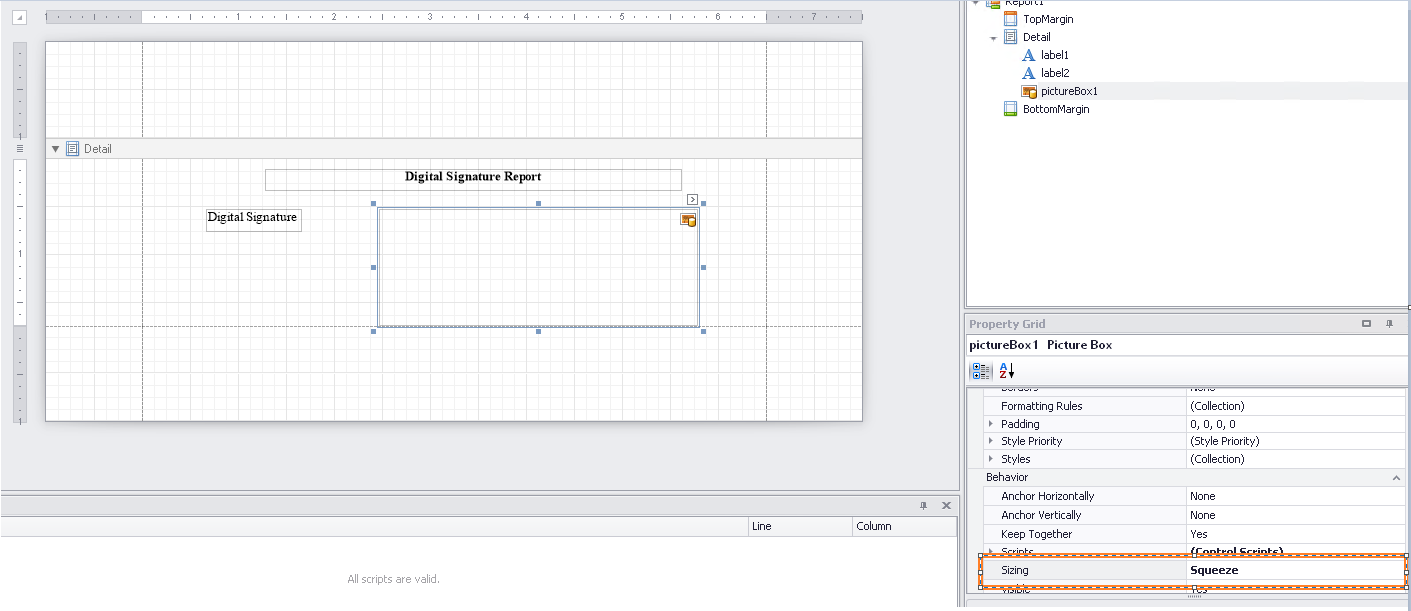
- Save Report.
- Click on the Scripts.
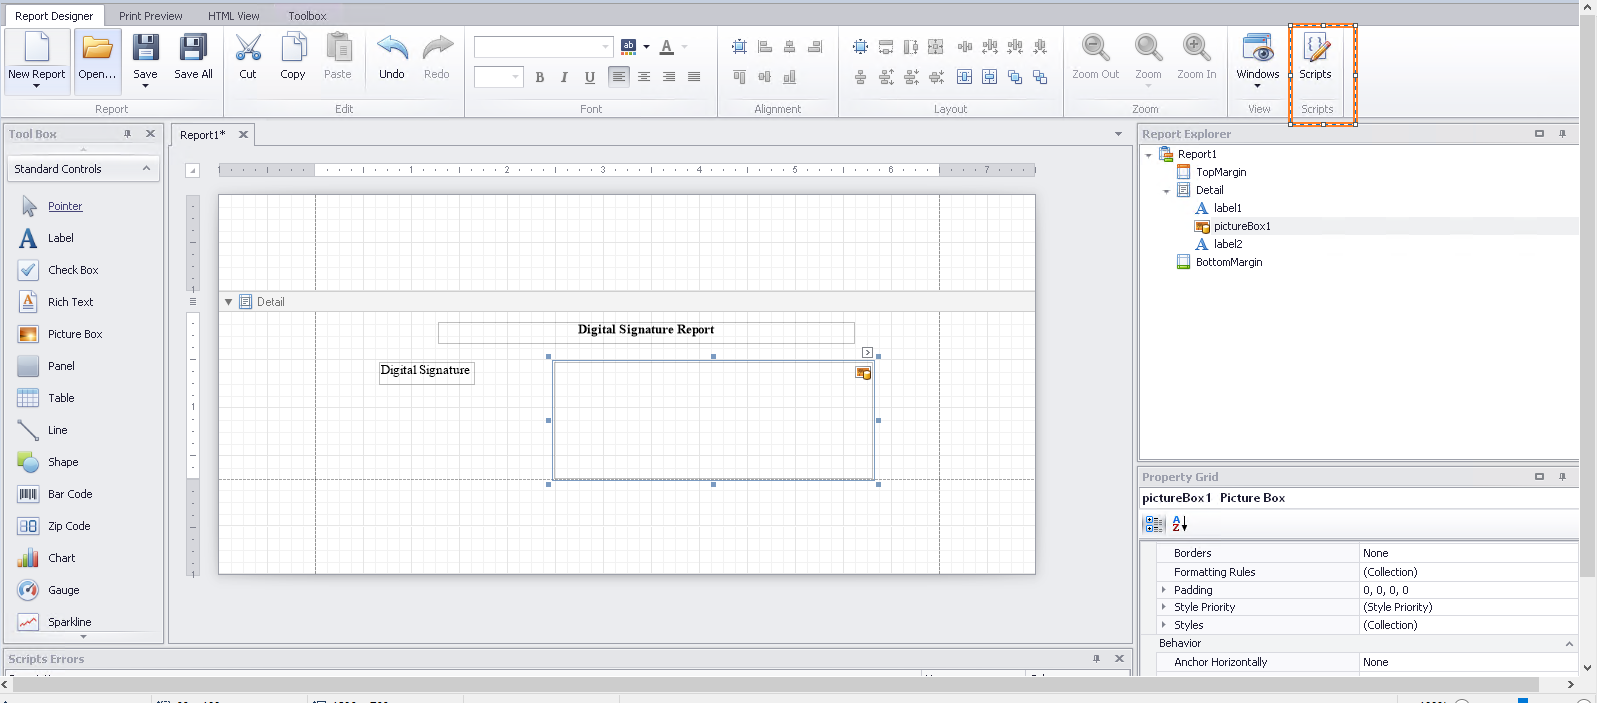
- In the opened script editor, select the Picture Box Control and Select Before Print.
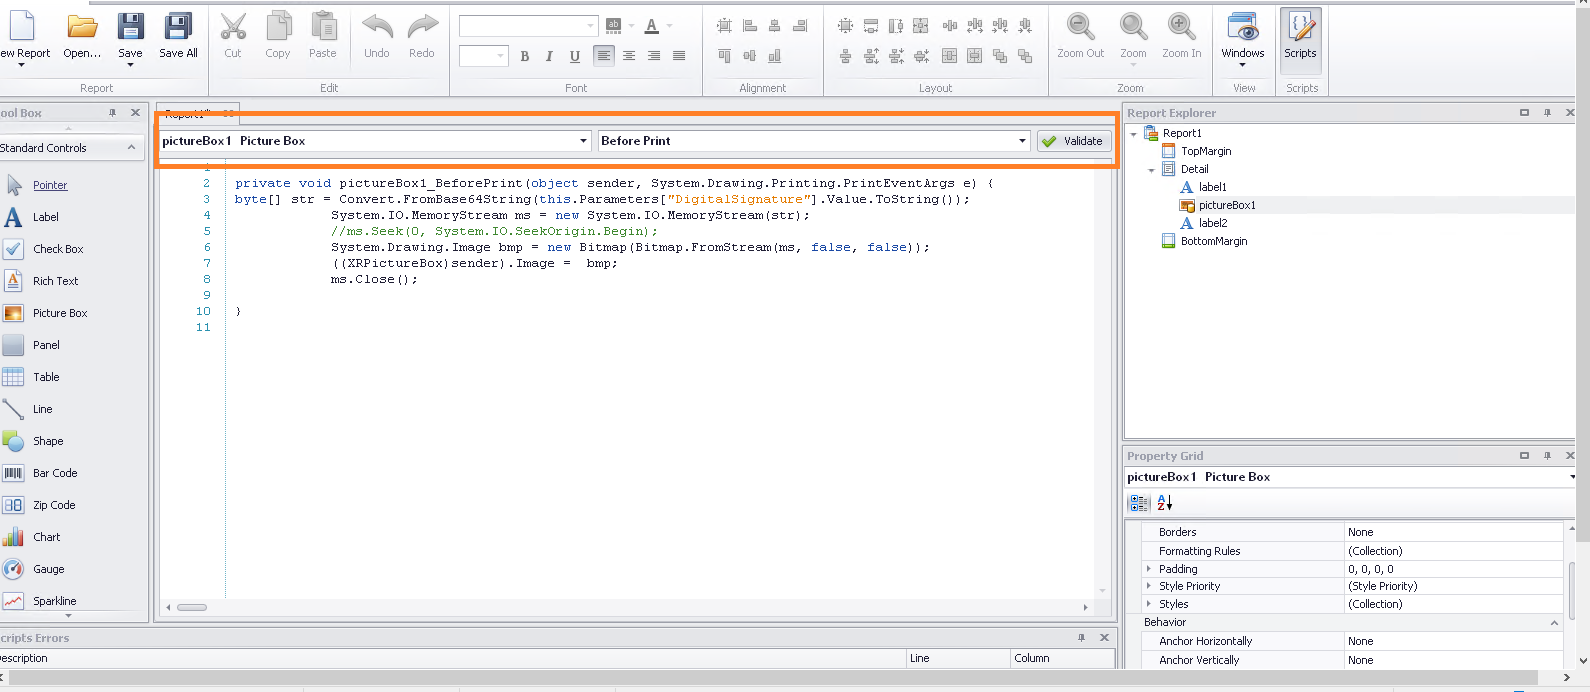
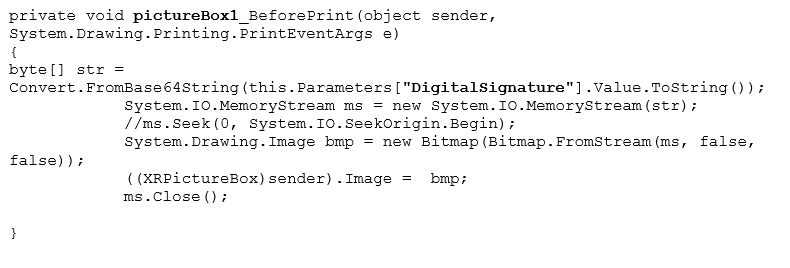
- Paste the following code on to the script editor and save the report.
Tip: Make sure the pictureBox id and DigitalSignature parameter name are modified according to the names in your report.
‘Print Report’ activity Changes
Navigate to ‘Print Report’
Click on Managed Activity
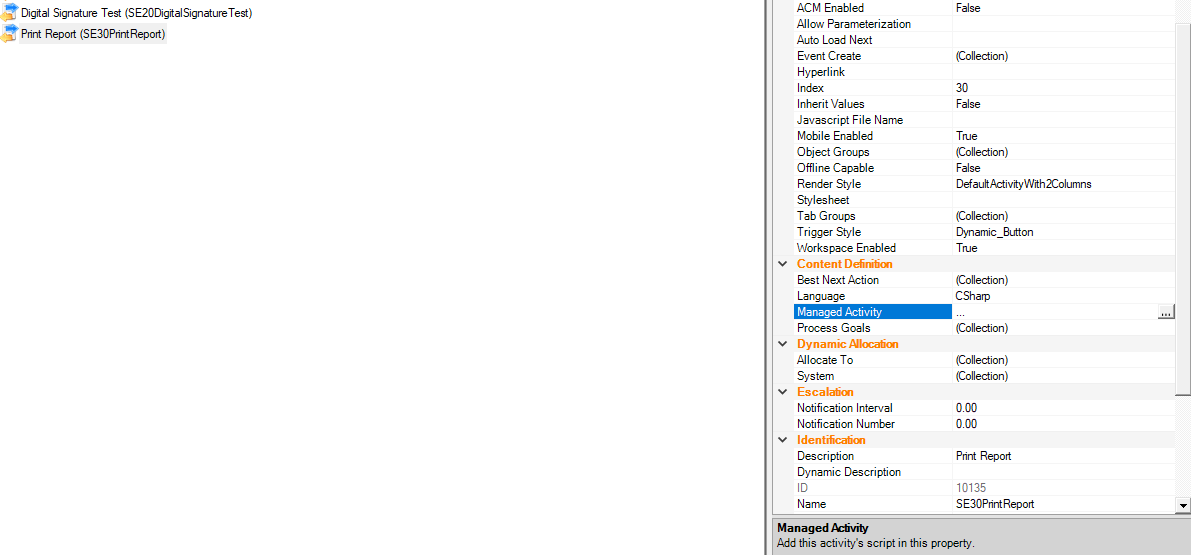
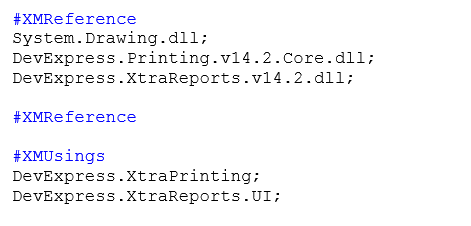
Add the following references in the opened script editor.
The DevExpress version depends on the XMPro Product Version.
Refer to your “bin” directory in XMPro Installation Directory to know the Dev Express Version.
Close the Script Editor and Save the activity.
Double Click on ‘Print Report’ activity.
Enable Script IDE and double click on ‘Generate Report’ command control to open script designer.
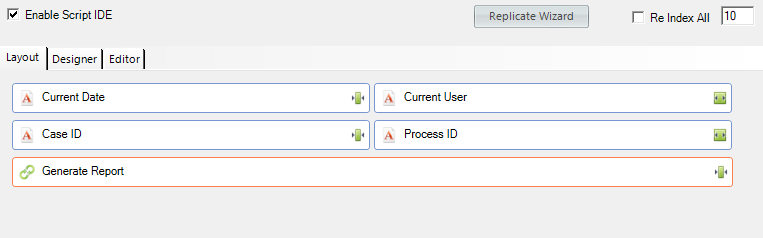
Let’s say if the command control id is “SE3050GenerateReport” , In the opened script designer, paste the following lines of code and replace the place holders as required.
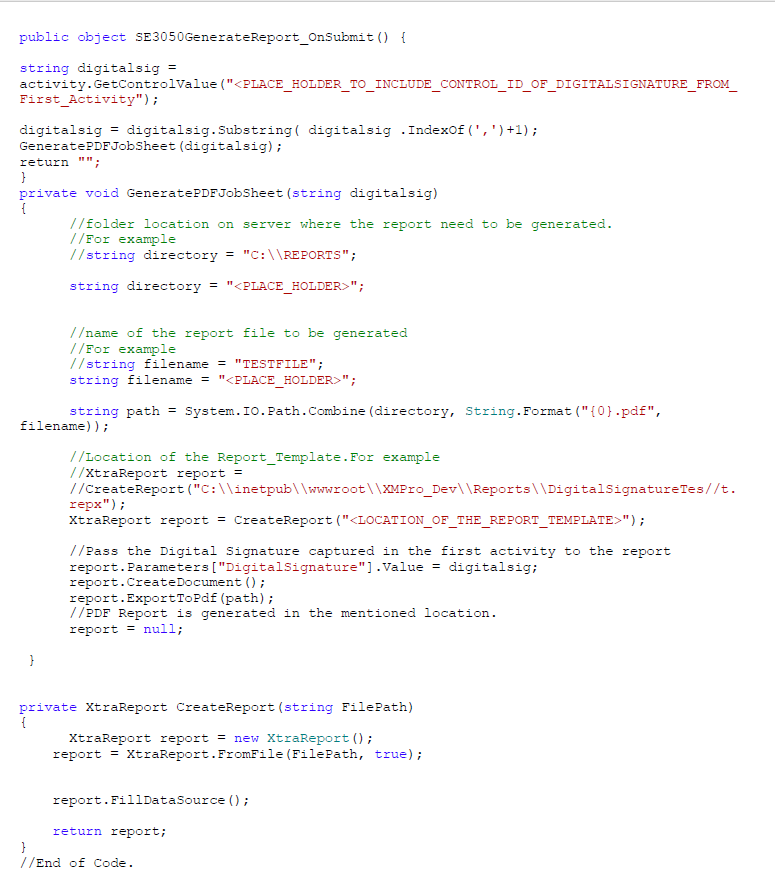
The report will be generated in the folder mentioned as per the name provided in the code . The report will look like:

Comments are closed.